
The Pinecil: The $25 Smart Soldering Iron
My first soldering iron was a $9 piece of junk from Radio Shack. It worked, and I used it until it was little well past the point of needing to be replaced. When I did, I replaced with with an orange Weller pencil iron that was $15. It wasn't until 2019 that I finally gave in and bought a "real" soldering iron: A Hakko FX-888D. Since then, my soldering needs have been effectively solved.
Well, mostly. Since the advent of USB-C Power Delivery, there's been a growing number of "portable" soldering irons requiring only a USB power bank to operate. I have absolutely no need for portable soldering as I only have need to assemble the odd kit or keyboard PCB. Still, the thought of portability was intriguing. The popular options of the TS100 and TS80P were well outside outside my price range ($65 to $110) at the time.
Then Pine64, the maker of the PinePhone, PineTab, and other open source hardware projects, announced the Pinecil. For $25, it promises all the functionality of pricier options while striving to be more open than their competitors. I put in an order and waited.
It took almost two months for the iron to arrive. I doubt this is typical, although many others on the Pine64 Discord expressed similar frustrations. I suspect it had more to do with the effects of the COVID-19 pandemic, as well as the blockage of the Suez Canal due to the Evergreen running aground. Compare this to the shipping time of the PinePhone mainboard replacement; in 3 weeks it went from Shenzen to Indiana.
I'm used to the long ship times from Pine64. They are a more niche company and don't have the mass infrastructure we would expect from large manufacturers or retailers. I point this out now because if you do find yourself ordering one, be prepared to wait.


While the PinePhone had a pitch-perfect unboxing, and the PineTab humble and understated, the Pinecil is exactly what you expect. The box is a basic matte black on all sides, with a silver pine cone logo on the sites, an information sticker on the back, and a large, transparent window showing the contents. The inner box is filled with dense foam holding the soldering -- iron? Handle? -- and the plug-and-play tip.
If I saw this package hanging from retail shelf with a price of $25, I'd be instantly drawn to it. It does an excellent job of showing what's in the box with no pretension. There is, however, no wording on the front of the box that this is a soldering iron. The product itself does the speaking here.
Curiously absent is any sort of warning information, instructions, or even a quick-start. That seemed odd to me at first, but later I found out the clever reason why. I can imagine that the retail packaging will differ somewhat compared to what I received in the mail. In addition to shrink wrap, there would be additional feature advertising, and legal notices depending on where it's sold.
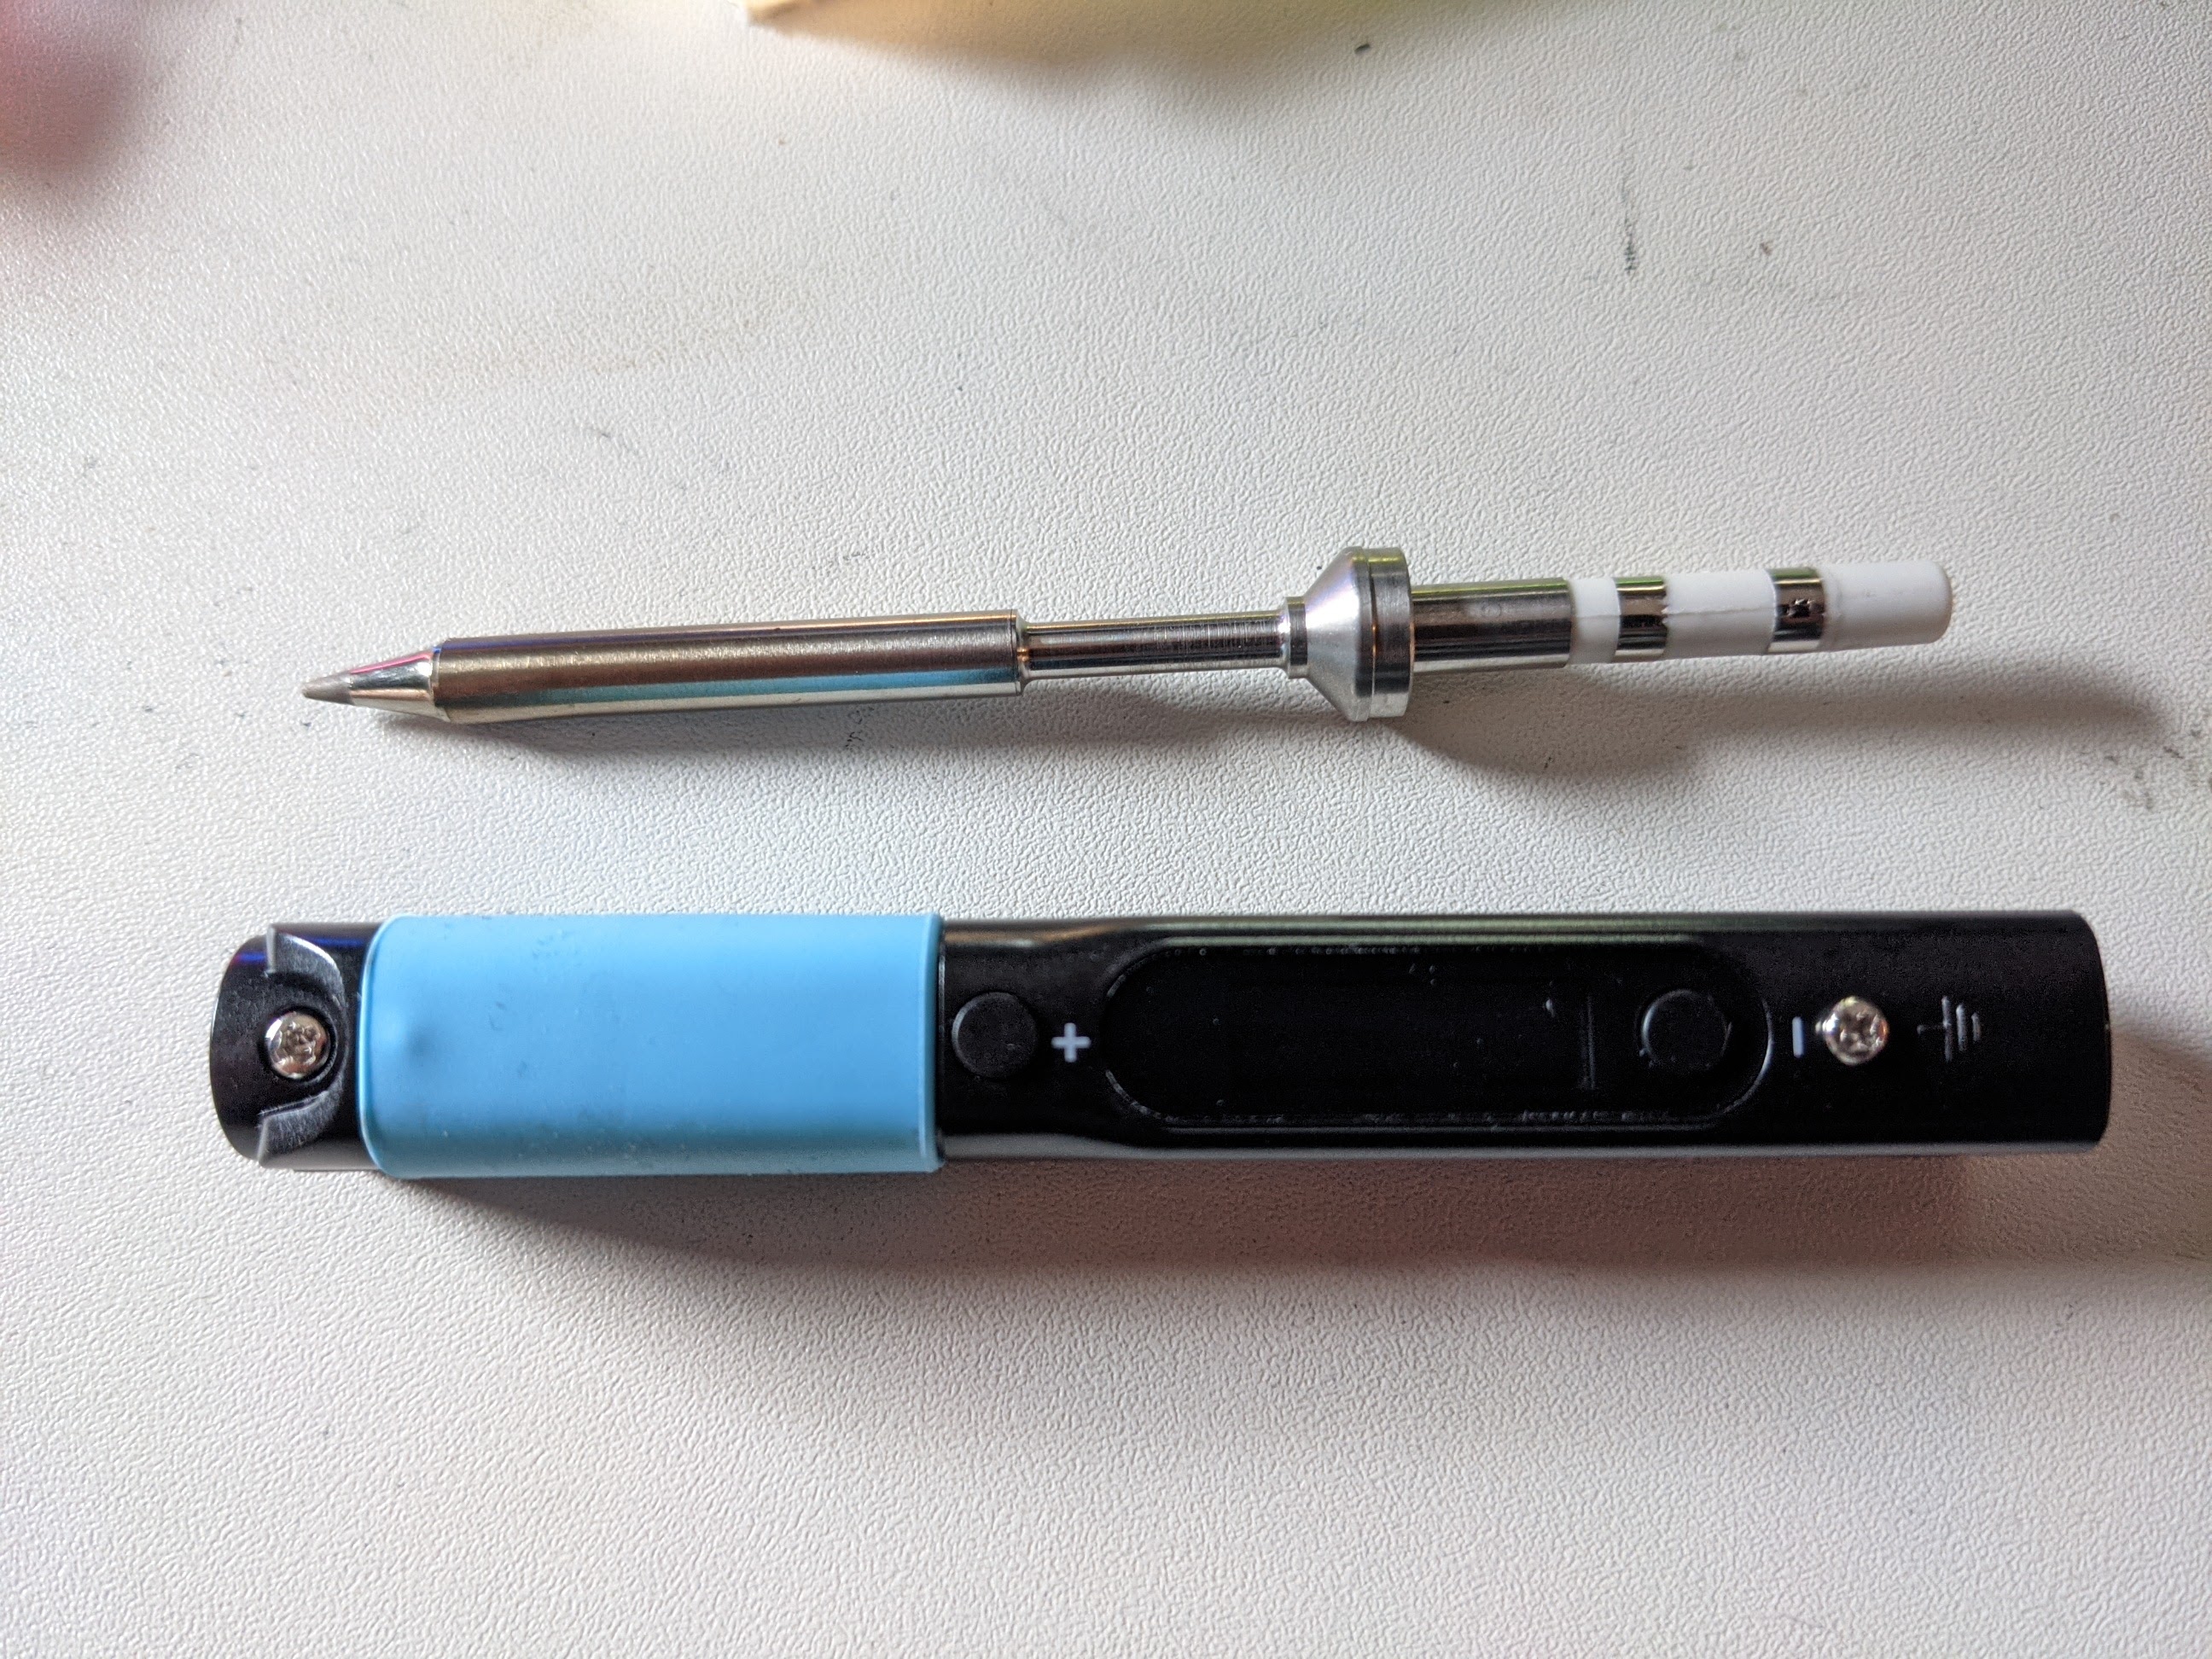

There's nothing to assembling the smart iron. Pull out the two pieces, plug the non-pointy end into the hole on the handle, and you're good to go. There wasn't even protective plastic over the small OLED display, which means no satisfying plastic-peel video this time. Sorry!
The body of the iron is, as you'd expect for the price, plastic with a silicone finger grip toward the bottom. There's no raised lip or guard to protect your fingers from slipping off and touching potentially hot metal. It is safer than it looks, however; the tip is only hot at hte thicker side, giving you an additional safety margin. The slim design also means the iron feels unusually nimble in the hand. Lighter and thinner than the iron on my Hakko, I felt ready to do some incredibly delicate work. Despite the electronics, the handle half of the iron is slightly lighter than the tip half. This gives the iron an off-balance feel, until you plug in a USB-C cable to power it.
Consider donating! It helps us pay for hosting, equipment and materials.
The plastic case feels similar in material to the back of my PinePhone braveheart edition. The iron doesn't twist or flex when put under strain. While the bottom of the Pinecil is rounded, there are two little built in "feet" near the tip to prevent the iron from rolling off of your desk. This was a nice detail, as it means you don't need a separate stand for it in use -- particularly important for a portable iron.
The tip half of the iron is solid, weighty, and mostly made out of metal. There are some ceramic components used as both an electrical and thermal insulator. The heating element is actually integrated into this half of the iron. This means that when the tip wears out due to corrosion and use, the entire assembly has to be replaced. This makes it more expensive (and more wasteful) than a normal bench iron in which only a metal tip need be replaced. This isn't a unique problem for the Pinecil; all portable irons of this type use the same sort of design.
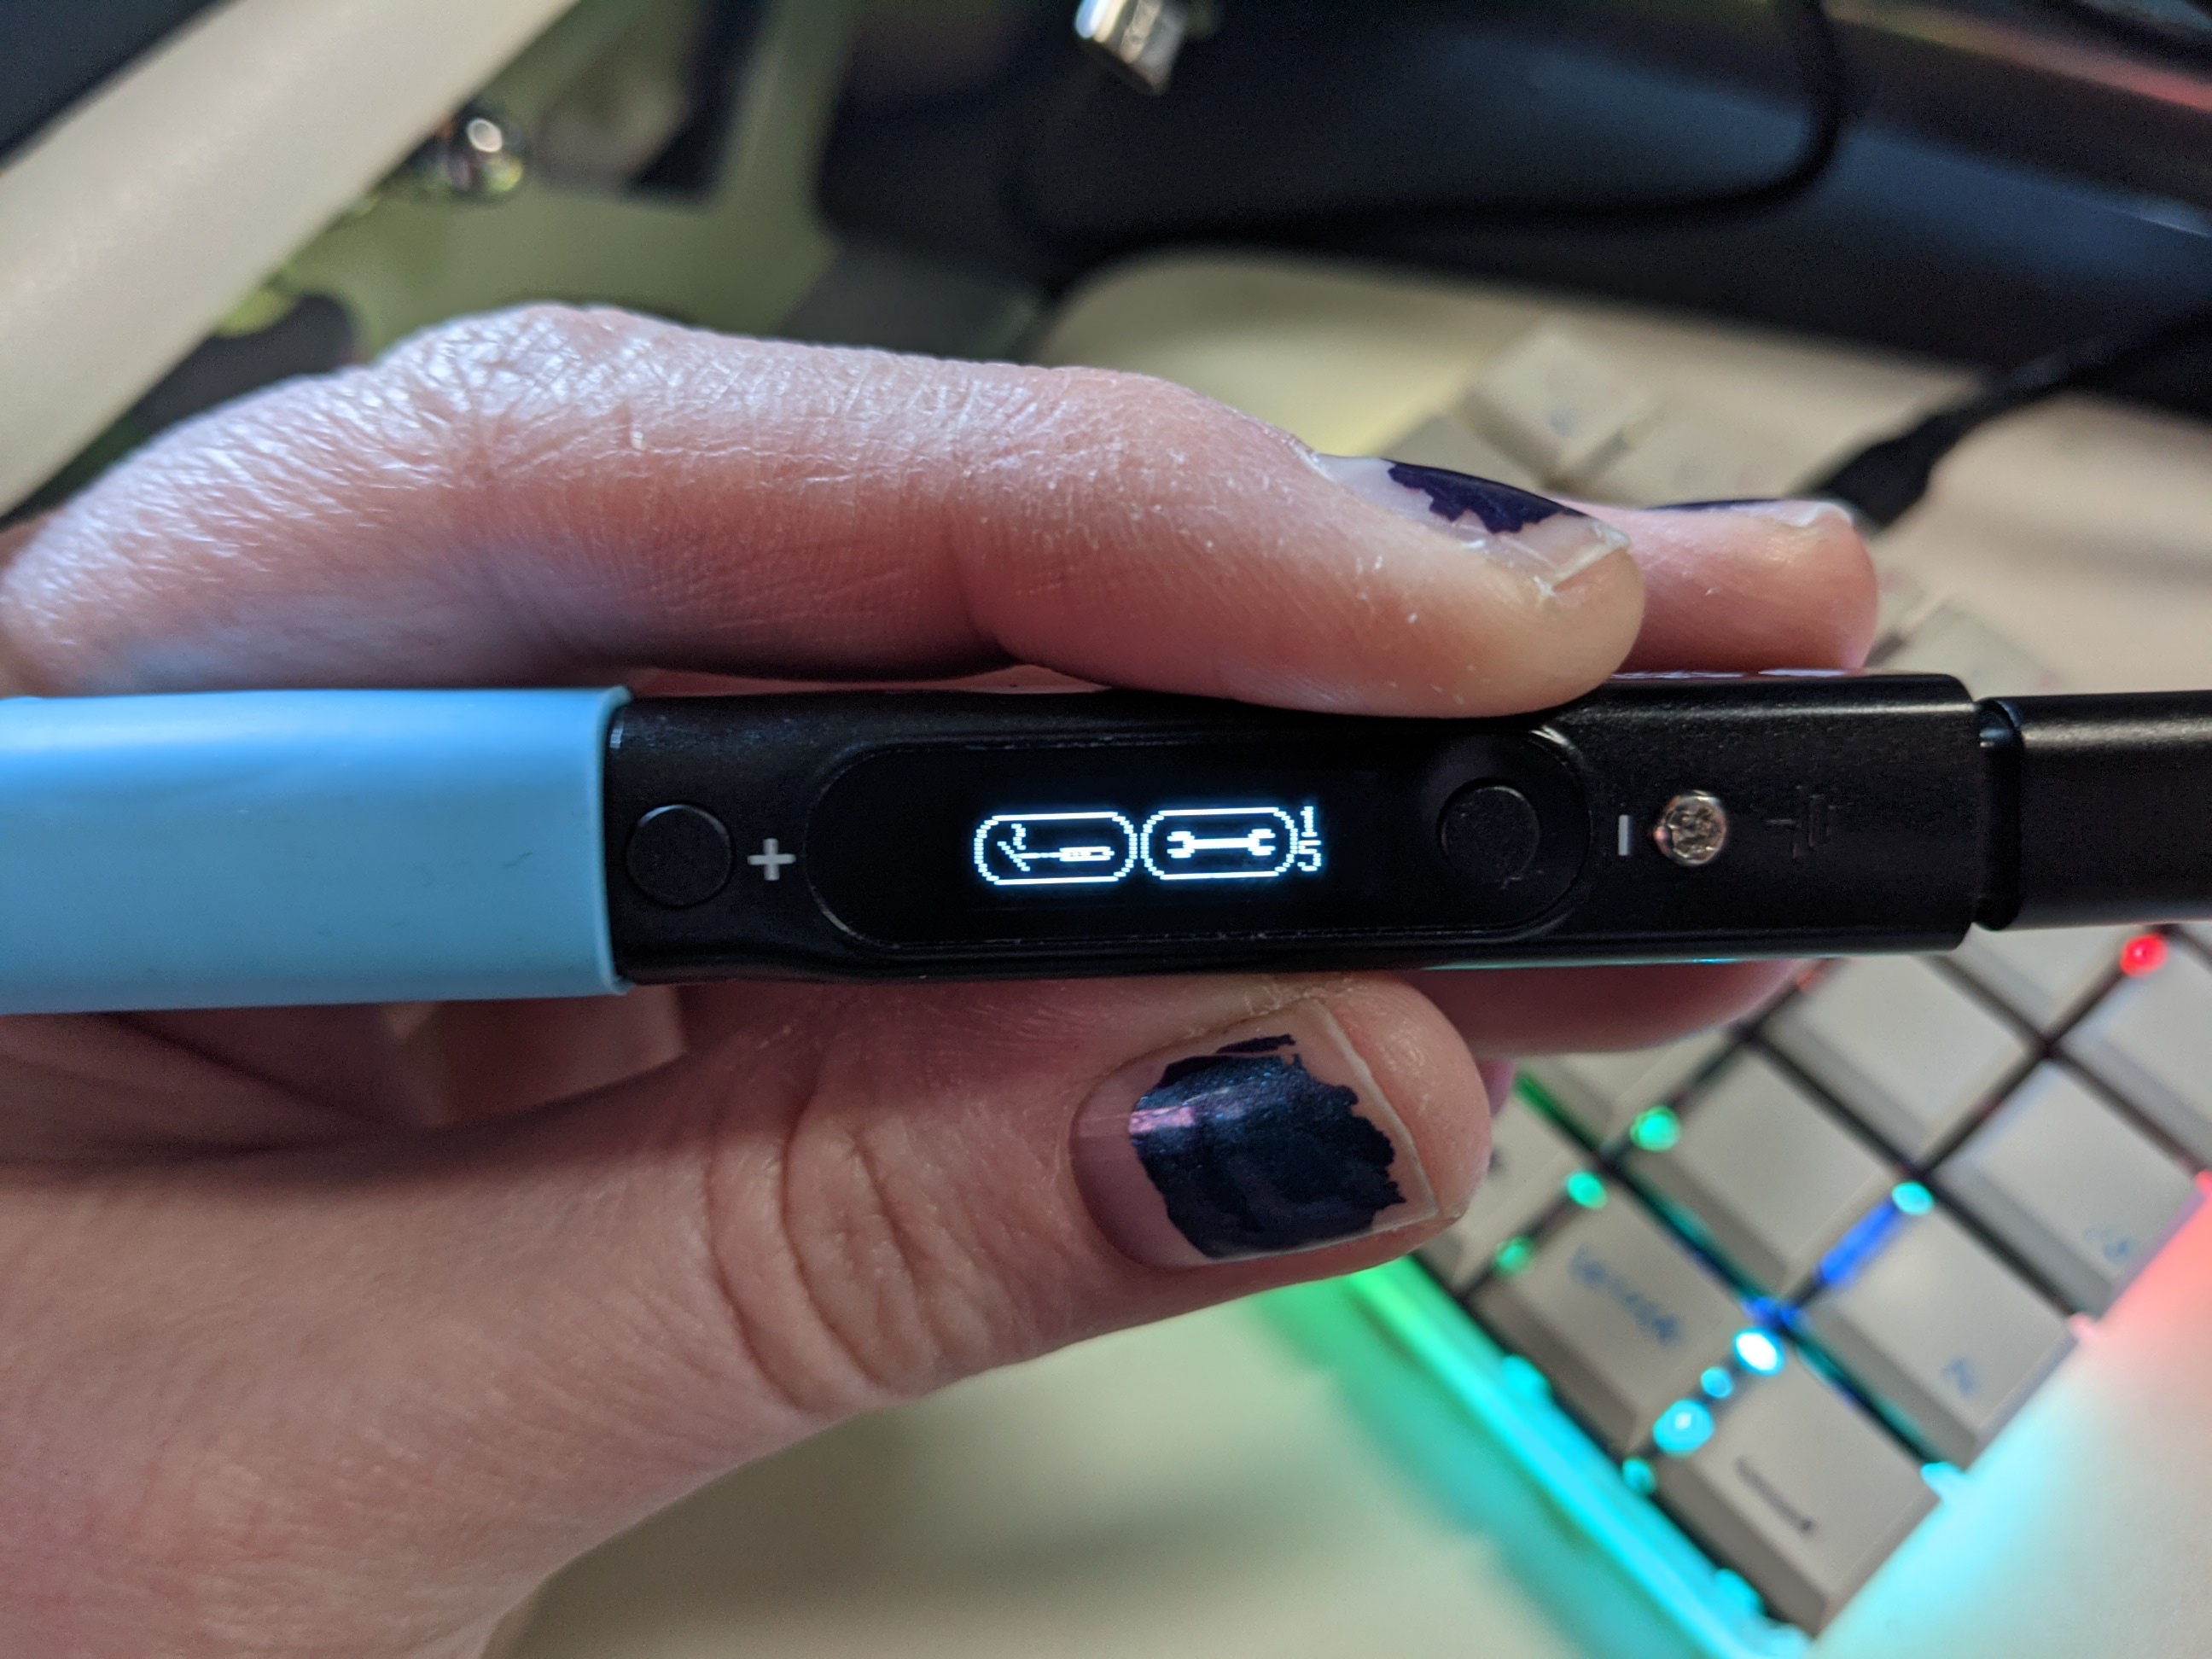

When you first plugin the Pinecil, you're given a small graphical screen of two choices, ironing or settings. This parallels the two buttons on the handle, allowing you to choose one mode or the other easily. Click the left plus button to iron, or the right minus button to configure.
There's also a small number on the right side of the display. At first, I didn't know what this was for, but after trying a few different USB-C power sources, I found out that this was a voltage indicator.
When plugged into the largest power bank I have at hand, it read "20" for 20 volts. My laptop charger, however, only put out 15V. Both of these are enough to power the iron and allow you to solder.
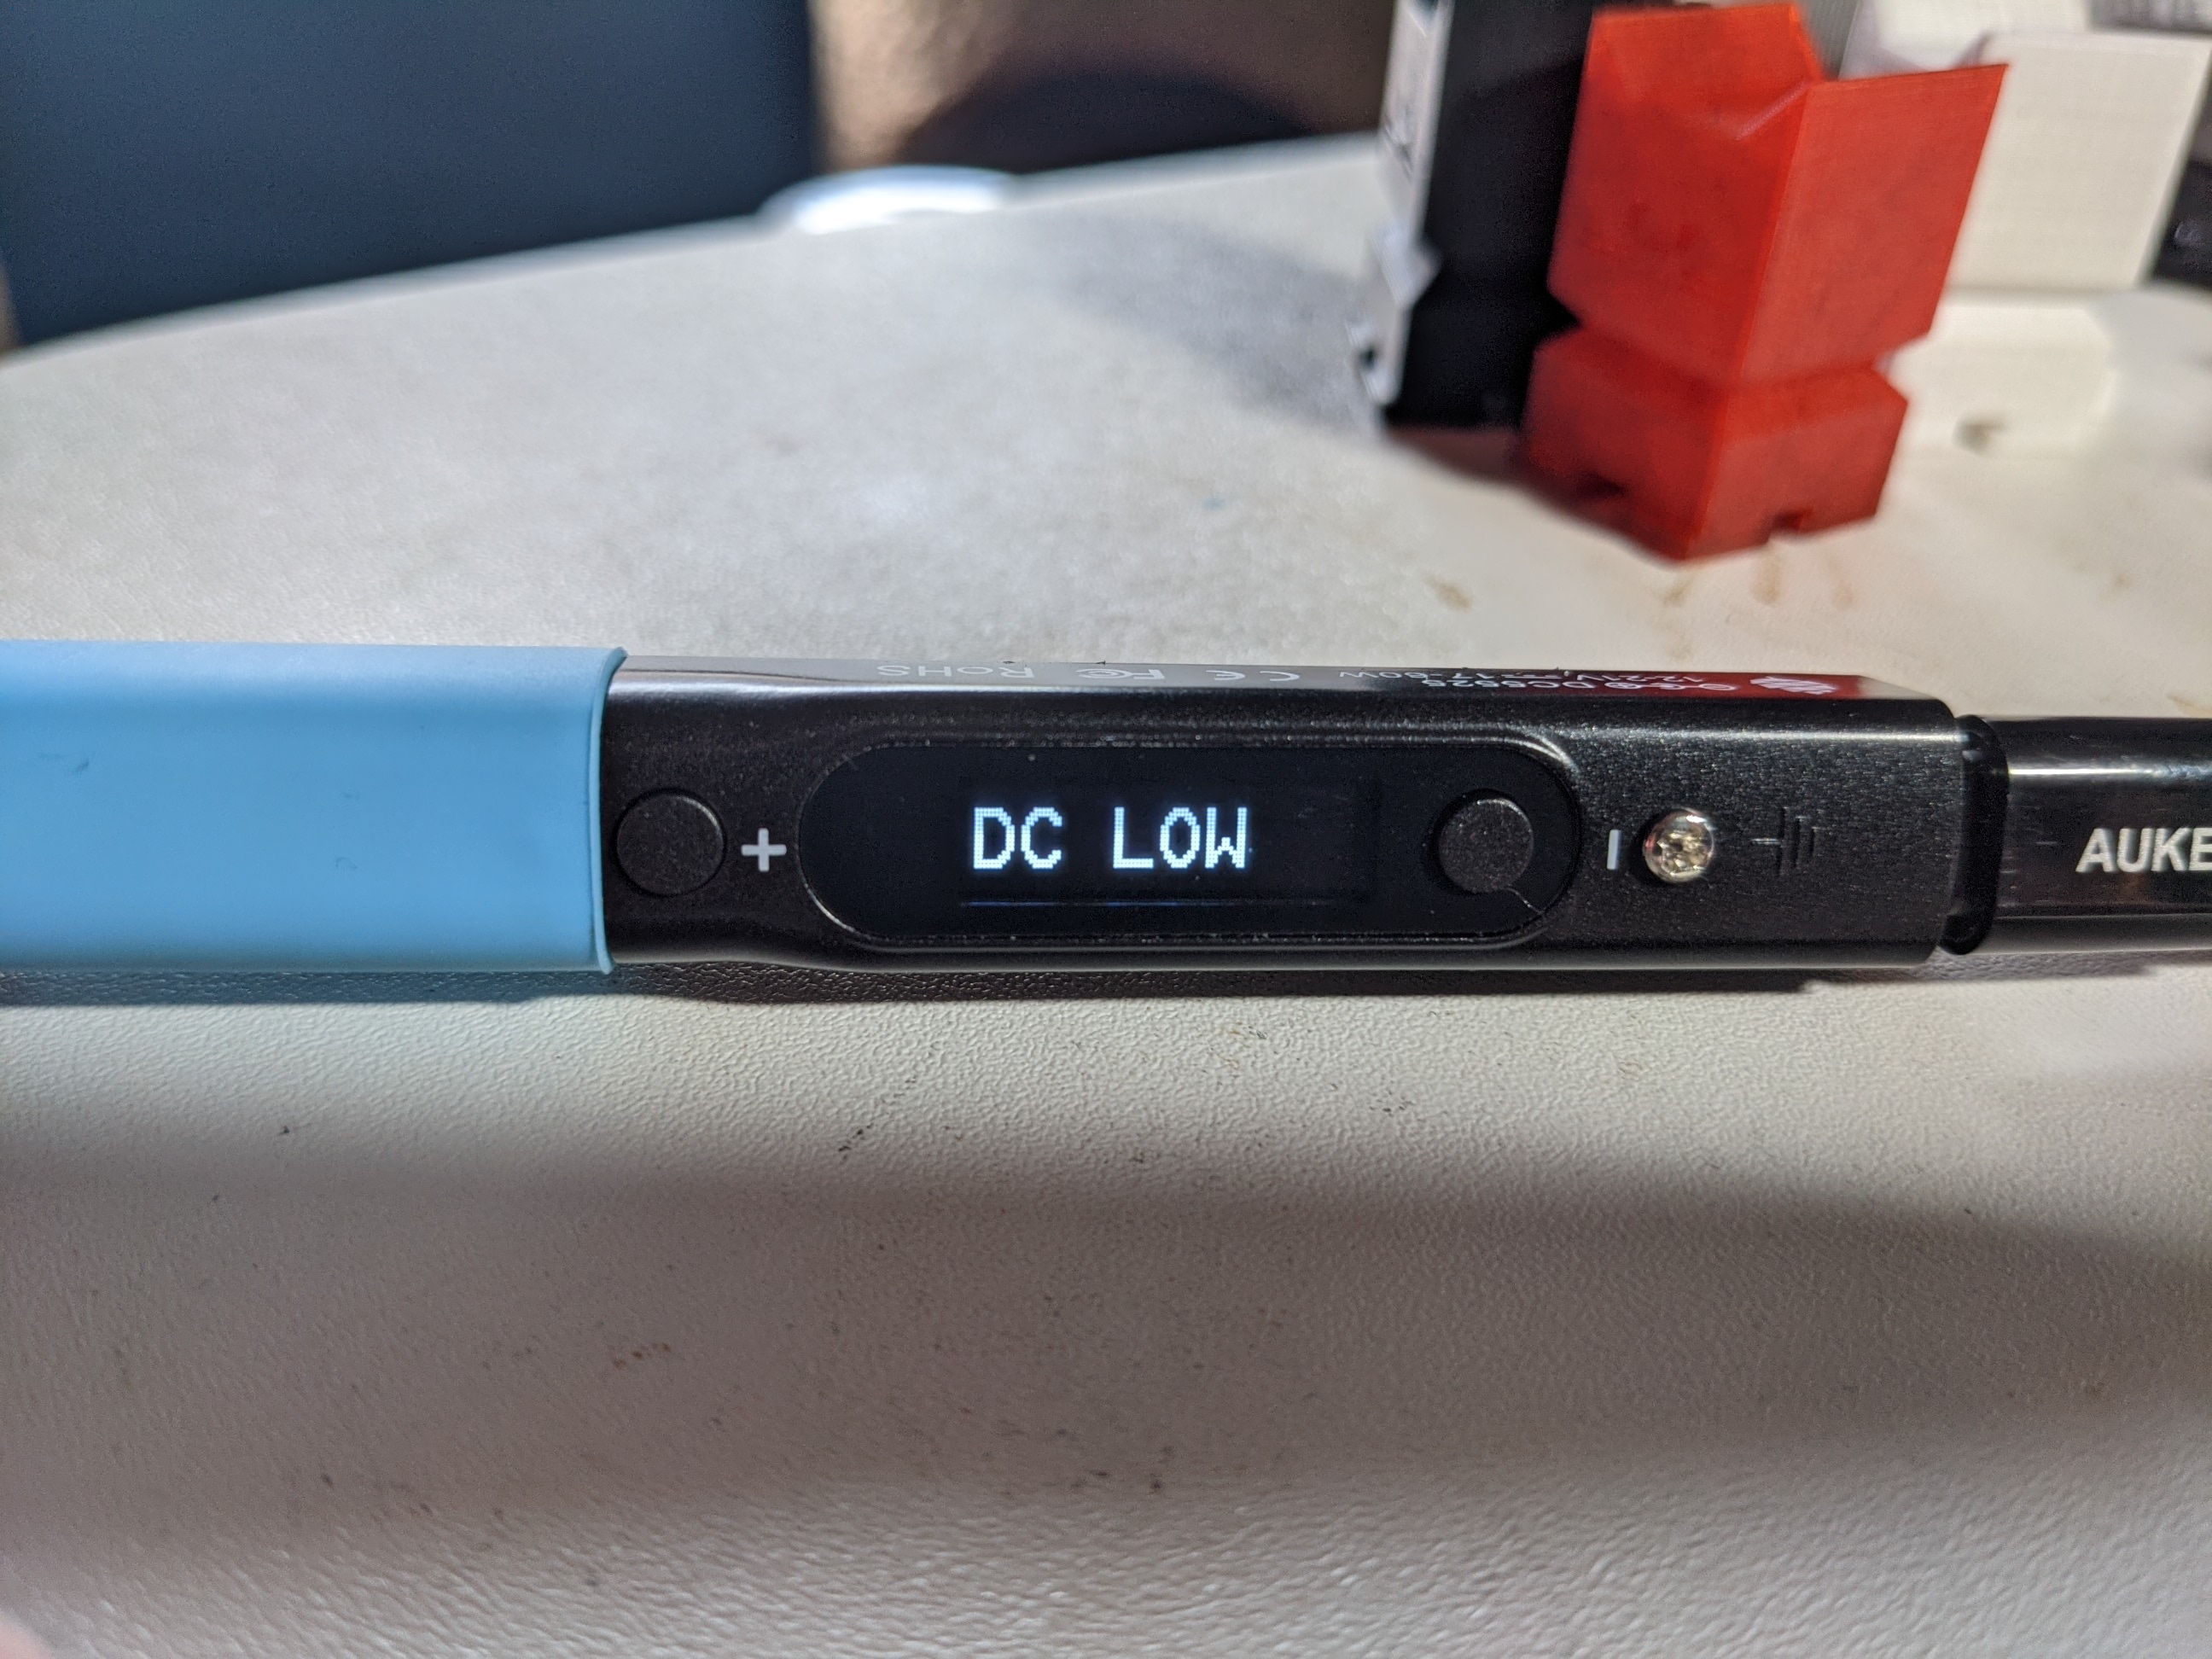
I decided to test the Pinecil's smarts and plugged it into a 5V USB-A power supply While the iron did boot, it wouldn't heat up and instead read "DC LOW", indicating it needed more power to function. This built-in bit of safety is welcome, since it prevents straining the internals of the iron or the power bank if there's simply not enough. Powering the display regardless of input was an excellent touch as well.

You can also choose to abandon USB-C altogether. In addition to the ubiquitous port, there's a DC barrel jack connector. The side of the Pinecil provides the voltage ranges needed as well as the polarity of the connector. Even with an adapter working as low as 12V, you can still get some soldering done. This range of power input options is pretty great for flexibility.
For a small iron, there's a *lot* of configuration options within the menu system. Yet, there's no manual to explain what each options really does. I found this head-scratching at first, until I left the menu open on a particular option.
When idling over a menu item, the Pinecil will start showing an explanation of the setting and what each choice does in large, scrolling text. This clever bit of UX is why I suspect the iron had no manual -- it's a manual itself! This negates the need to dig around online for detailed explanations or PDFs.
I won't go into all the menu options in depth, but I will say what is there is clean an intuitive. The only thing that isn't, at first, is how to navigate it. The minus button scrolls, advancing the tiny scroll indicator on the left side of the screen. The plus button selects. You might be tempted to think you can go back and forth with options in the menu, but instead you have to cycle through all choices, since you really only have one button for that action. A little annoying, but worth it at the cost of keeping the iron svelte.


To test the iron, I decided to pull out the parts for a future keyboard project. I have an Easy RGB Corne keyboard set up with hot-swap MX switches. While the keyboard PCB is no longer available, I did get all the parts for it ahead of time. One particular challenge with it for me is that nearly all of the parts are surface mount devices (SMD) rather than through-hole components.
This includes some of the tiniest diodes I've ever attempted to affix to a board. From previous experience, I knew that a four step process worked best for me:
- Tin one pad with a minute amount of solder.
- Position the component, and solder that one pad.
- Hold down the component with a finger or pencil eraser and reflow the joint, squaring the part with the PCB.
- Solder the remaining connectors.
This process takes less than a minute usually, and produces decent results. Usually, only the briefest touch with the iron is necessary to form the connection. This can be cumbersome with larger irons like the Hakko, so I was eager to find out how the Pinecil performed.
At first, the Pinecil did not melt the solder as I hoped. The lead-free solder I'm using, however, is cantankerous stuff and needs a higher temperature to melt easily. The Pinecil tops out at 420C, although it realistically only reached 412C in use. Still, it was enough. At the higher temperature, soldering was quick and easy.
This is, unfortunately where you can feel the cost of the Pinecil. The means by which the tip clips in to the handle feels loose and sloppy. When you apply a little bit of force, you can feel the tip shift in the case. It's not enough to feel unsafe, but it is enough to notice. Nevertheless, the iron performed beautifully.


Tiny diodes are...well...tiny. They only need a lot of heat in a small, shallow area to work effectively. Bigger parts require more power as you need to transfer more heat from the iron to the joint. I didn't have anything as intense as a coax connector to solder, but I did have the hotswap sockets for the keyboard switches as well as the TRRS through-hole jack to solder to the board.
Both of these require much more solder than the diodes, and make the iron work harder. I was relying on a large USB-C power bank throughout all my testing, but rarely did the power bank seem under stain. Indeed, the Pinecil breezed through this test as well. Granted, this isn't the sort of torture test one could do with an iron, but hobbyists rarely need such power.
The lightness and smallness of the Pinecil was welcome, allowing me to get into tight confines my Hakko would not have endured. After soldering each component, I would set the iron aside and test it with a multimeter. That's when I discovered another neat little feature.
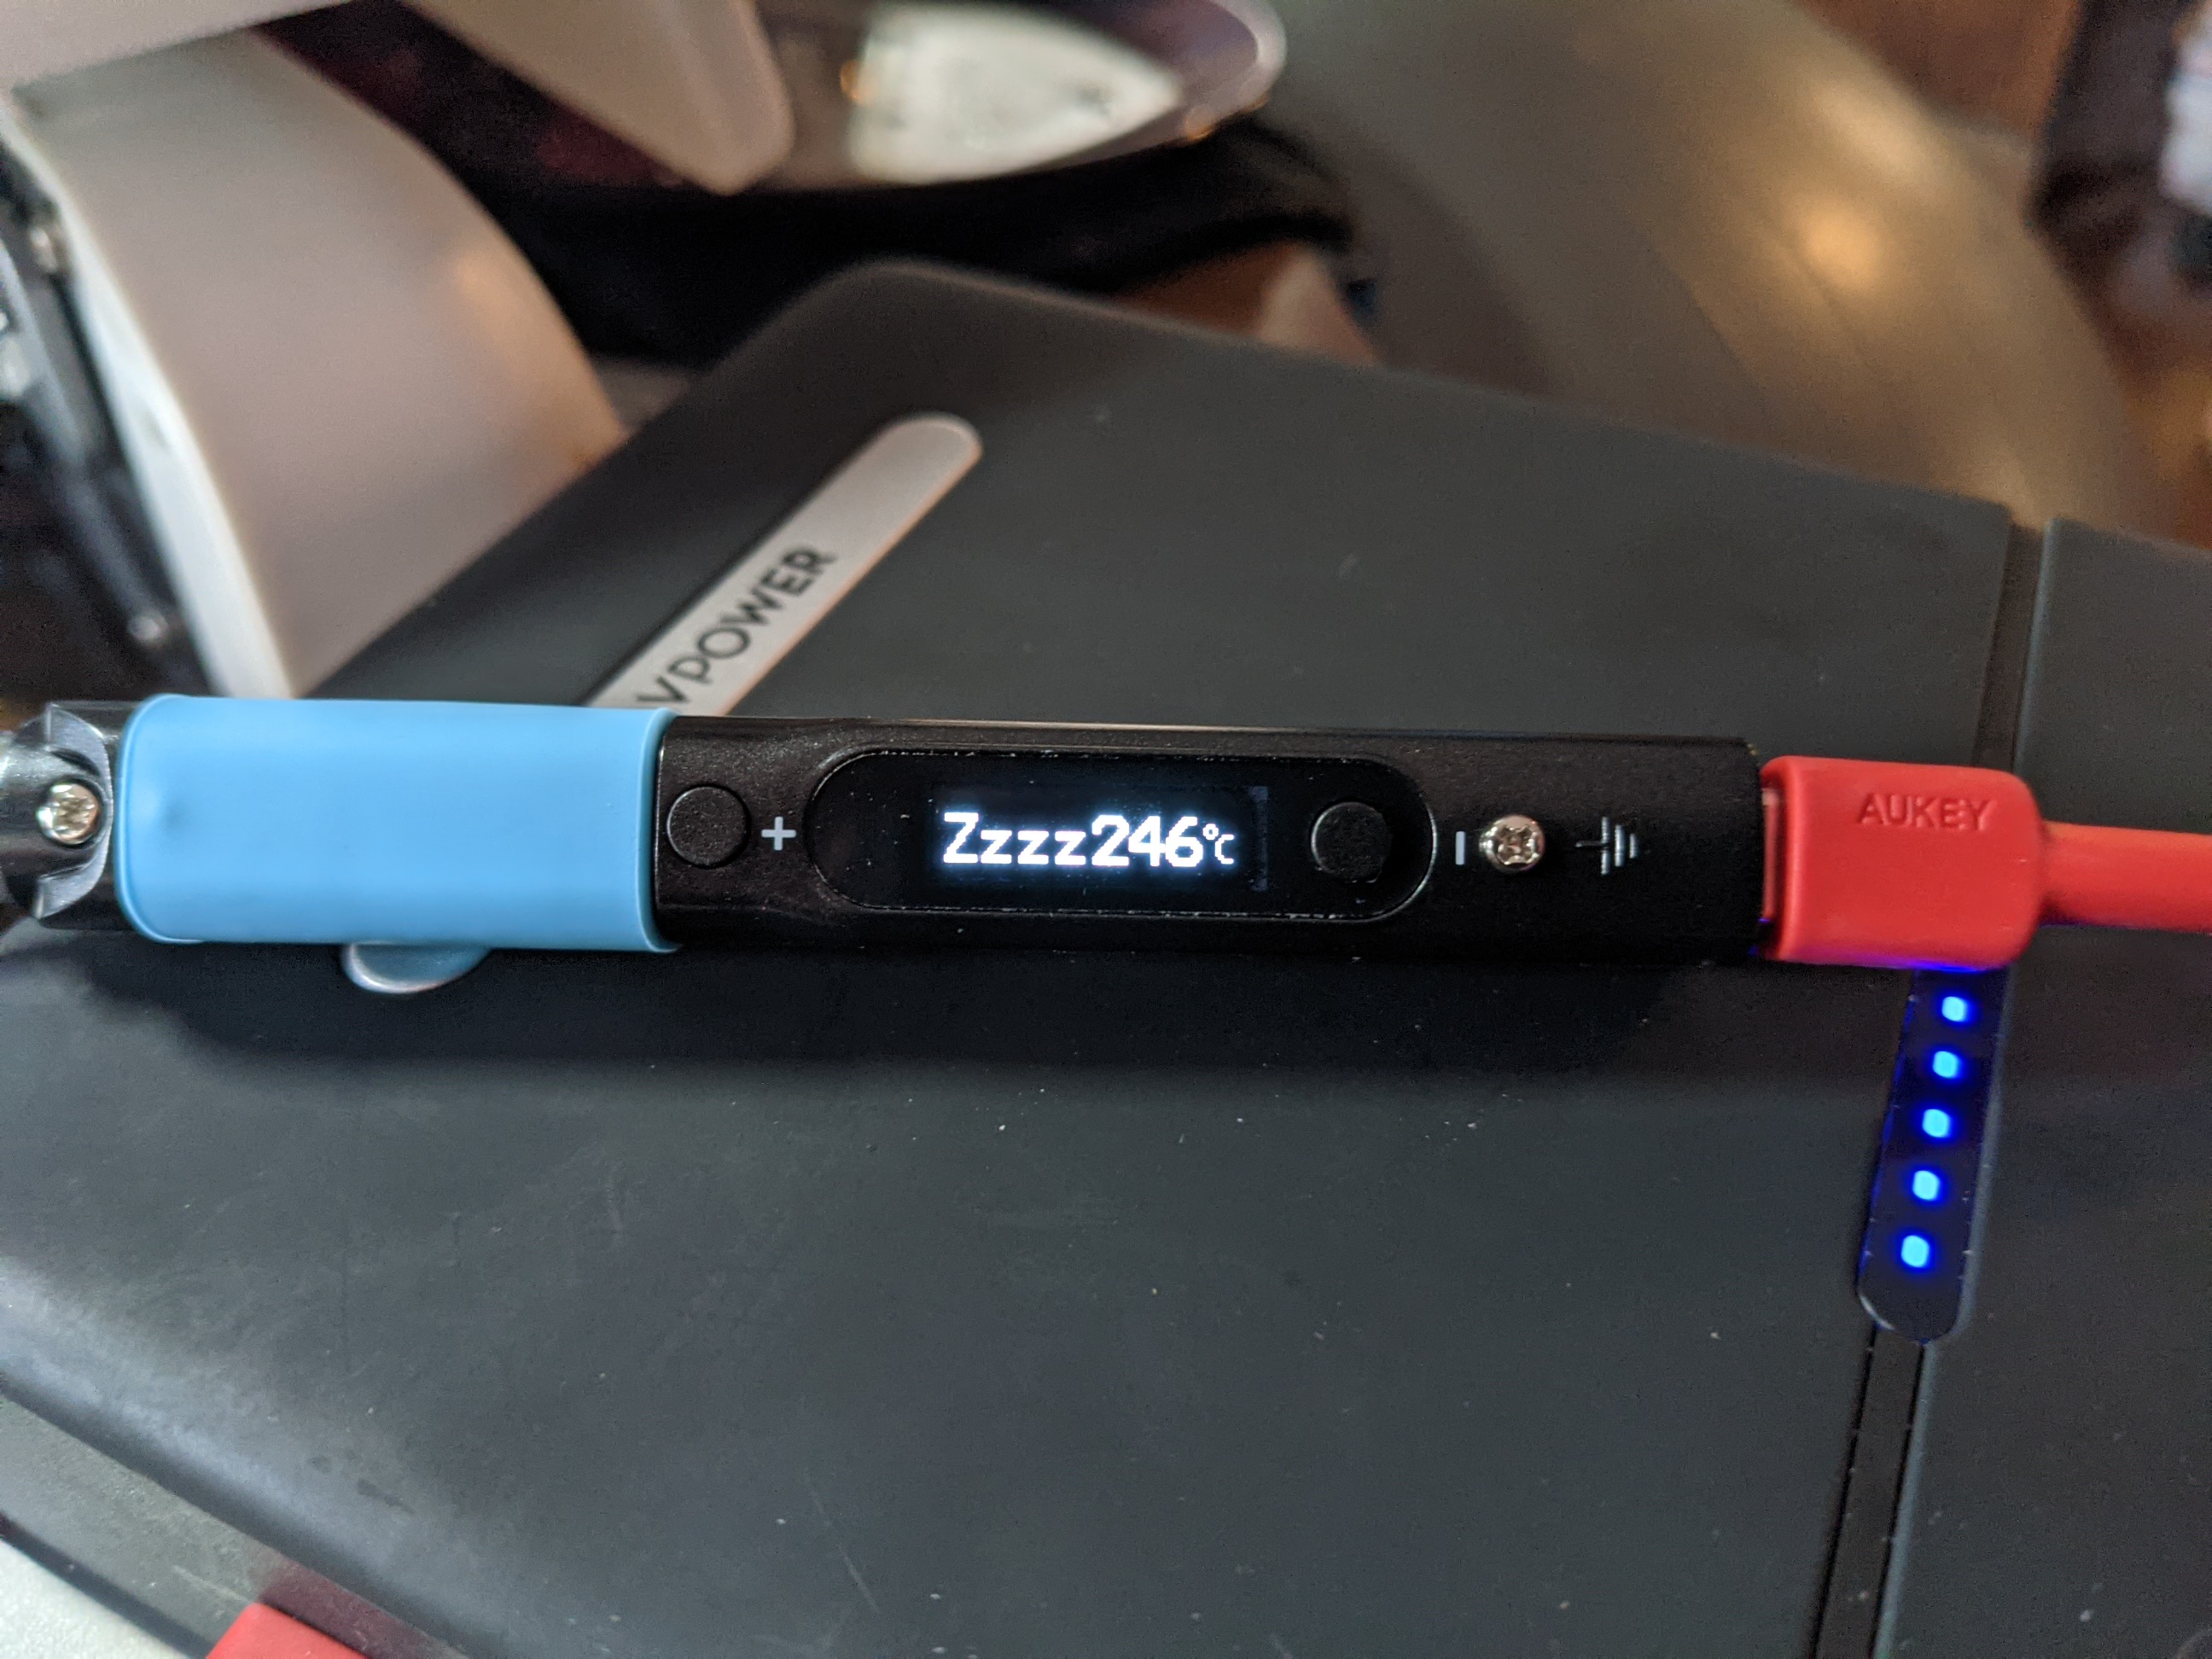
The Pinecil will put itself to sleep after only a short amount of time, about a minute by default. For a bench iron, this wouldn't be acceptable, but for a portable iron this is exactly what you expect. It conserves power while providing a greater margin of safety. There's no need to put the iron back into a custom stand (as you do the Hakko), instead it uses built-in hall effect sensors and an accelerometer to know if the iron is idle.
During sleep, the iron will display "Zzzzzzz" on the screen along with a current temperature. The iron will not cool down all the way, but remain at a configurable minimum until the 10 minute auto shut-off kicks in.
This frequent sleeping and minimum idle temperature reduces the time to reheat the iron. Only once did I need to wait more than 5 seconds for the iron to be ready for use. And even then, it only took another 10 seconds before I was melting metal once more.

Like the PinePhone, the Pinecil is intended to be a hackable device. Pine64 even sells replacement cases if you prefer them over the default charcoal gray. The firmware is also user replaceable via the USB-C port.
I didn't go that far, but I did want to pry the thing apart and get a look inside. There are are only a few screws holding the iron together:
- The top screw near the tip provides grip on the tip itself, allowing you to lock it in place if you choose.
- The top screw on the cable side is for an optional grounding strap.
- The bottom screw holds the case together.
To remove the case cover:
- Remove the soldering tip.
- Slide off the silicone grip.
- Undo the bottom screw.
- Carefully pry the bottom panel off at the seam using fingers or a tool such as the iFixit Jimmy.
A series of internal clips hold the bottom panel in place in addition to the screw. While you can pry it apart with fingers alone, I did find the Jimmy helpful. It will however, mar the plastic if you twist it. For this reason, try to insert the tool in the part of the seam hidden under the silicone finger grip.
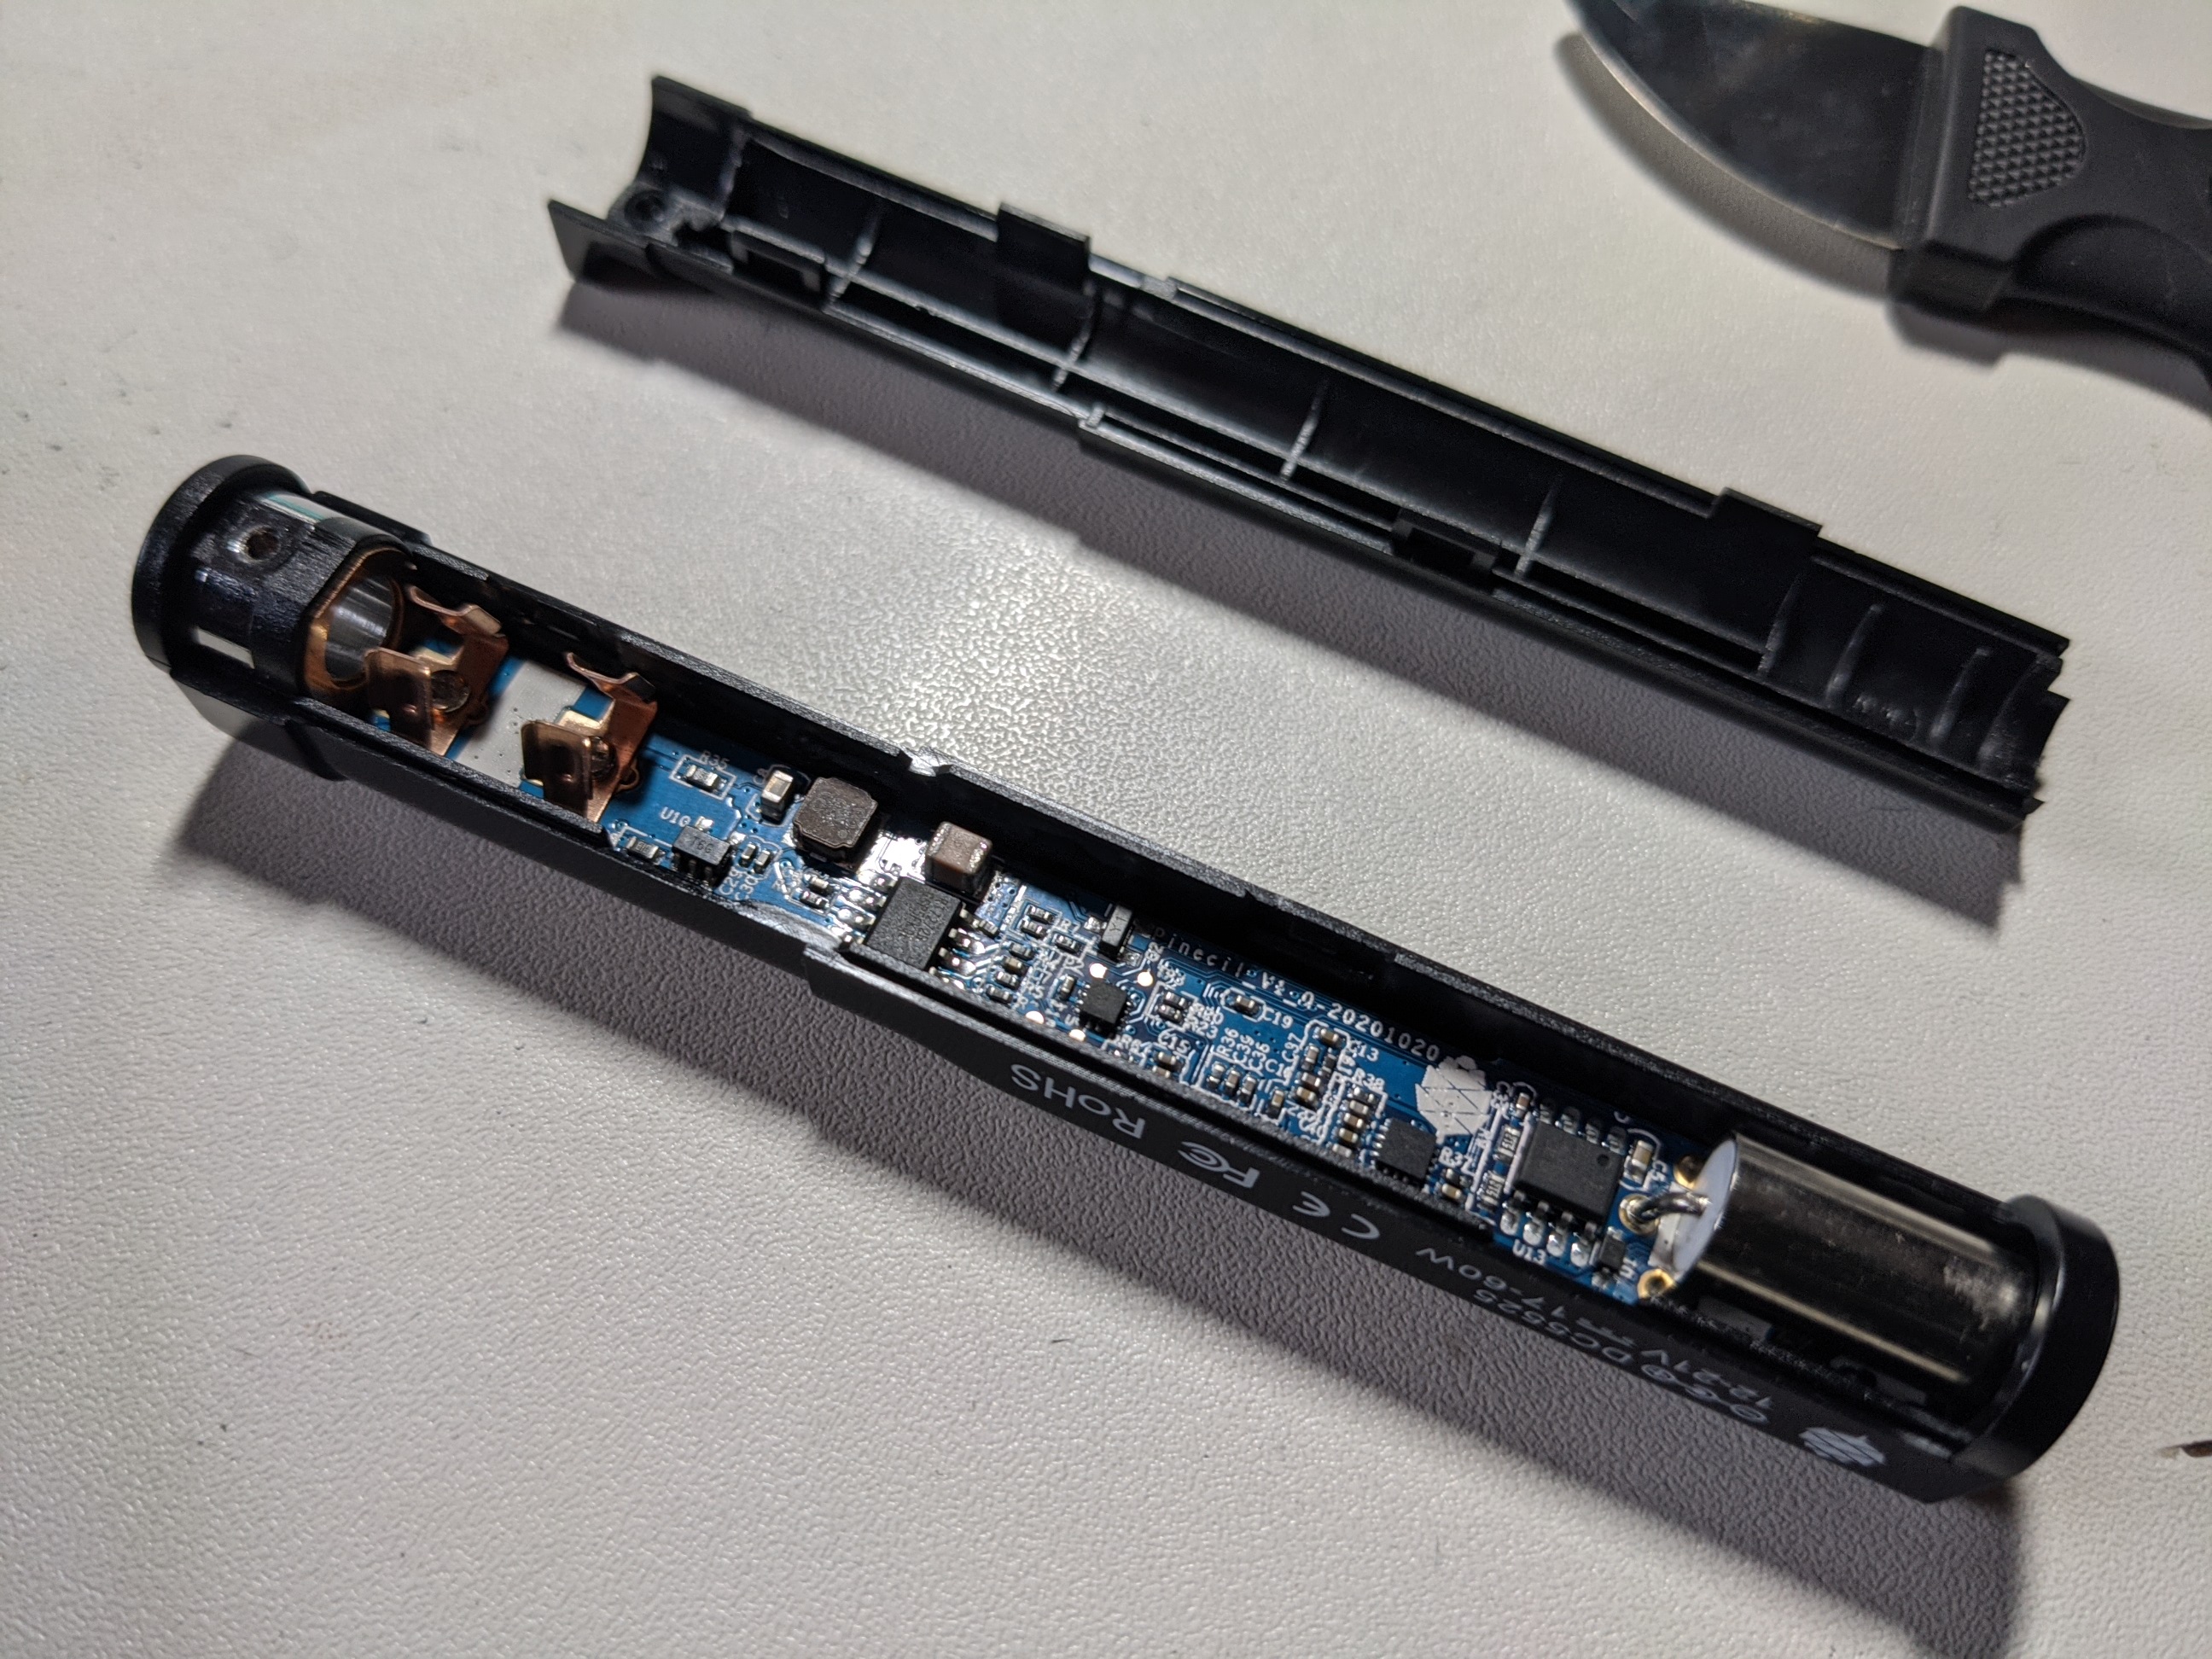
Once open, the bottom panel swings away revealing the Pinecil's internals. I'm no expert, but the PCB is clean with no jumpers or wires anywhere. You can also see why the tip feels sloppy; a pair of metal clips hold the iron in place, rather than a complete tube of metal for each contact. The design could stand to be improved, but it's more than sufficient for this cost.
The Pinecil is a great value for it's cost. While corded, temperature controlled irons start at $35, they can't offer the same features as the Pinecil. It's light, smart, safer, and effective for most SMD and through-hole components. Heavier applications such as soldering connectors or covering large areas with solder are beyond its capabilities, however.
In addition to soldering, I was curious if the Pinecil would work well for other hobbyist applications. While the tool ships with a standard conical tip, you can get a pack of four alternate tips including a hot knife and a spreader. To me, this makes it a perfect tool to perfect and alter 3D prints and objects created with a 3D pen. Modelers would no doubt find a use for this tool as well.
For an occasional electronics hobbyist or a beginner, I would recommend it over other options. It will get you further. If you're more experienced, however, this will never replace your soldering station. Nor should it.
This post was created with the support of my wonderful supporters on Patreon.
If you like this post, consider becoming a supporter at:
Thank you!!!


