
Upgrading a PinePhone Braveheart edition to 3GB
It's been over a year since the original PinePhone, also known as the "Braveheart" edition was made available. When I reviewed it, it showed a lot of promise, despite being intended for developers. While the software has been incredibly improved since then, it failed to replace my Android phone.
The problem revealed itself when I tried to sort out why I couldn't use a USB hub with the device. I tried every one in the house, and then even a few more, and none worked. More research landed me on the PinePhone Wiki, where I found a page listing various hardware issues discovered in the Braveheart.
A possible fix was to remove several tiny components on the board to correct the USB issue. This, however, would only fix one of several problems I was having. The worst of which was it didn't have enough memory. The newer Community Edition PinePhones have 3GB of memory in addition to other hardware fixes.
Instead of buying a new PinePhone outright, I decided instead to do something I never attempted before:
Replace a phone's mainboard.
Pine64 sells a number of replacement parts for the PinePhone, including a complete mainboard replacement. Earlier this year, they were also offering a discount to Braveheart owners for one of these replacements.
The problem was, in order to get the discount, I needed my order number. Despite a lot of searches, I had no copy of it physically or digitally. I decided to ask Pine64 instead, and helpfully, they emailed my order number back immediately. Once I had the funds available, I ordered a new 3GB mainboard, and waited.
And waited.
The COVID19 pandemic and the Suez canal blockage resulted in a number of shipping delays for the part. Even after arriving in the US, it sat, holding somewhere in USPS's system for another month, resulting in a 3 month ship time total. I don't blame Pine64 for any of this, and prefer to blame to slow strangulation of austerity policies worldwide.
Nevertheless, it did arrive, wrapped in ESD safe wrapping inside a small plastic box.
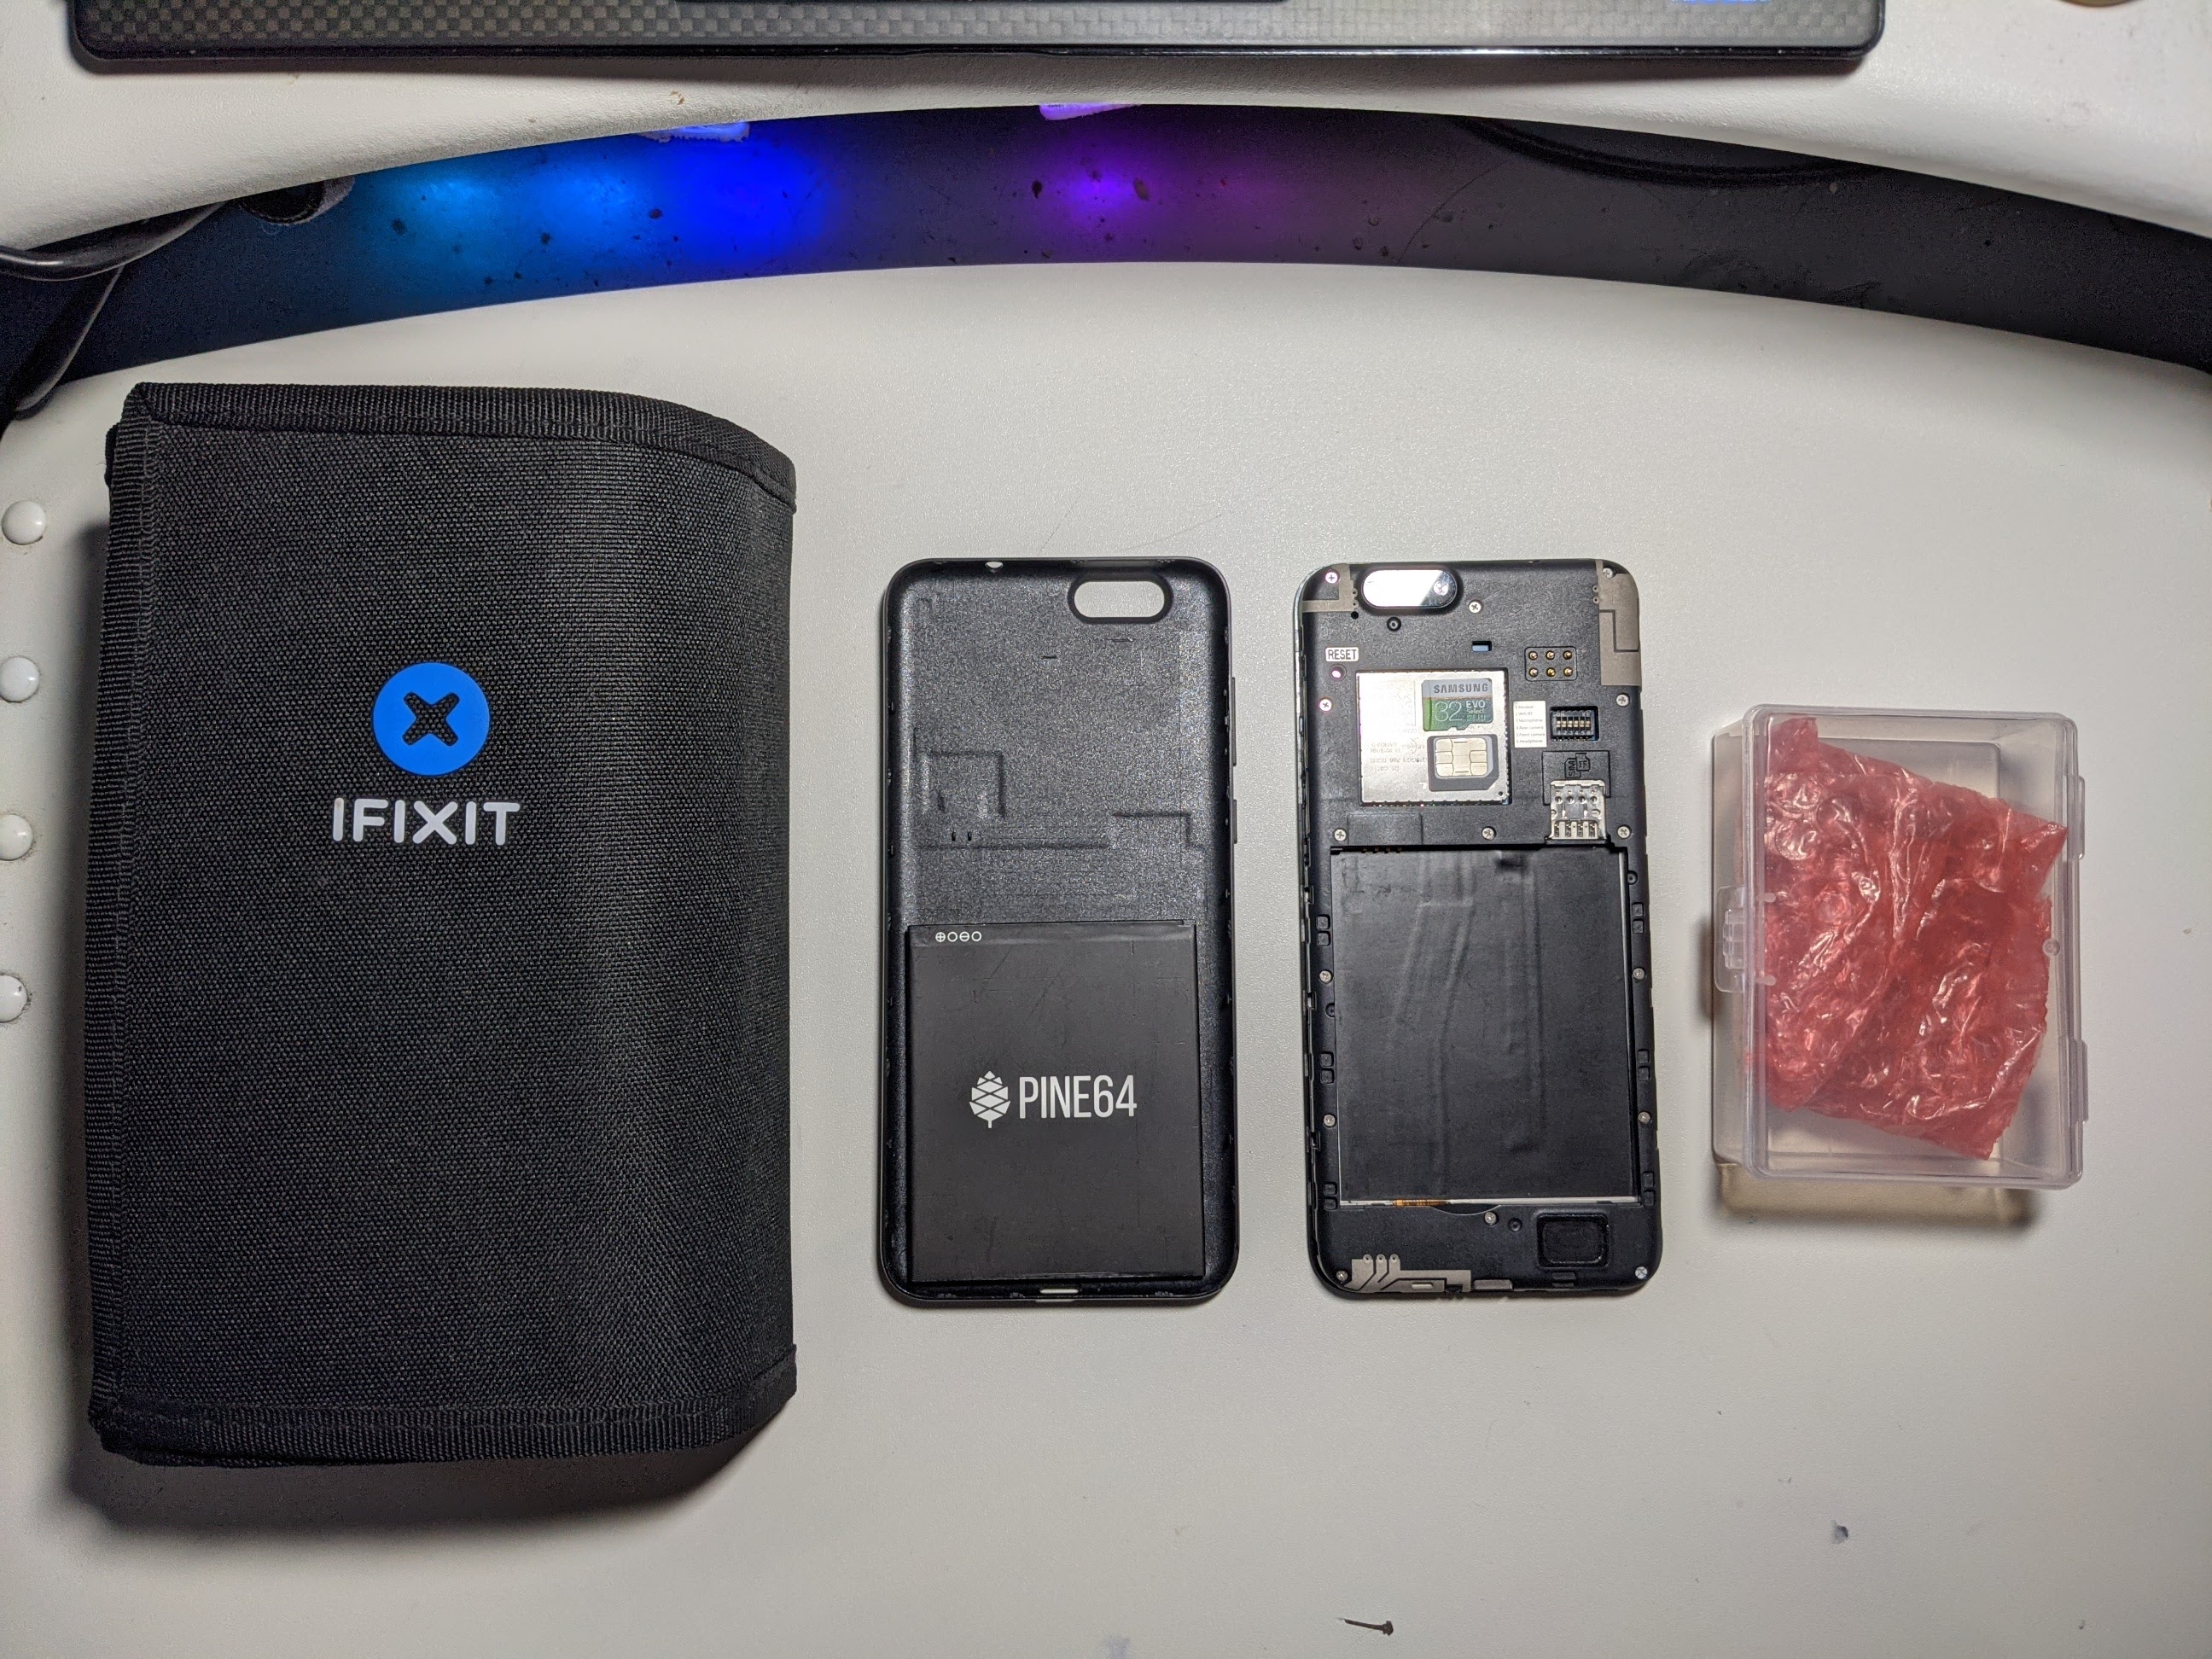


A wonderful thing about the PinePhone is how easy it is to disassemble. With the rear case off, you only need one Phillips style screwdriver to remove the frame which protects the electronics. All the screws are the same size, making disassembly and reassembly even easier. While you can accomplish this task with any screwdriver, I found that having a dedicated small electronics toolkit like iFixit's Pro Tech Toolkit (not a sponsor) made the process easier.
The frame is held on the screen assembly with screws and small clips. A thin, non-conductive tool is best to pull them apart. The toolkit I had provided just the thing, but a credit card or guitar pick would work just as well. With the frame removed, the PinePhone's internals are revealed, and we can move on to disconnecting the original mainboard.


You can find several videos online about disassembling the PinePhone. I'm particularly fond of this one, as it is straightforward and has little narration. The process is fairly simple:
- Disconnect the two rectangular connectors at the bottom of the mainboard connecting it to the screen assembly.
- Disconnect the speaker ribbon cable at the top.
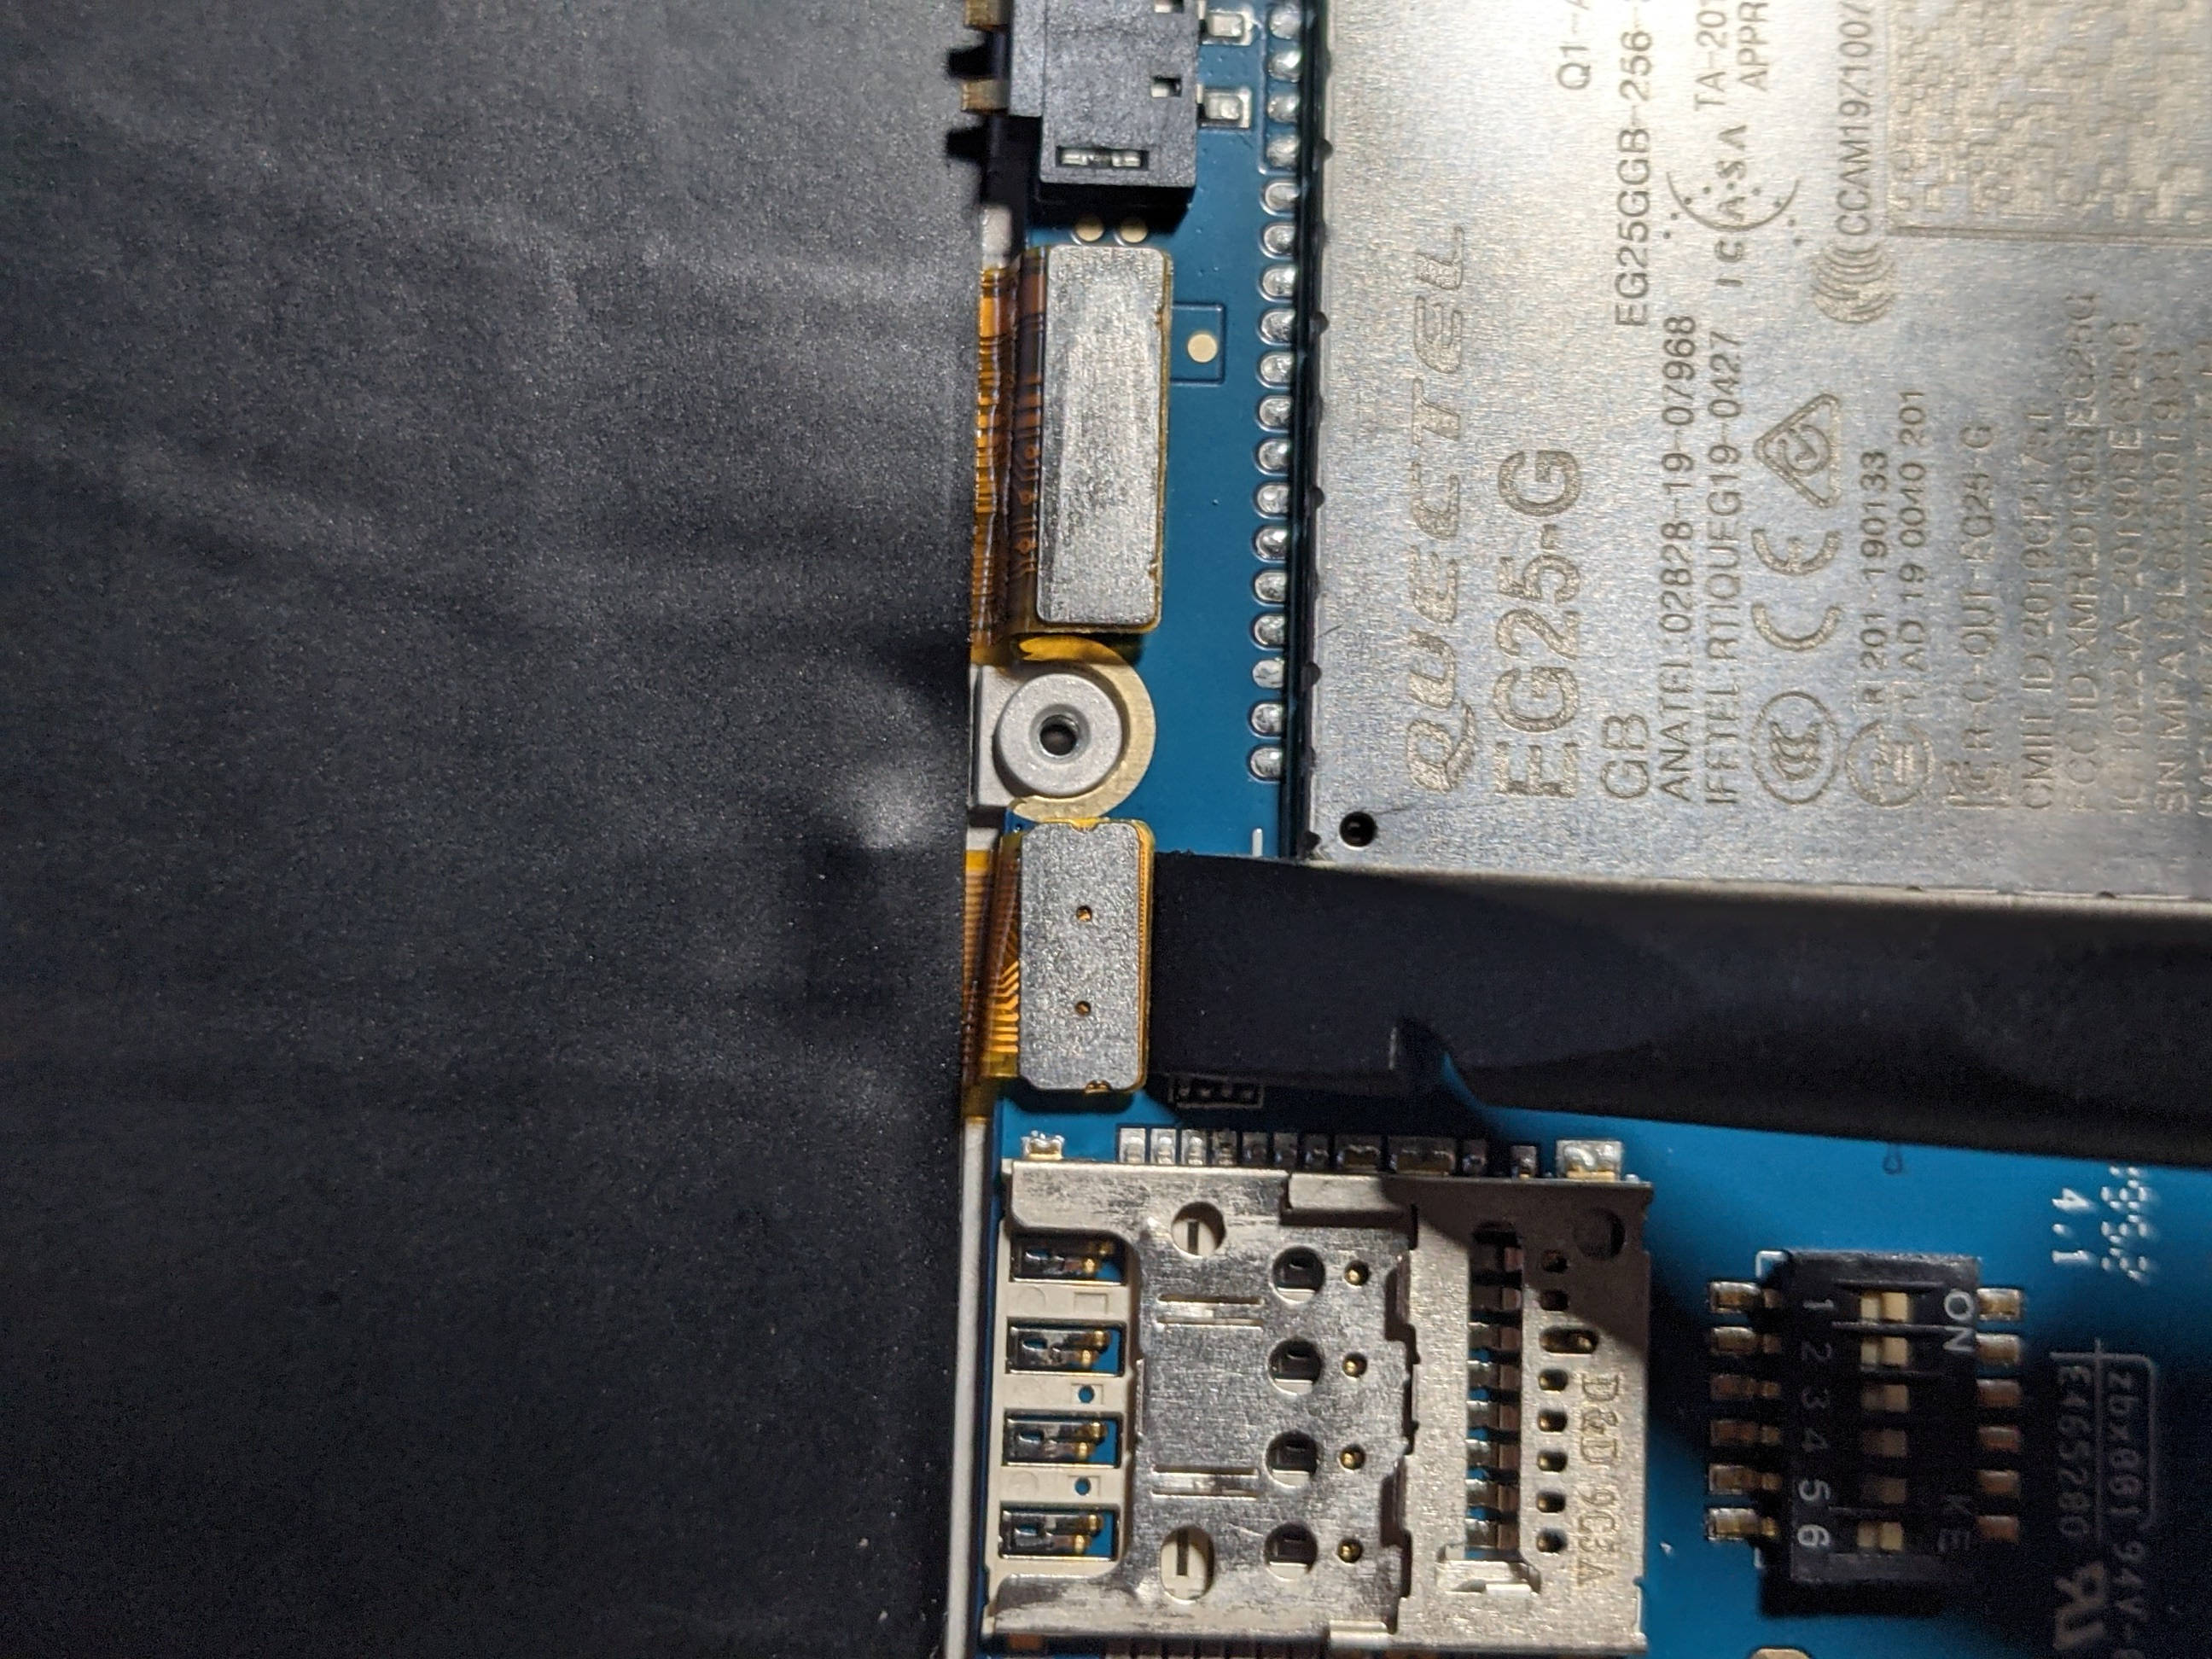
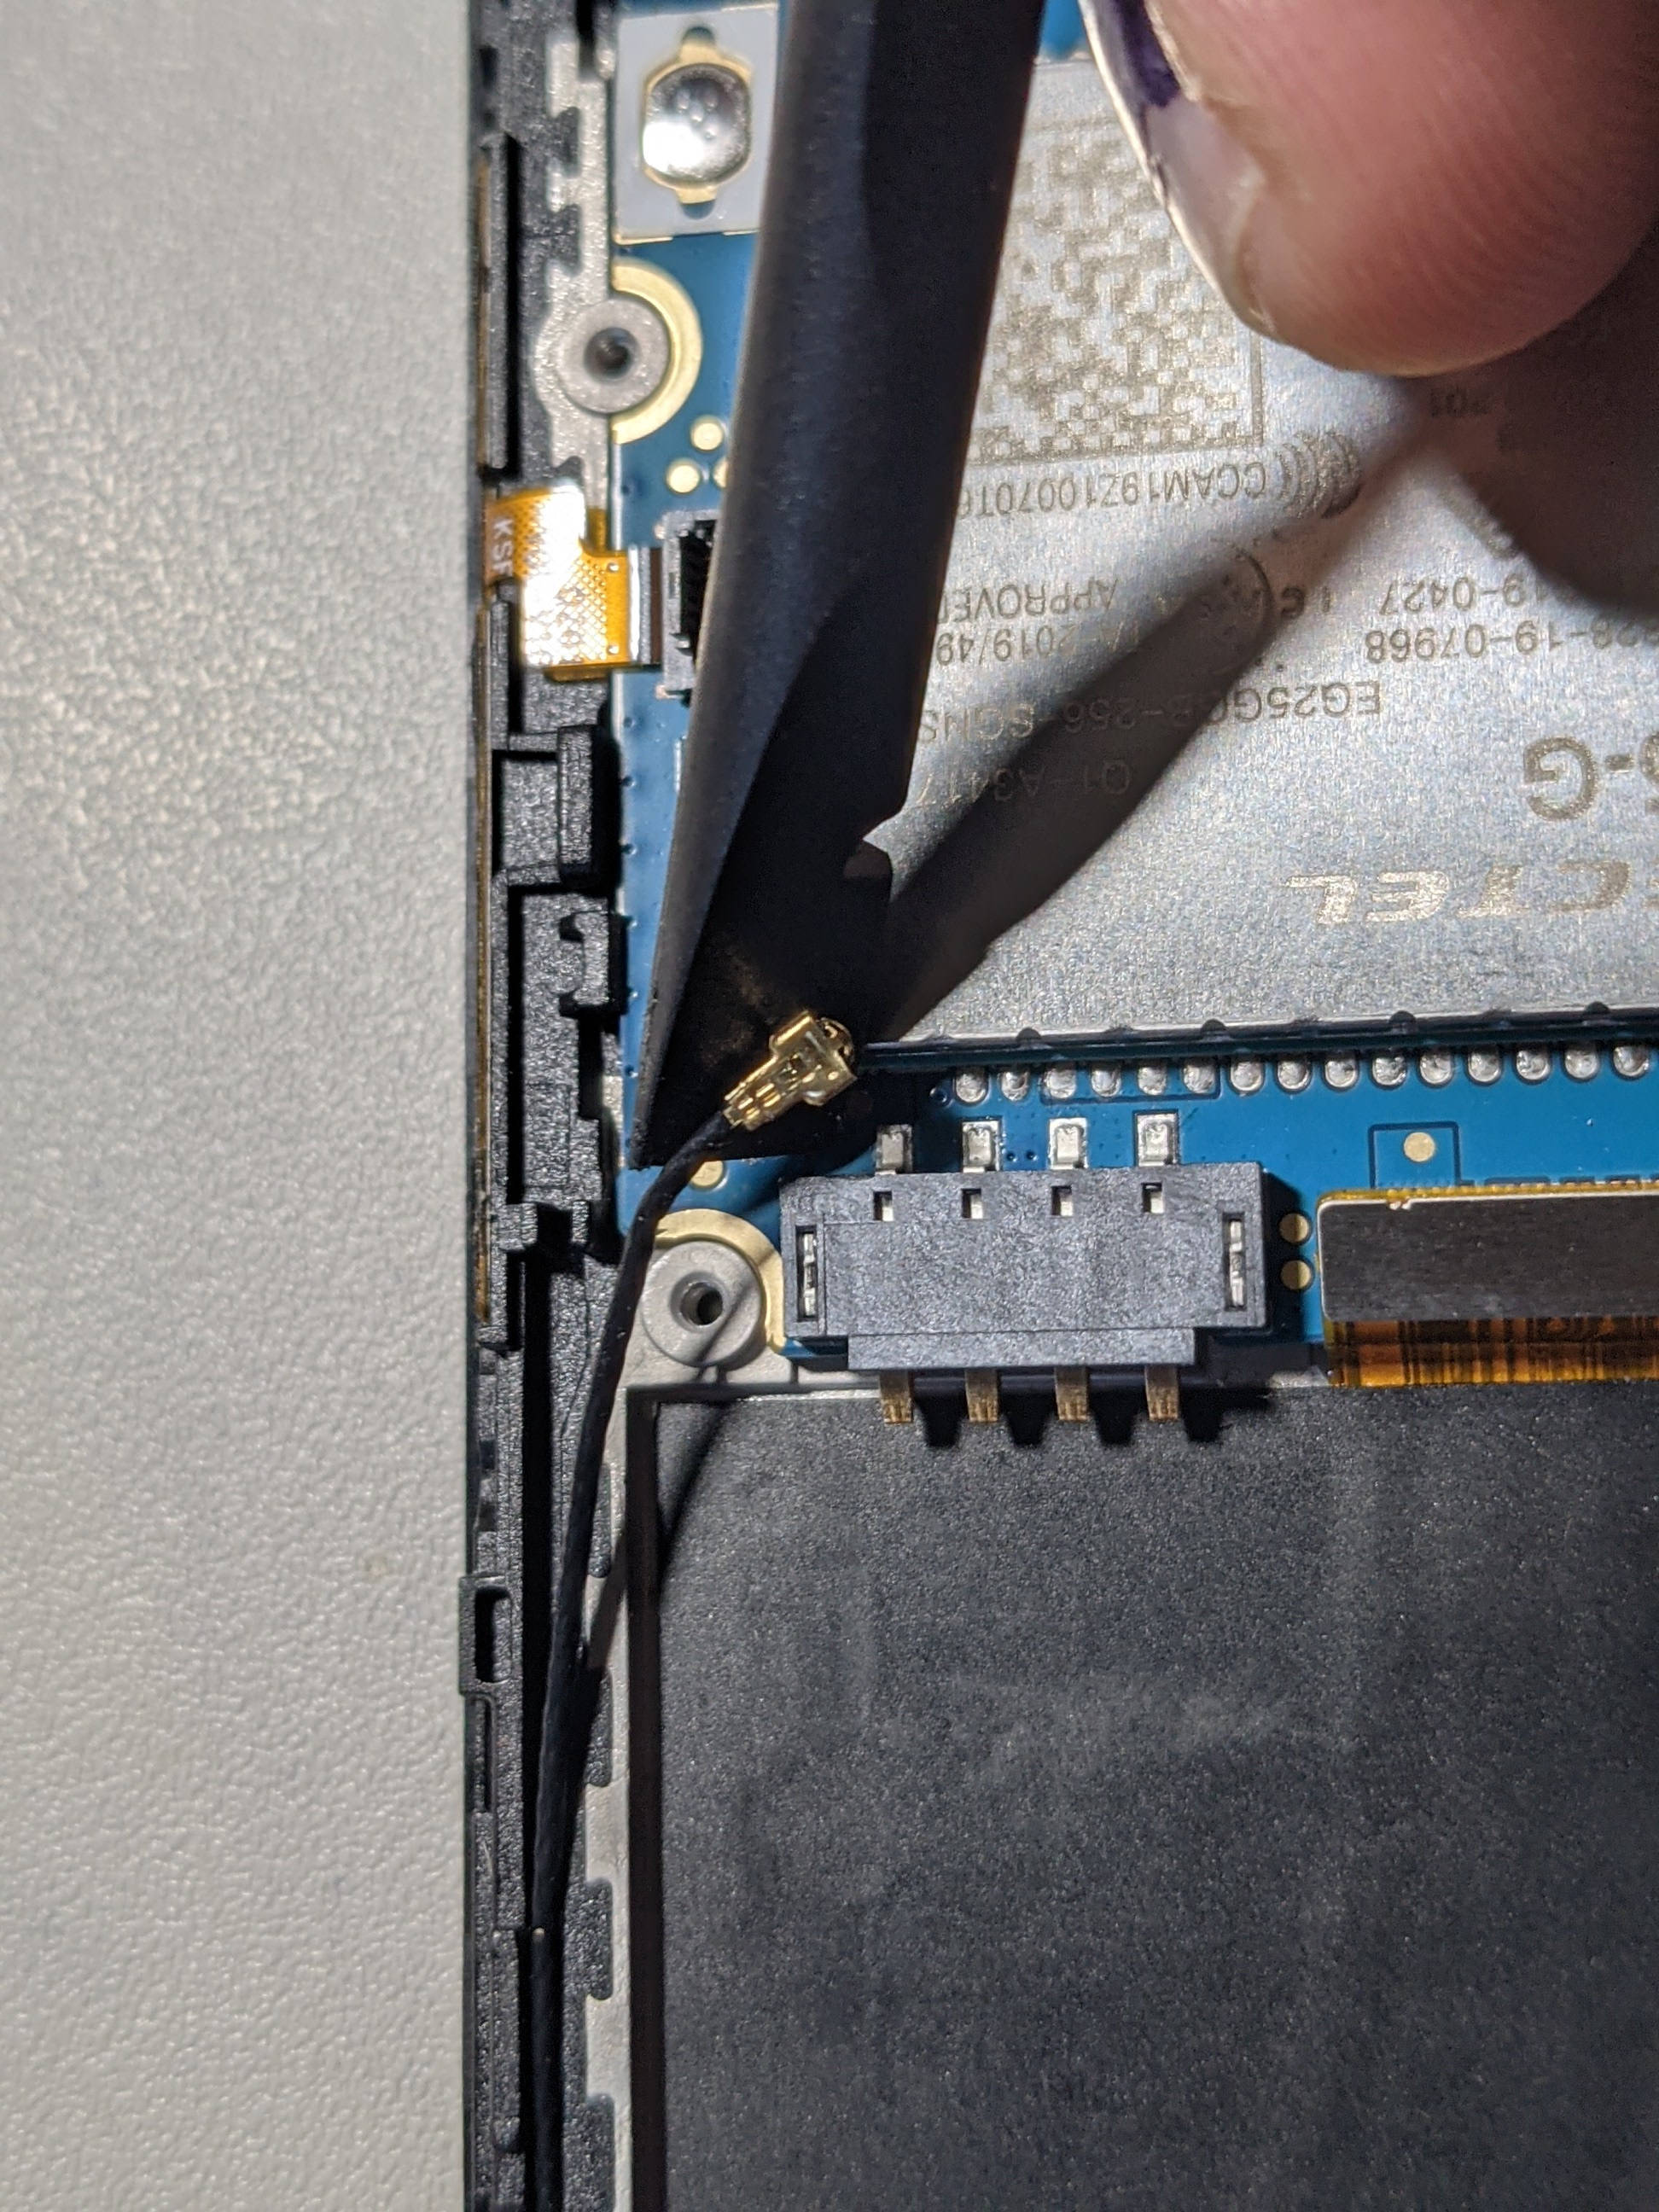
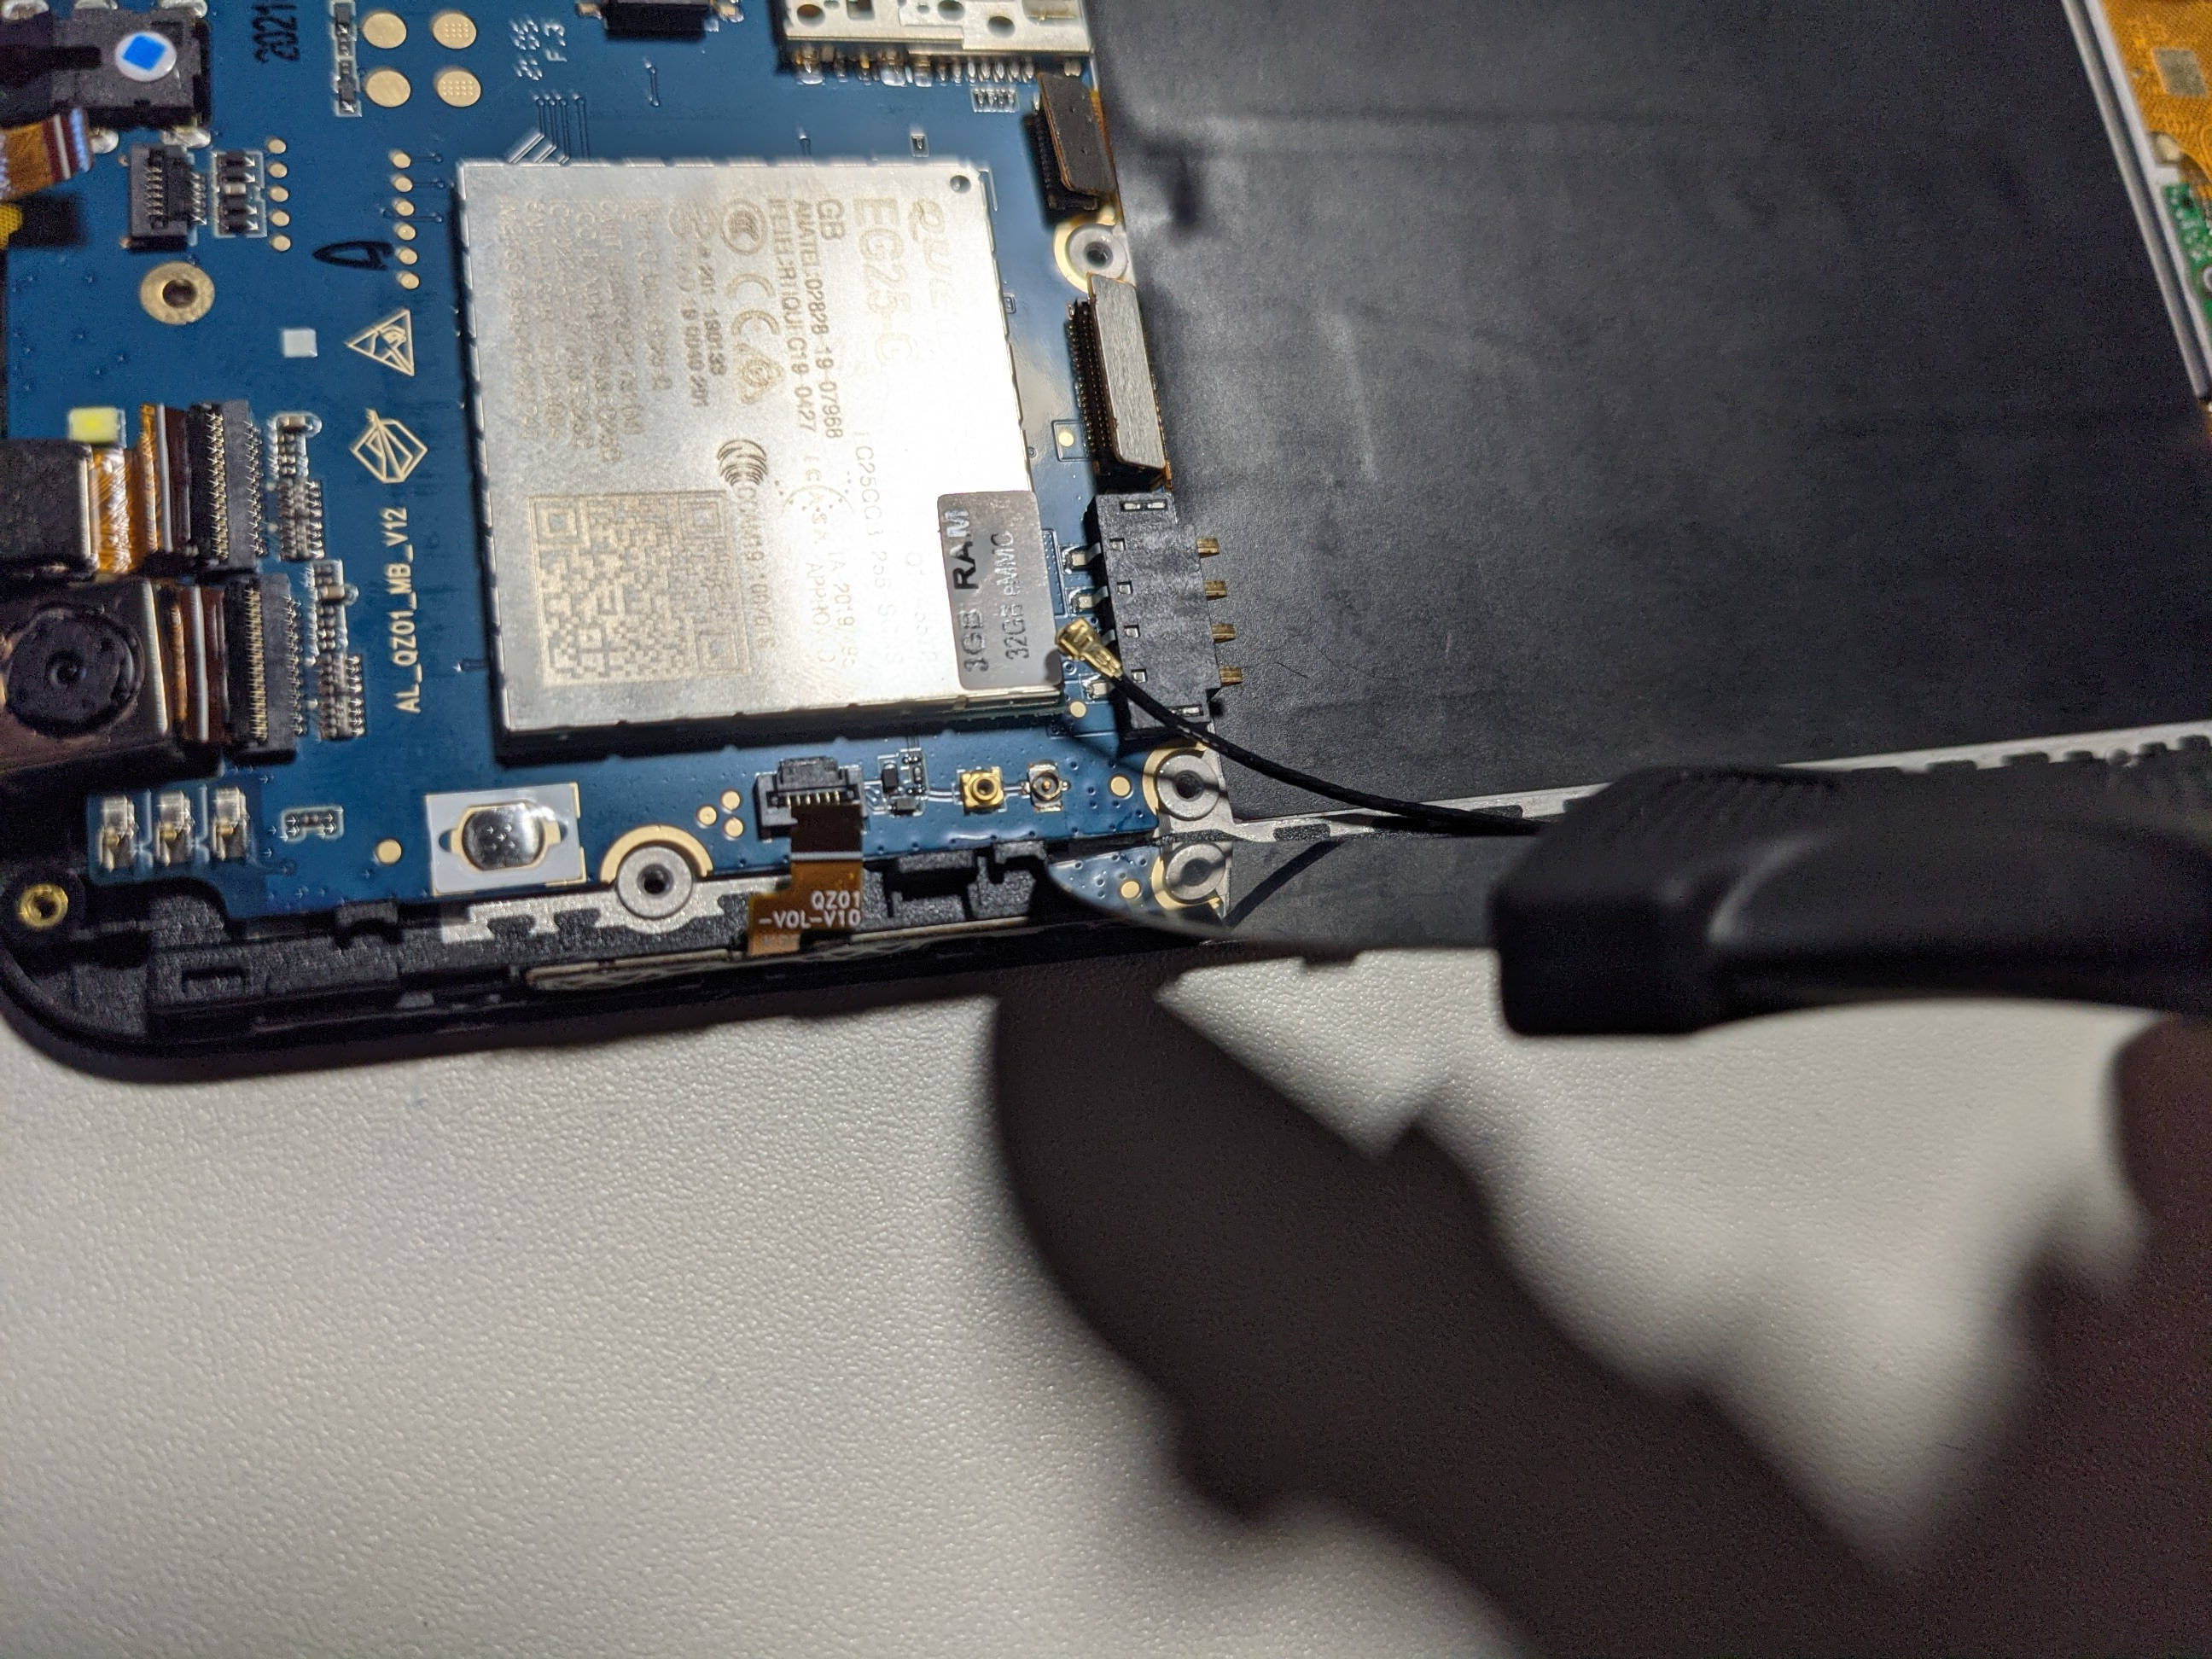
- Disconnect the antenna cable on the left side.
- Finally, disconnect the ribbon cable for the button assembly.
You can use your fingers or a small screwdriver for this, but I felt safer using a spudger -- a non-conductive plastic tool specifically for poking around in electronics. It has a slot-screwdriver like edge on one side, making it easy to lever out most the connectors.
The important detail is most of the connectors. The two ribbon cables on the top and left of the mainboard first require a small pressure lever to be released. This is accomplished by levering up from the opposite direction from which the ribbon cable enters the connector. Once the lever is released, you can use a small tweezers to pull out the cable. Again, you should use tweezers specifically intended for electronics (often called "ESD safe") to prevent static electricity from damaging the components. Many ESD safe tweezers can also be very sharp, so take care not to pierce the ribbon cables.

The small antenna cable connector is perhaps the most difficult one. It is coaxial, and needs to be carefully wedged up from both sides to disconnect it without damaging the delicate wires connecting it to the screen assembly.
Once all the connectors are free, you can place a tool between the edge of the mainboard and the screen assembly to lever it out. I used both a spudger and an iFixit Jimmy for this, although a small screwdriver would work just as well.

With the mainboard extracted, we can now move on to reassembling the phone.


The replacement mainboard does not come with new cameras, so you need to move them from the original board to the new one. The process is similar to the other ribbon cables. Release the pressure lever, and then extract the cameras using a tweezers or a small pliers.
I found that it's best to not use a pair of spring loaded tweezers for this particular task. A spring loaded tweezer exerts too much pressure, and on the round lenses. To my shock, it can make the cameras into mini projectiles. Luckily, I only nearly lost one camera, and neither appeared to be damaged.
Connecting the cameras back up is far more difficult. I found I needed the dexterity of fingers rather than tools to accomplish the task correctly. Seating the ribbon cable was surprisingly difficult because it is the only supporting structure for the camera. After a few tries, I got it. Always, be very careful and patient with ribbon cables, as they are very delicate!
Reassembling the PinePhone after the upgrade is the same steps as disassembling it but in reverse. Place the board on the screen assembly taking special care to keep all the ribbon connectors and the antenna cables from getting trapped under the mainboard, or pinched between the mainboard and the clips on the screen assembly.
I found some difficulty snapping in the board in place. I found it easiest to place the mainboard under the clips in the screen assembly along the right side, then use a thin tool to deform the clips around the screen assembly to get it the rest of the way down. Once seated, I used a combination of tools and fingers for the ribbon cables, and fingers alone for the antenna connector and rectangular connectors. I found the tactile feedback was essential to seating the connectors without damage. This is especially true for the antenna connector, which would have been impossible to reconnect otherwise.
Once the mainboard is seated and everything is reconnected comes that perilous first boot test.
This is where I noticed something might be wrong. Normally, the Phosh lockscreen has four icons:
- Wifi
- Mobile network
- Bluetooth
- And battery status
In the video above, however, only the battery icon showed. I played with the the phone for a minute and confirmed that there was no network. Instead of troubleshooting this further I made a guess that the PinePhone's hardware is actually smart enough to detect if the antennas were connected. I hadn't placed the back frame back on the phone just yet so as to avoid much needless unscrewing, and of course, the back frame is where the antennas live.
After putting the frame back on, screwing down all those many tiny screws, installing the battery and the back cover, the operation was a success!

One thing that was a constant problem with the PinePhone Braveheart is how it was almost enough. It was almost enough memory. It was almost enough speed. It was almost enough screen. It was almost enough storage.
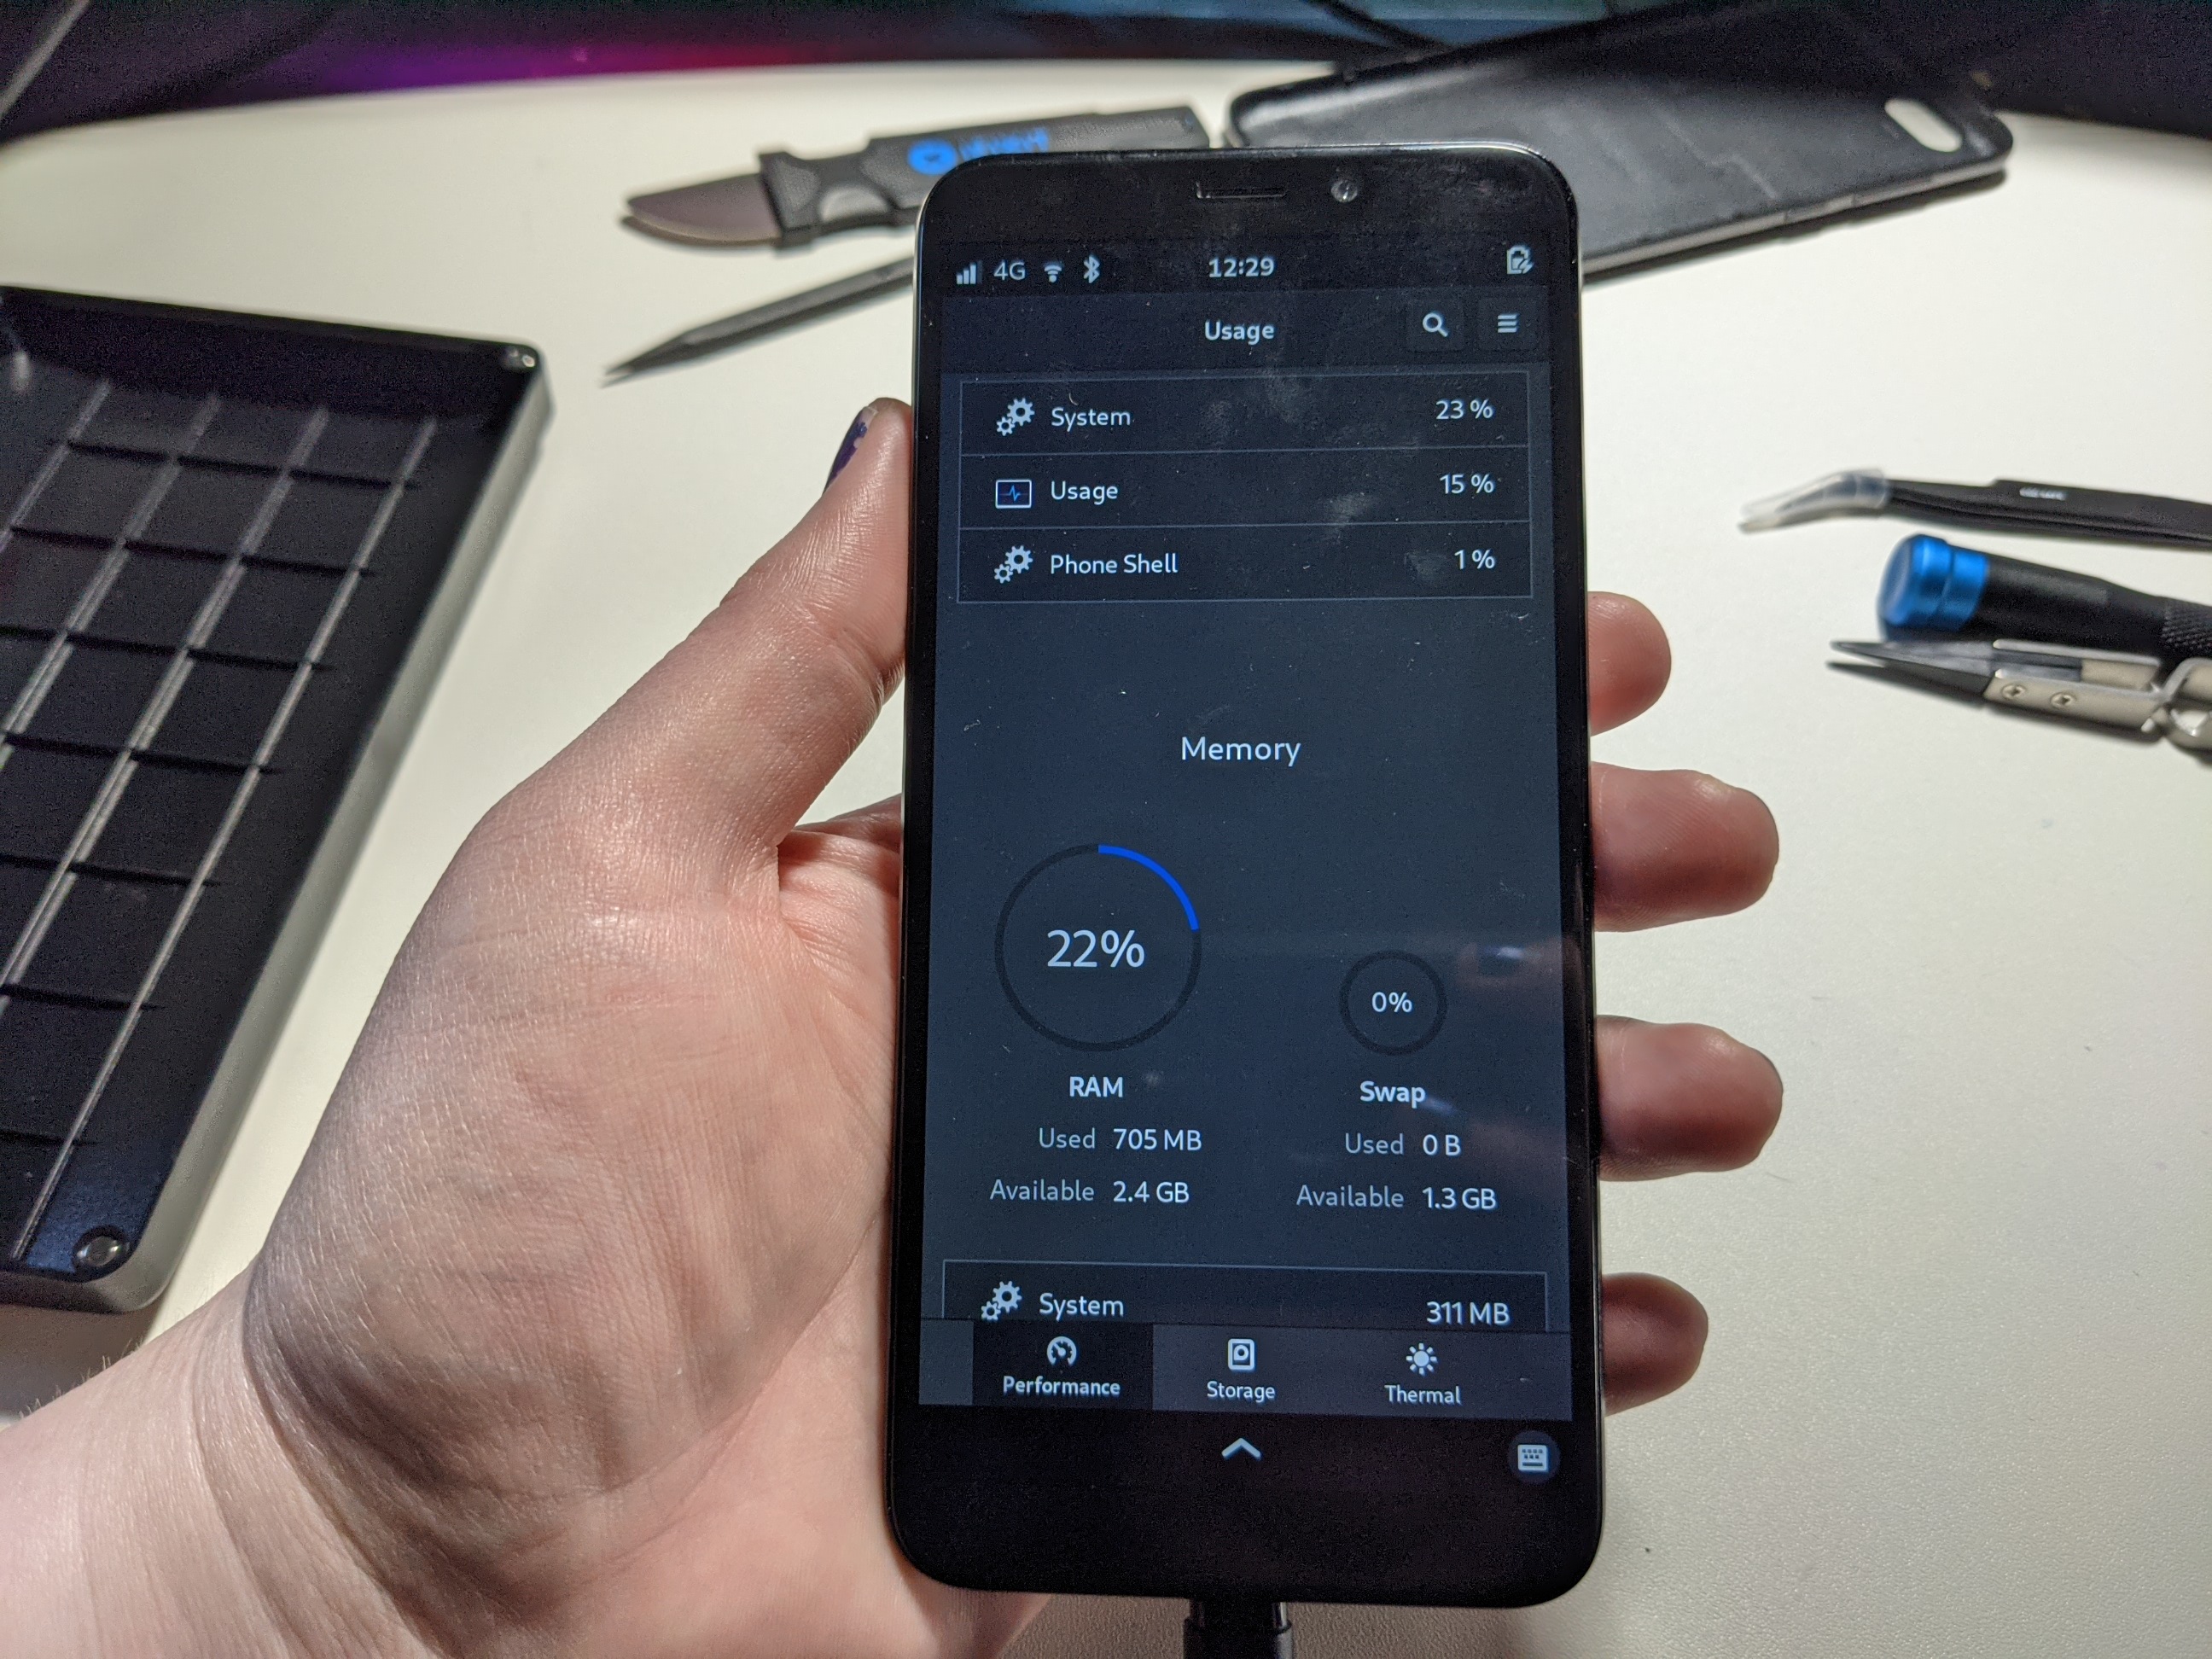
This upgrade converts my Braveheart into what Pine64 calls a "Convergence Edition" phone. An extra gigabyte doesn't sound like much, but it makes a big difference in terms of speed. A single instance of FireFox no longer allocates all the memory on the system. While Mastodon remains usable, Twitter's extensive JS makes it hard to use, and I needed to resort to the Corebird application instead.
Connecting a USB hub now works effortlessly with the phone. I can charge and connect external devices without issue. Astonishingly, HDMI out even works, although I haven't a clue how to put a window on a second screen in Phosh.
The PinePhone continues to be a utter masterwork in repairability in smartphones. With two or three tools and an hour's worth of time, you can replace nearly everything in the phone. Everything is either on the mainboard, the screen assembly, or in a breakout board attached via a reusable connector. While the parts are delicate, only care and patience are required. There's no need to break out a heat gun or fight with obstinate globs of adhesive.
The 3GB version of the PinePhone continues Pine64's excellent work in bringing mainline Linux into the smartphone space. For those not bound to particular apps, or key Smart Home integrations, the PinePhone makes a suitable replacement. And few smartphones have the joyful amount of repairability as this device.
The upgrade was well worth it.


