
Filament Storage v2
When you've been 3D printing for a while, you start to collect a lot of filament. For many, they may simply put a half-used spool on a shelf or on a rack where it can be pulled down easily. While this does work, it runs the risk of degrading print quality over time.
Most 3D printer filaments are hydrophilic. That is, they absorb moisture from the air over time. For standard PLA, this isn't much of an issue as the filament will generally give good results even if left in the open air. Other filaments, such as ABS or PETG, a much more hydrophilic.
Why is this a problem? When the "wet" filament encounters the hotend in printing, the water will instantly boil, resulting in a small snap of expanding water vapor. Since this happens in the plastic, a little bubble or "pimple" develops on the resulting print. Furthermore, wet filament has a tendency for stringing, or leaving gossamer threads of plastic between non-printing moments when the hotend moves to another location for further printing. Keeping filament dry helps to reduce the likelihood of both of these issues.


There's a number of different ways to keep filament spools dry, but most involve isolating them from free air, and using a desiccant to keep what air surrounds the spool as low moisture as possible.
My very, very first filament storage container (version 0) was simply a five gallon bucket with silica gel at the bottom. I could fit four to five spools easily and the cost was very low. If you collect desiccant packs from foodstuffs, medications, or technology packaging you may not even need to buy the desiccant either. It worked, but it wasn't all that convenient and there wasn't a good way to know how dry the filament really was inside the bucket.
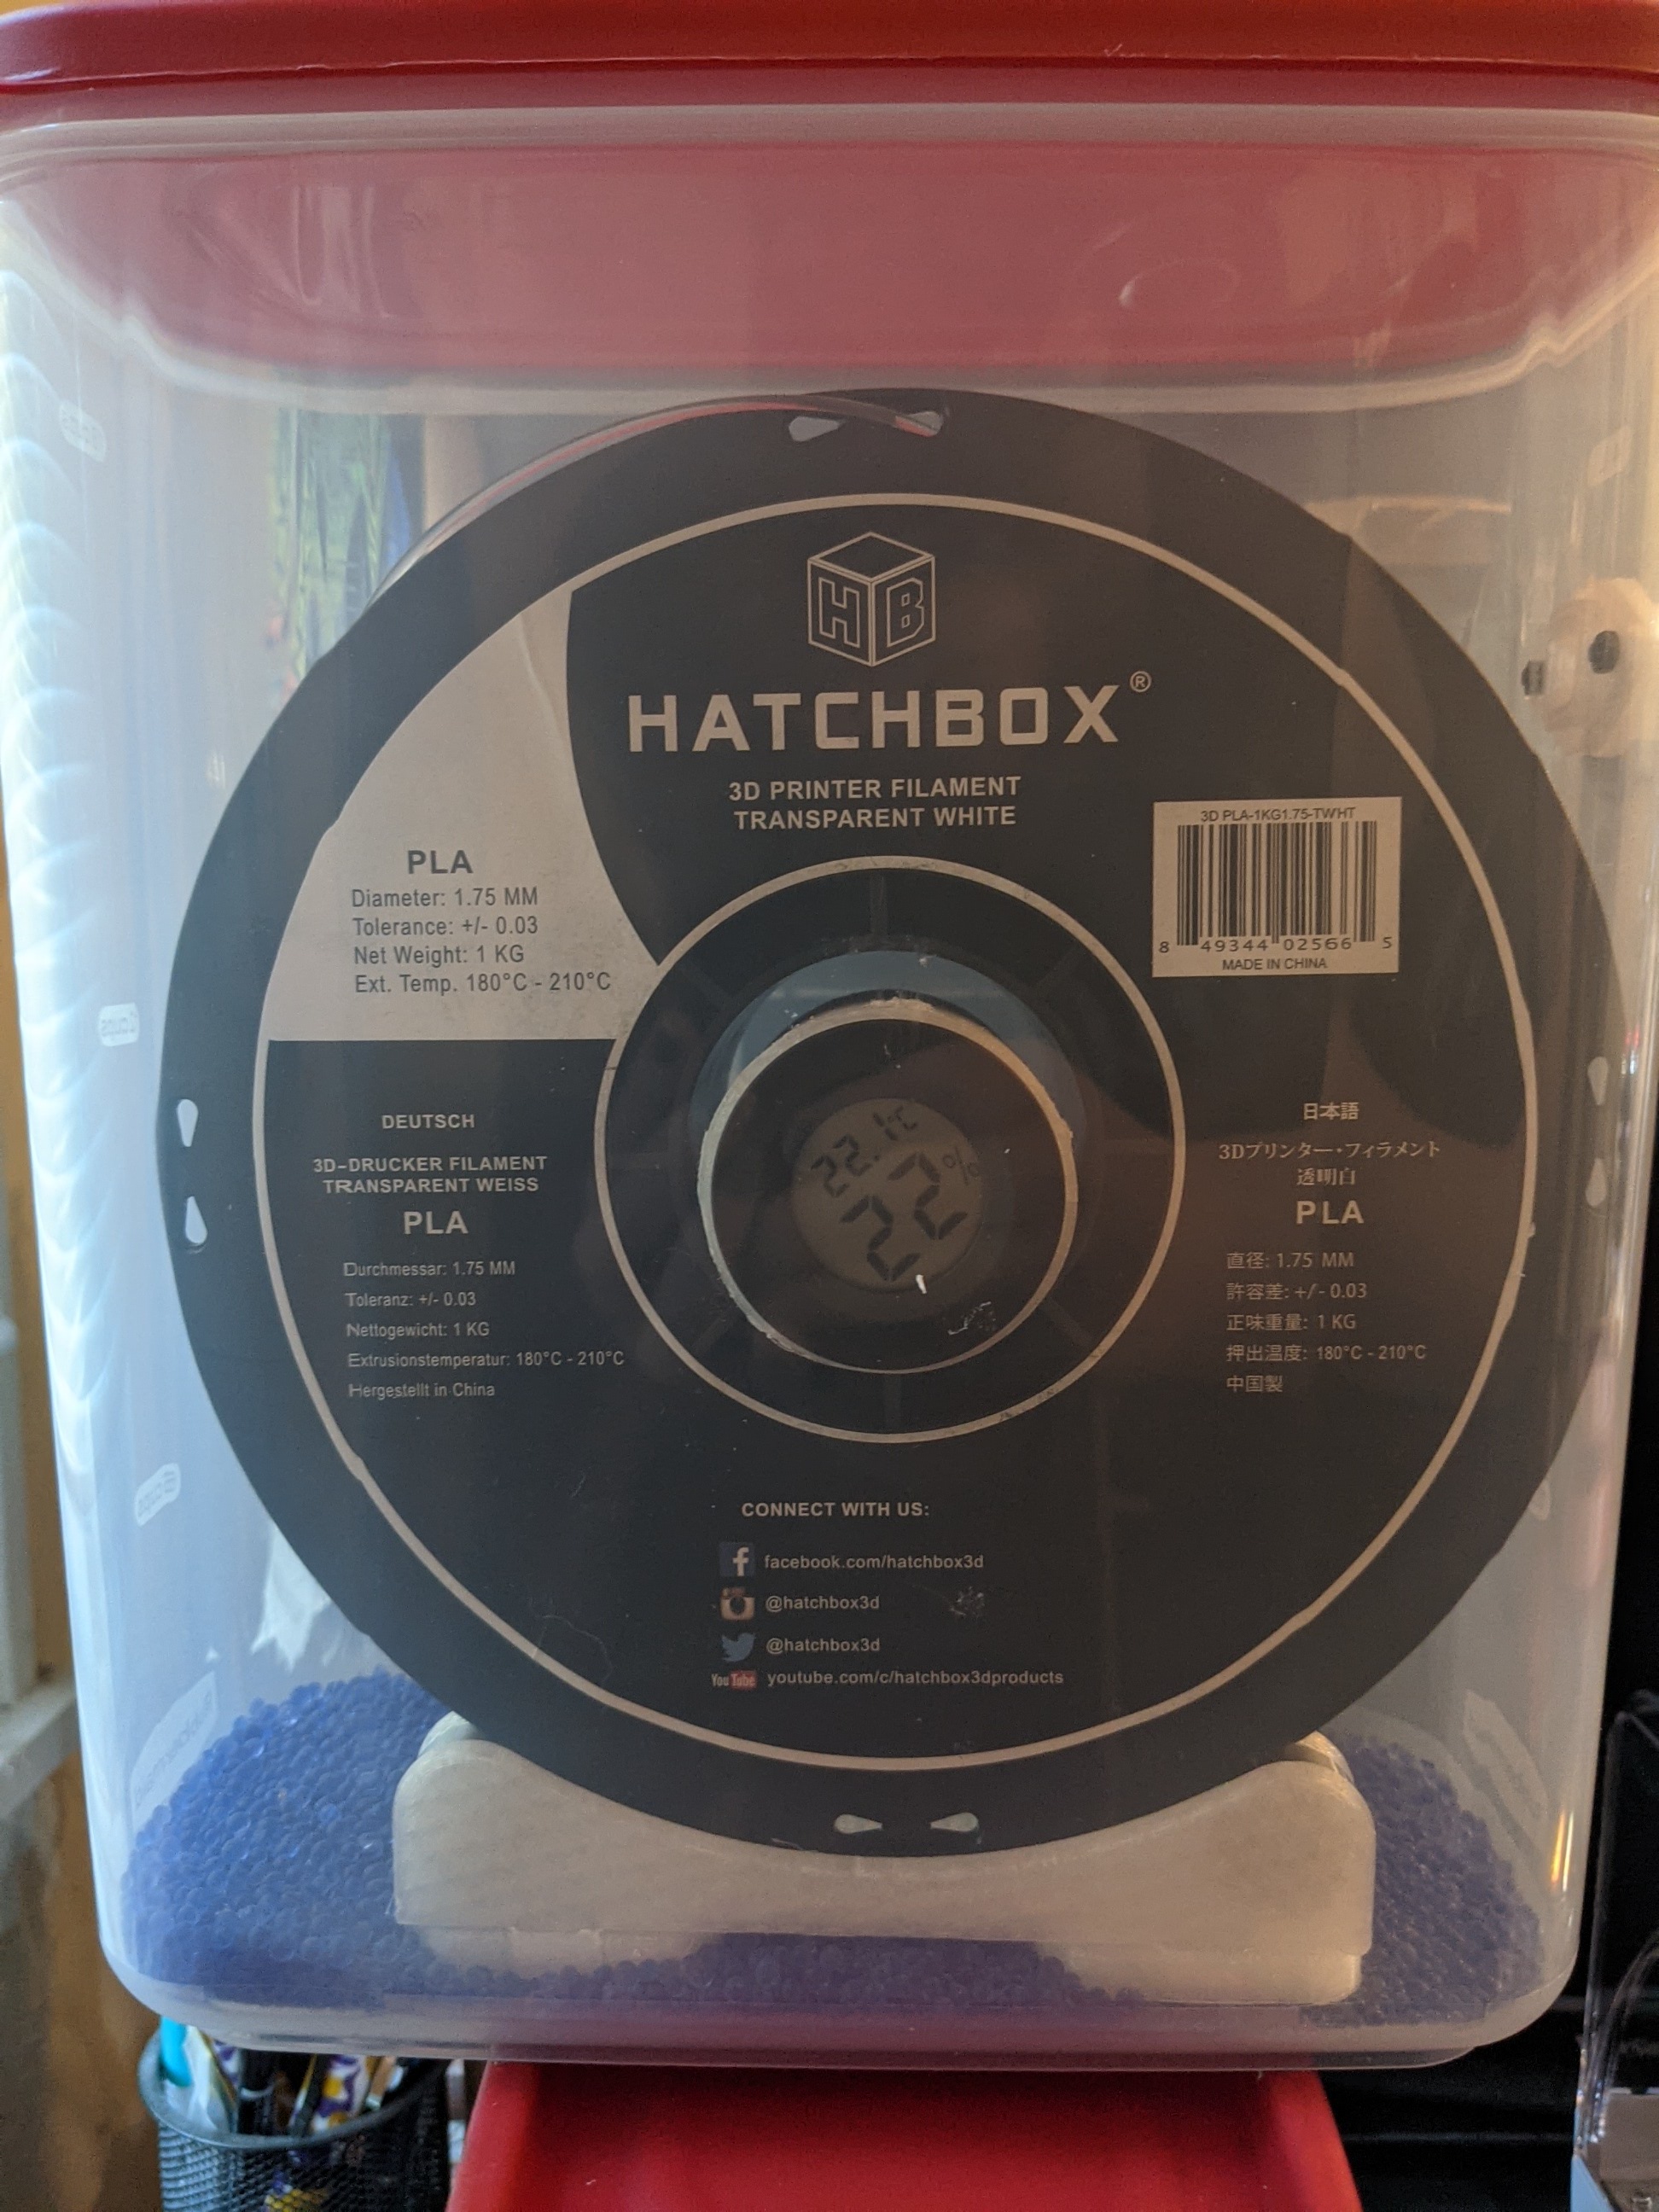
The second version improved on things significantly. Instead of a single, huge bucket, each spool was now in its own individual storage box. These storage boxes are modified "21 cup" cereal storage containers commonly found in the US. They're wide and tall enough to store one spool easily. I was reluctant to modify these heavily, so I settled on the following:
- A small outlet valve would be mounted to the front.
- A printed "jar" of desiccant was stored in the empty spool center.
- A roller using bearings would allow the spool to move freely.
- Any further desiccant could be dumped on the bottom of the container.
The jars also had a special feature. While one side was merely a screw-on lid, the other side had a spot to attach a hygrometer. These meters are also commonly found online, and display both the temperature and the humidity near to the sensor. Since the jar merely sat in the empty center of the spool, no further modification was needed to the 21 cup boxes.
A final improvement to the storage solution was to buy a filament dryer. The Sunlu dryer I bought was on sale, and generally considered good enough for use. It also meant not buying a food dehydrator and risking plastic contamination from mistaken cross-use. I modified the dryer nearly as soon as it arrived to add a PTFE fitting as an outlet port, and a small stop on the back to prevent the lid from falling behind the dryer when opened.
The dryer, while basic, had surprising results. It completely revitalized some ABS that had been left out in the open air for months, making it readily usable again. Storing a similar roll in desiccant after being exposed to open air for weeks didn't result in improvement. The key? Heat. The filament dryer heated the roll, allowing stored moisture to escape.
While the dryer was a definite improvement, I quickly found issues with the 21 cup boxes:
- The outlet port was leaky and allowed more moisture into the container over time.
- When removing a spool, the desiccant jar would fall out with a clatter, or worse, break open sending silica gel everywhere.
- You couldn't read the humidity from the front of the box, only the side.
- The rollers only had a narrow rolling surface; many spool sizes wouldn't fit at all.
The biggest problem, however, was the desiccant jars. Not only did they fall out annoyingly, but they were far too small to keep the filament dry. I ended up pouring more desiccant at the bottom of each box, but this created further hazards. If the box was dropped, gel would go everywhere. Worse, there was no easy way to collect the desiccant and "recharge" it in a microwave or an oven. It was a messy process, and resulted in exposure to silica gel dust, which is a health hazard.


One thing I really wanted was to make the desiccant easy to remove from each box, but also easy to put in the filament dryer to recharge. This would eliminate the need to ever remove the gel from the boxes and improve use and safety. You can actually buy silica gel in such metal boxes already, but I already had a quantity of loose gel, and I wanted to make use of that instead. I thought about printing boxes, but the print times weren't favorable no matter what I tried, and many couldn't withstand a trip through an oven for an intense recharge.
The solution I came up with was to buy several metal boxes, often used for breath mints. Since they're metal, they wouldn't melt in a normal house oven, and would be perfectly fine inside the filament dryer. To make sure air could come into contact with the gel, I cut a window in each box -- you can buy them with the windows if you prefer -- using a nibbler tool. Once a port was cut in the bottom of each box, I similarly cut a piece of metal mesh to fit using tin snips, and glued them together using JB Weld.
Two of these desiccant boxes can fit on the bottom of a 21 cup container with ease. Three if one is propped up vertically. Even better, three could be put in the filament dryer at a time to recharge the gel. Kapton tape was used to keep each box closed.


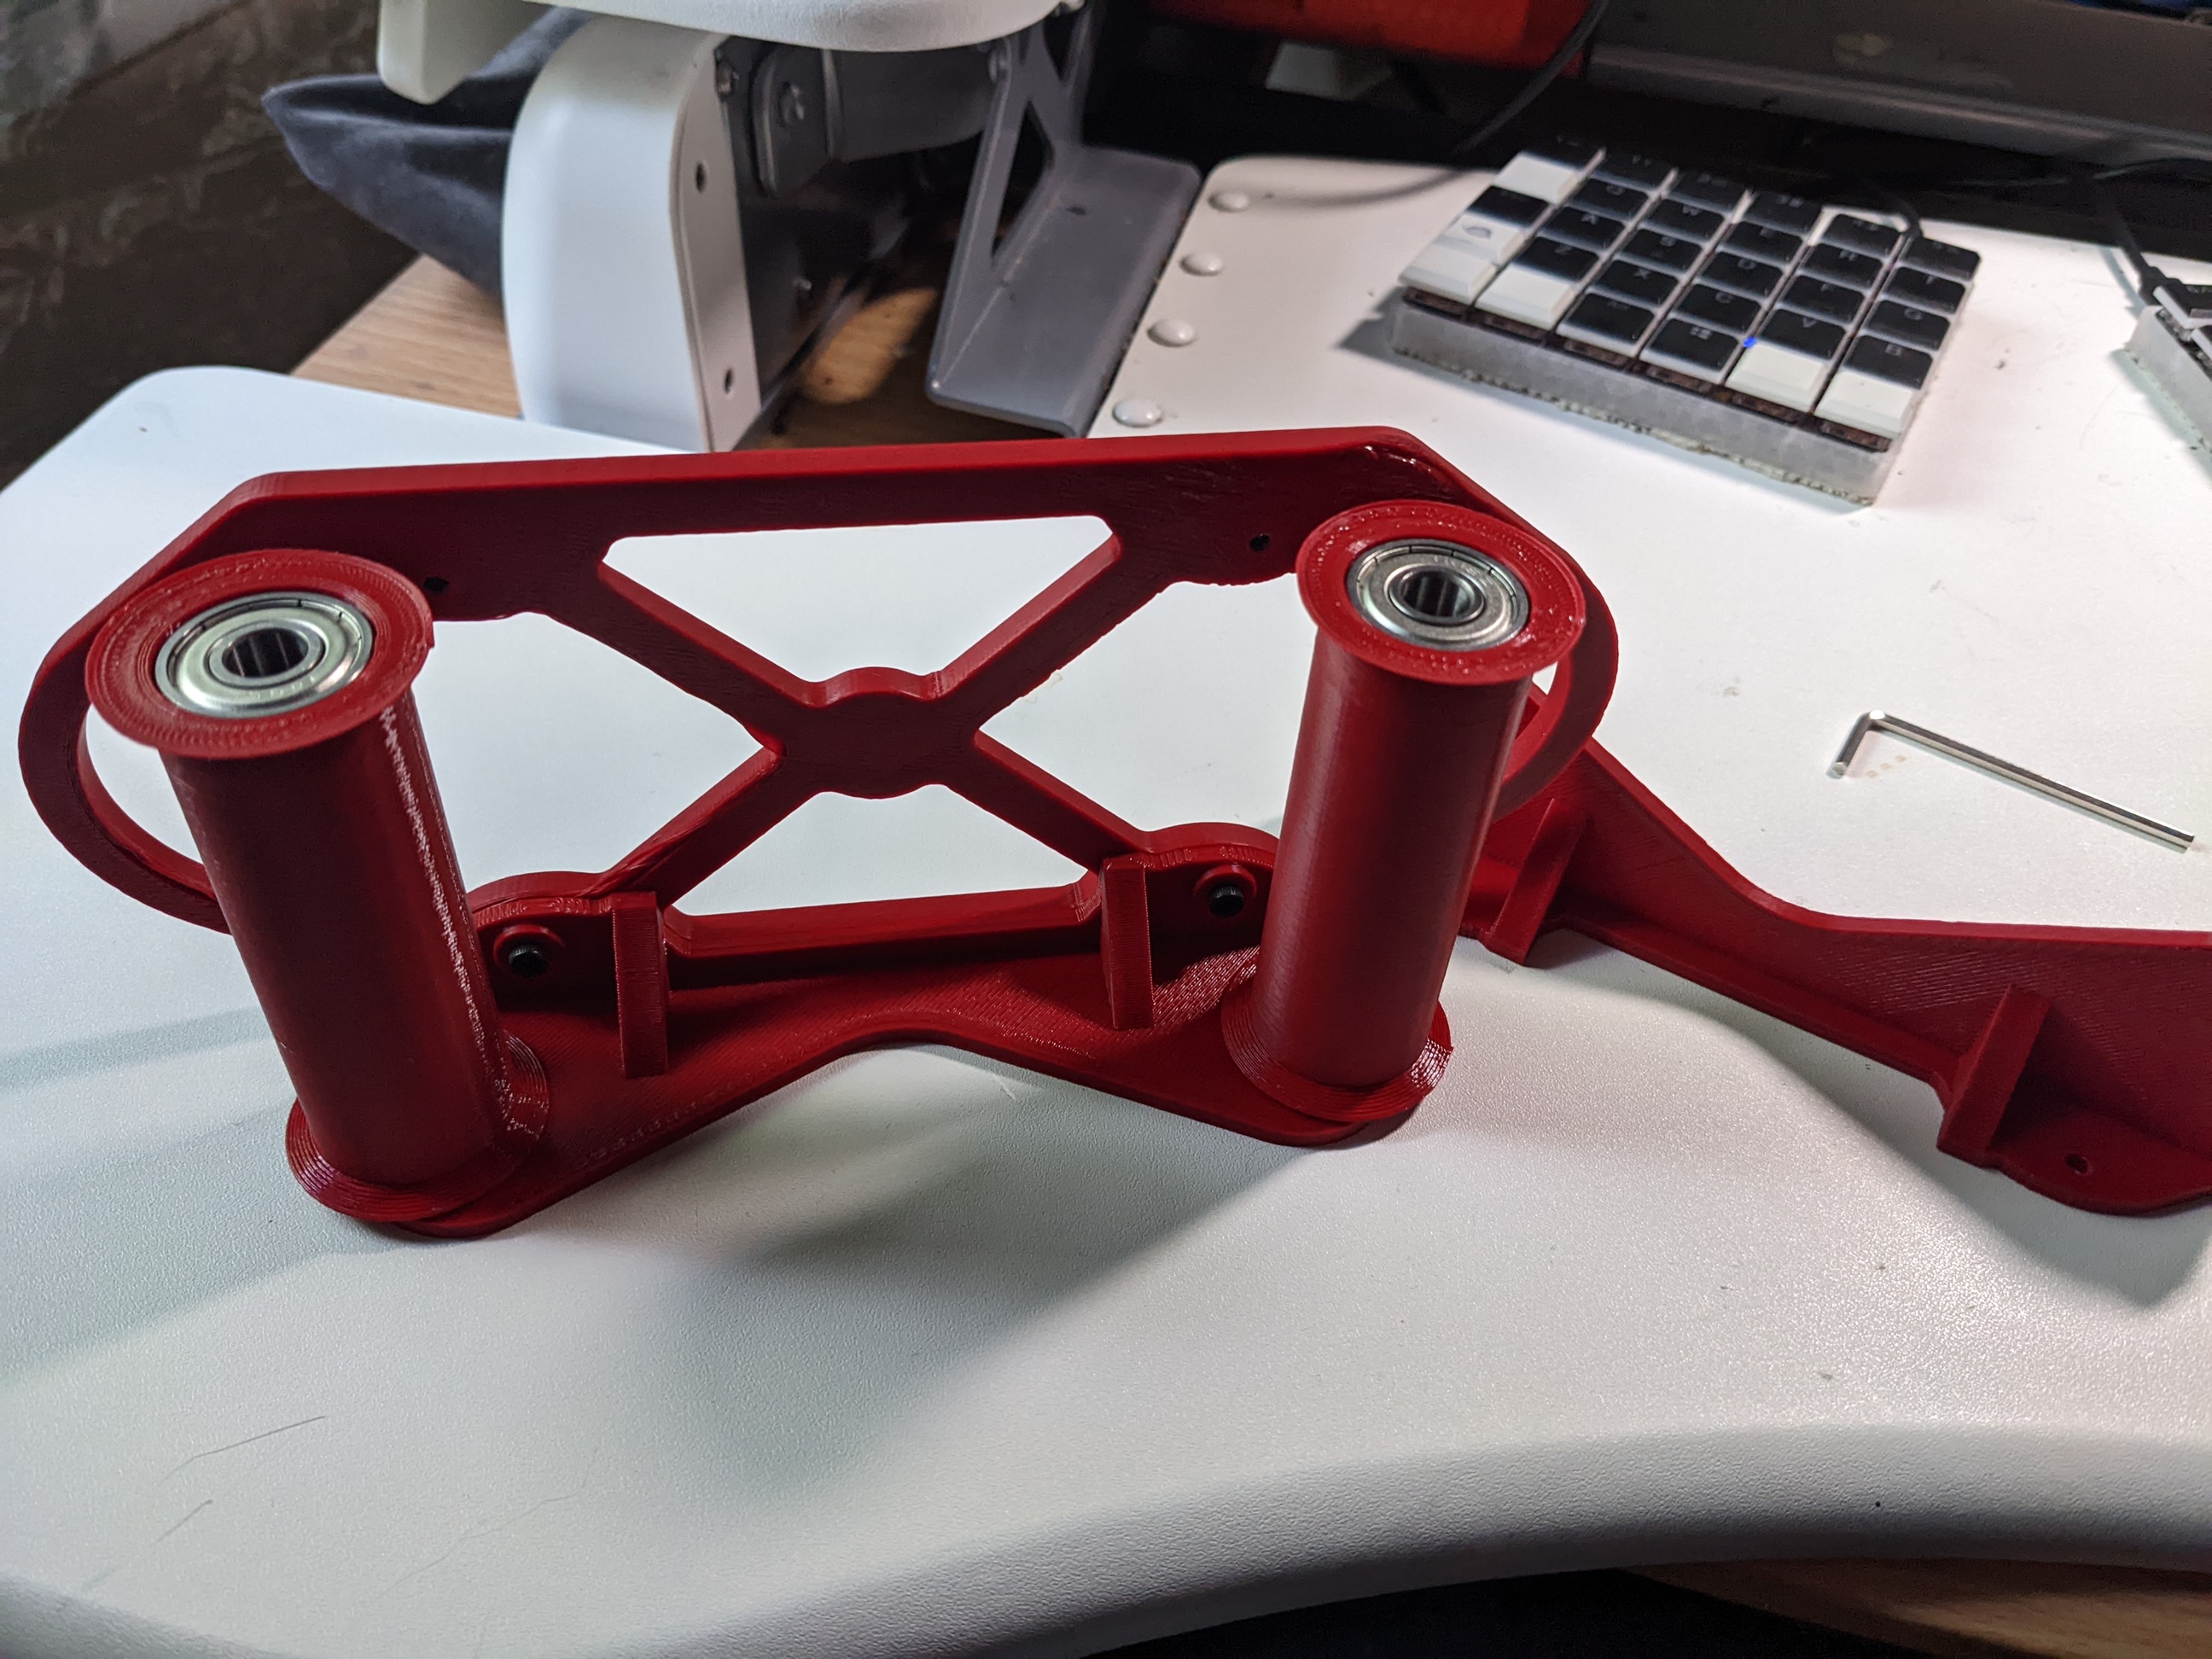
There were two issues with the rollers for the spool: They only could accept a limited size of spool, and they moved around back-to-front within the box. After some searching, I found this design on Thingiverse which would solve both issues. Instead of the spool resting directly on the bearings, two large rollers were printed instead allowing for multiple spool widths to be compatible. The base or "shoe" of the roller also was perfectly sized to prevent back-to-front motion of the roller in the box.
However, the existing design created a new problem: it wasn't compatible with my desiccant boxes. Small raised bumps on the underside of the shoe allowed for nuts or threaded inserts, but made the roller rest unevenly on the desiccant. To solve this, I remixed the shoe design to be thicker and completely flat. The added thickness allowed for M3 nuts to be easily embedded into the plastic leaving a flush bottom.
Since both the old and new rollers used the same number and size of bearings, I was able to recycle my existing ones with no additional cost. Bonus!


The final, biggest issue was fixing the output port of the box. While I really liked the simplicity of the ones I had printed for the first version, they where very leaky, and allowed outside air to enter the box over time. I thought about designing a replacement cap for the ports, but in the end, the fundamental design of the port was flawed.
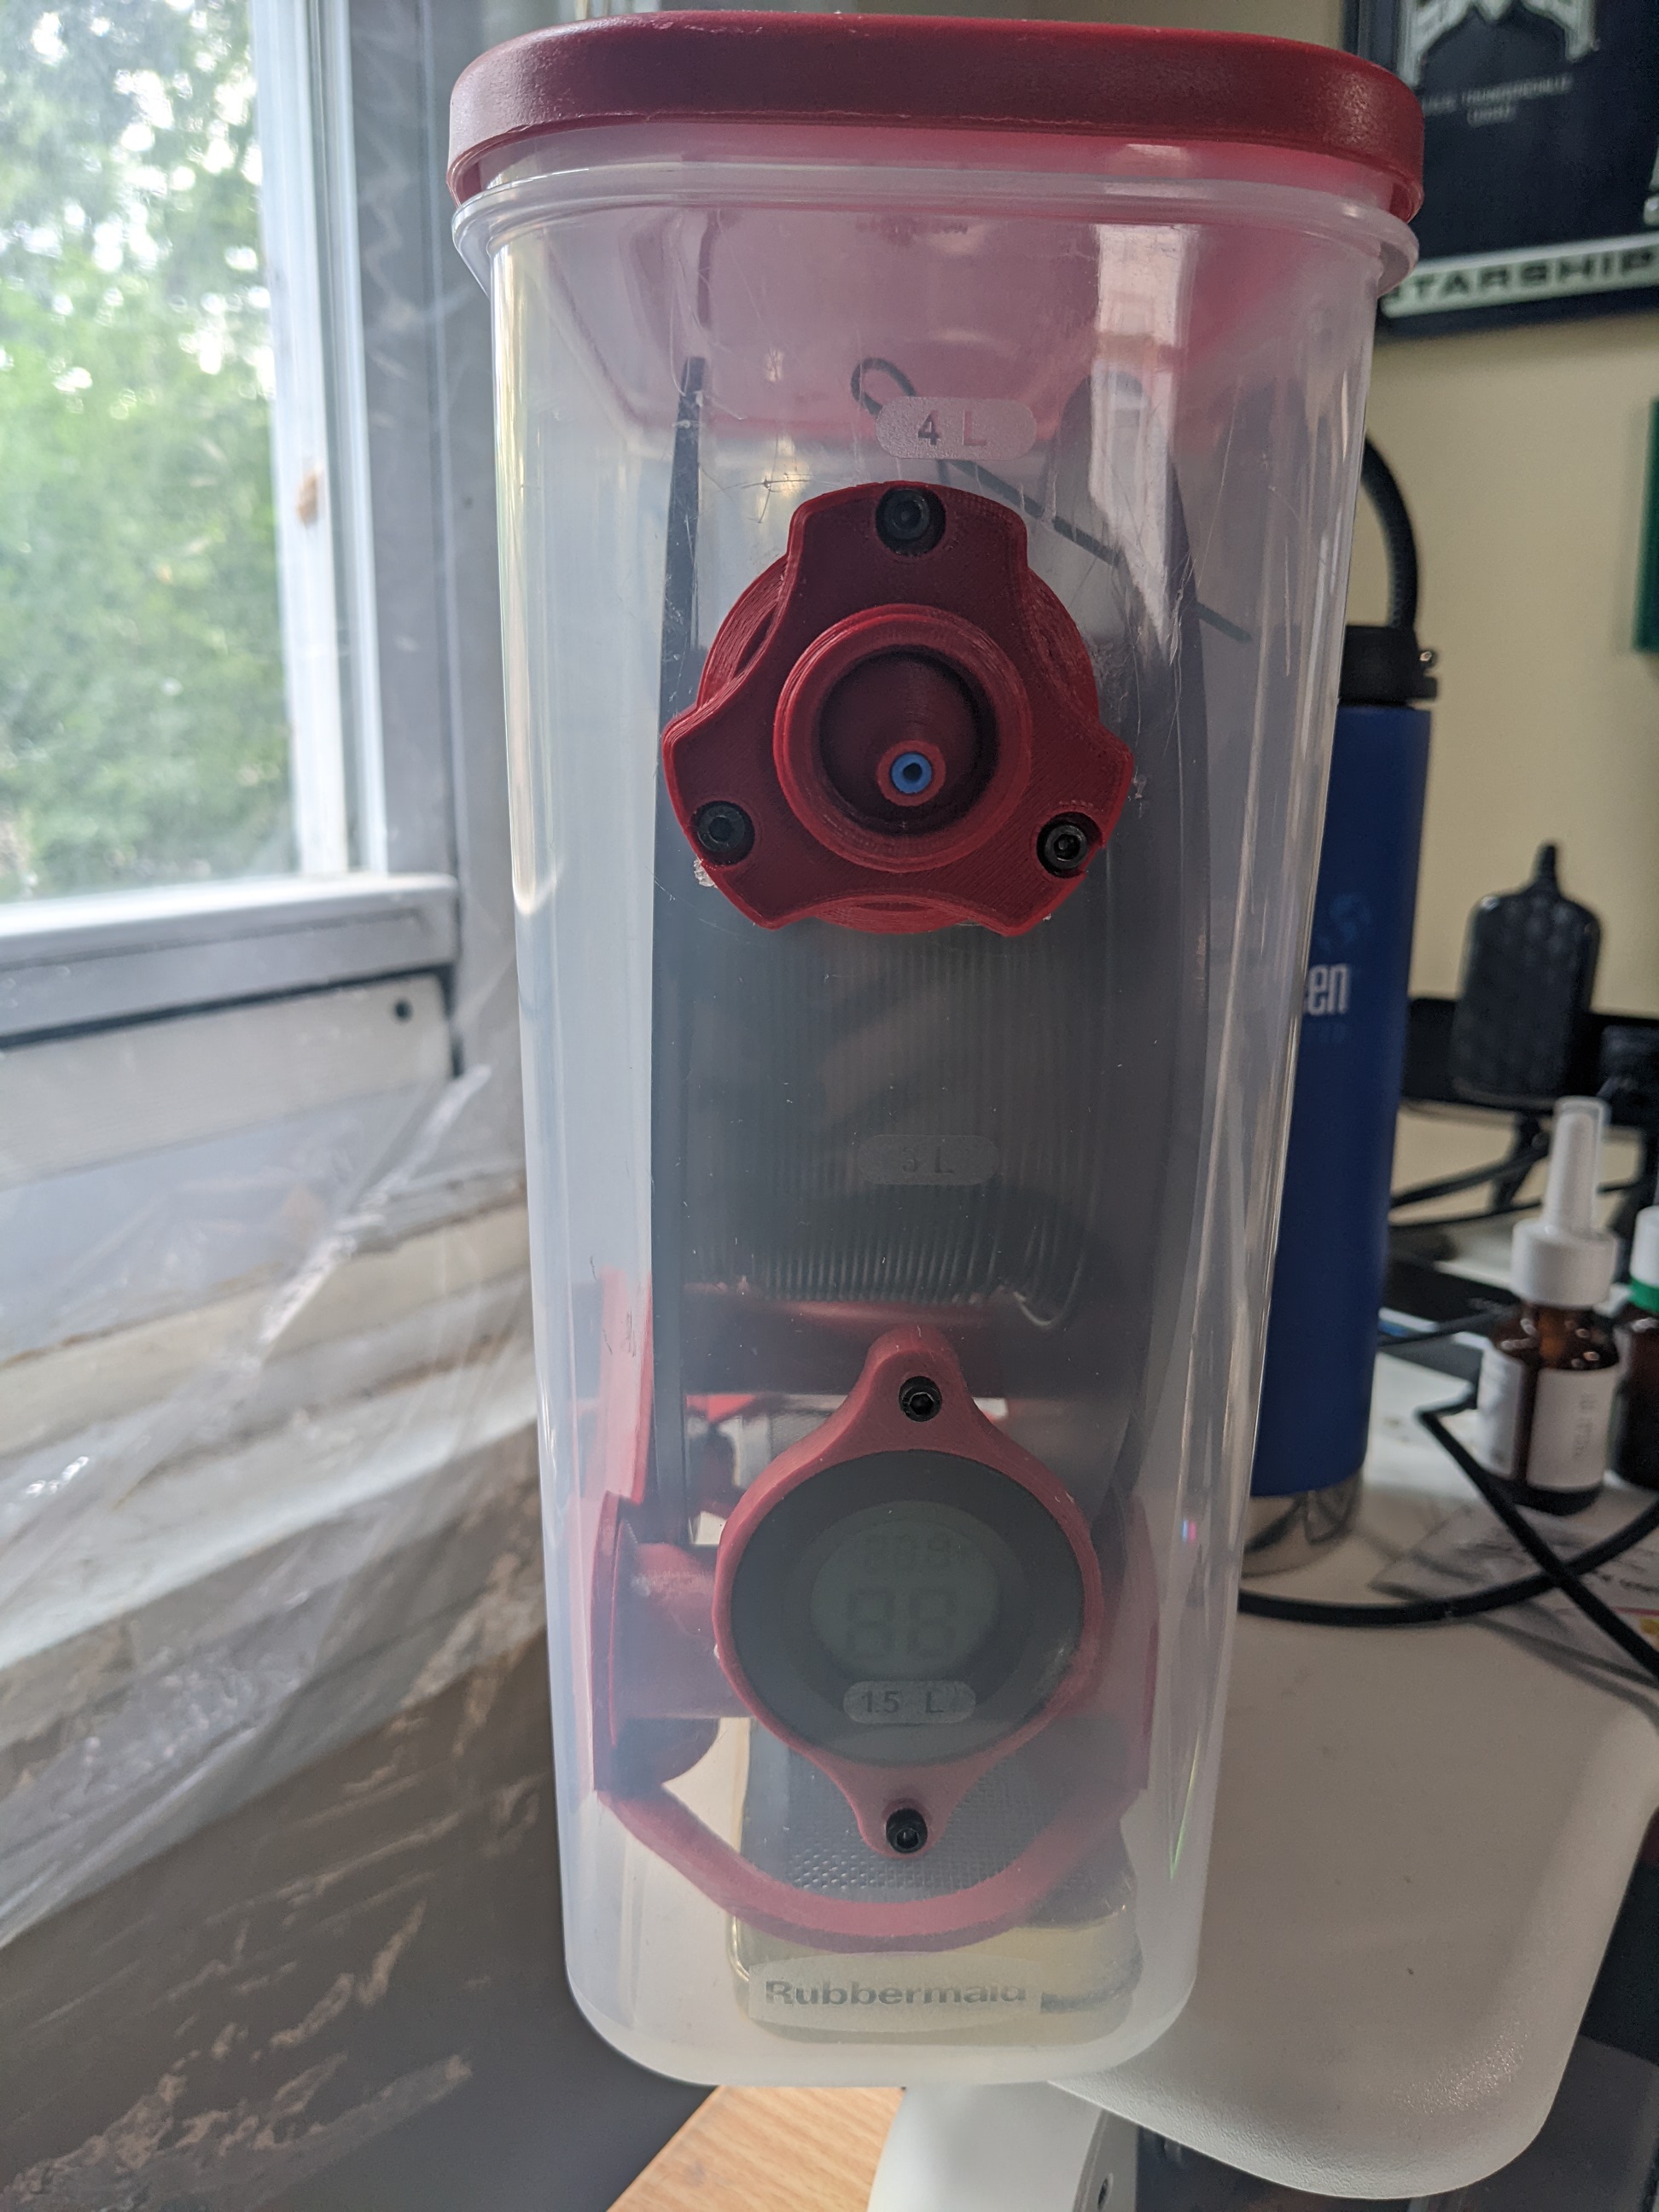
Again I found the solution on Thingiverse as this amazing design. While larger, this port uses rubber O-rings to create an air tight seal. Furthermore, the port's center is a rotatable ball, allowing for filament to exit at a broader range of angles than the existing port. I completely loved this design, but there was one single problem.
The original ball has small fins inside to hold a piece of PTFE tubing. The PTFE allows for less friction on the filament as it leaves the box. Try as I might, however, those fins just wouldn't print on my Ender 3 Pro. As you might guess, I remixed the design with much more aggressive teeth which easily grabbed the PTFE I had on hand.
To ensure a better seal, I used 30 minute clear silicone sealer when mounting the port on the box. It was....intimidating cutting the much larger hole necessary to mount the port on the boxes, but after the first two it was a non-issue. Combined with the O-rings around the ball in and in the cap created an excellent air-tight seal.
The remaining problem was hygrometer. Without the jar, it needed a new place to live on the box. As expected, Thingiverse already had the solution. The only confusing moment was realizing that the hygrometer would never go through the box, only the bolt holes do. I added silicone sealer around those as a precaution.
The new filament storage boxes are a huge upgrade from my previous attempt. The seal better, roll better, and I can even check on their status without opening them. Enclosing the desiccant in their own mini boxes results in better ease and much improved safety. Now the process for recharging the gel and drying a spool of filament is the same -- put them in the dryer.
Of course, now I have a new problem.
I would love it if I could use the new filament storage as intended. When printing, the spool never leaves the box, only goes through the port and into the printer. The problem is that my printer set-up is rather clumsy. The rudimentary shelving unit on which the printer's enclosure rests sits chest-high, with no room at the top to put the boxes. Nor is there room in the enclosure for the boxes. Instead, I remove the spool and put it on the holder on the printer itself. That, unfortunately, will require an even more complicated project to correct...


