
Winding Sticks
One of many boring tasks in woodworking is stock preparation. Even when wood is bought pre-cut and in a specified dimension, that doesn't mean that it's ready for use. Lumber is a natural material, and it often deforms and changes as it dries. Common patterns include:
- Cupping, where both sides are bent equally parallel to a board's length.
- Bowing, where the board is cupped perpendicular the board's length.
- Twisting or winding, Where either end of the board can be twisted in opposing directions.
In modern woodworking, such deformations aren't all that relevant. The boards are put through power tool called a planer that grinds off the top and bottom of the boards using parallel blades. The edges of the boards are then run through a jointer which grinds off one edge at a time, at a 90 degree angle to the "face" of the board. There's little need to check the state of the board ahead of time. Just put them in, check the results.
Both machines cost less than a modern smartphone. Like all power tools, they are noisy, take up space, and require regular maintenance. If I were doing woodworking as anything more than a hobby, it might be a good investment. But this is a hobby, and one I want to take slowly and enjoy the physical work involved.
Since I want to do this using hand tools, a more old-fashion approach is required. Cupping and bowing can be determined using a straightedge. By placing the straightedge perpendicular or parallel to the board length, these deformations are obvious. Twisting, however, is a bit more difficult.
Since the deformation is only apparent at either end of a board, a single straightedge wouldn't work. A common approach instead is to use two straightedges, of equal height. When placed on either end of the board, and perpendicular to the board's length, two exaggerated straightedges can be seen. Sighting down the length of the board, you can compare the one nearest to you to the one at the far end. If there's any twist, the two straightedges will not be parallel.
Buying two straightedges isn't difficult, but no simple straightedge would do. It's best if you can stand the straightedge at either end of the board. Furthermore, it's best if the top edge were contrasting shades or colors so the twist was more easily detected. This exact tool is called winding sticks.


Winding sticks can be bought, but...what's the fun in that? Creating two straight, parallel pieces of wood of equal height shouldn't be too difficult, right?
I had a piece of black walnut about 22" in length and little over an inch tall. A bit small, but it cut in half it would probably be long enough and tall enough to make a serviceable pair of sticks. Using a marking gauge, I marked a the two sizes to cut the walnut into two equal pieces. Less than a hand-length into the sawing, things became very difficult. Pushing and pulling the saw became harder and harder and I had to stop for fear of breaking the blade in half.
That's weird, I thought to myself, but I stubbornly continued. Taking some scraps, I wedged open the newly separated pieces so they wouldn't press against the faces of the saw and cause it to get stuck. I was so focused on not having the cut wonder off of the line that it didn't occur to me to stop and wonder why the saw was binding.
When I completed the cut, however, it became glaringly obvious why.

Winding sticks are supposed to be a good first woodworking project. They aren't complicated, they become a useful tool, and are generally forgiving of mistakes. And here I was stalled at the starting line. What the heck happened!?
While the piece of walnut I started with was indeed straight when it was in one piece, separating them caused it to bow. Rather, separating them removed counterpressure that kept the whole straight. Once removed, it bowed dramatically. Had I been more open, I would have recognized that the saw getting stuck was a symptom, and I would have stopped then.
I put down my tools and wondered how I could salvage the situation. I could try to bend the pieces back into straightness, but age may bend them back once more. Walnut is also rather brittle, and would likely break if I tried to force it against its will. I wanted to use it, since it was dark and relatively stable.
After thinking about it, I decided not to continue with the walnut. while I could attempt the project with a piece of maple, I decided to instead use some pine I had left over from a previous project. Although not the hardest material, the grain was straight and I had more than enough of it to attempt it twice over if I failed again.
I took the pine board and ripped it in two lengthwise. This was much easier and left me with three machined sides on each board, with one wavy, uneven side. Instead of trying to flatten that side on each stick individually, I used double-sided tape to adhere the two sticks together, with both uneven edges on the same side.
Once this was done, I used a hand plane to flatten and true the uneven side. And since I was working both sticks at once, I knew they would be parallel on that side. I lightly planed the other sides, but it wasn't necessary. In the end, I had a nice, square board that was the same height from one end to the other.
I could have separated the two pieces then and had working winding sticks, but I wanted to embellish them further. Using the hand plane again, I cut a heavy chamfer in the face of each stick. This made the top of the stick narrower and lighter than the bottom. This makes it easier to grip, as well as encourages the stick to stay standing.
Cutting the chamfer was a lot of work. I could have used a saw, but I wanted to use a hand plane instead. It took almost two hours to get it how I wanted. Even then I wasn't finished.
The next step was to add insets so I could inlay different colors of wood. This would create the contrast necessary to make the twist more easily read. For most of this, I used a combination of chisels and my router plane.
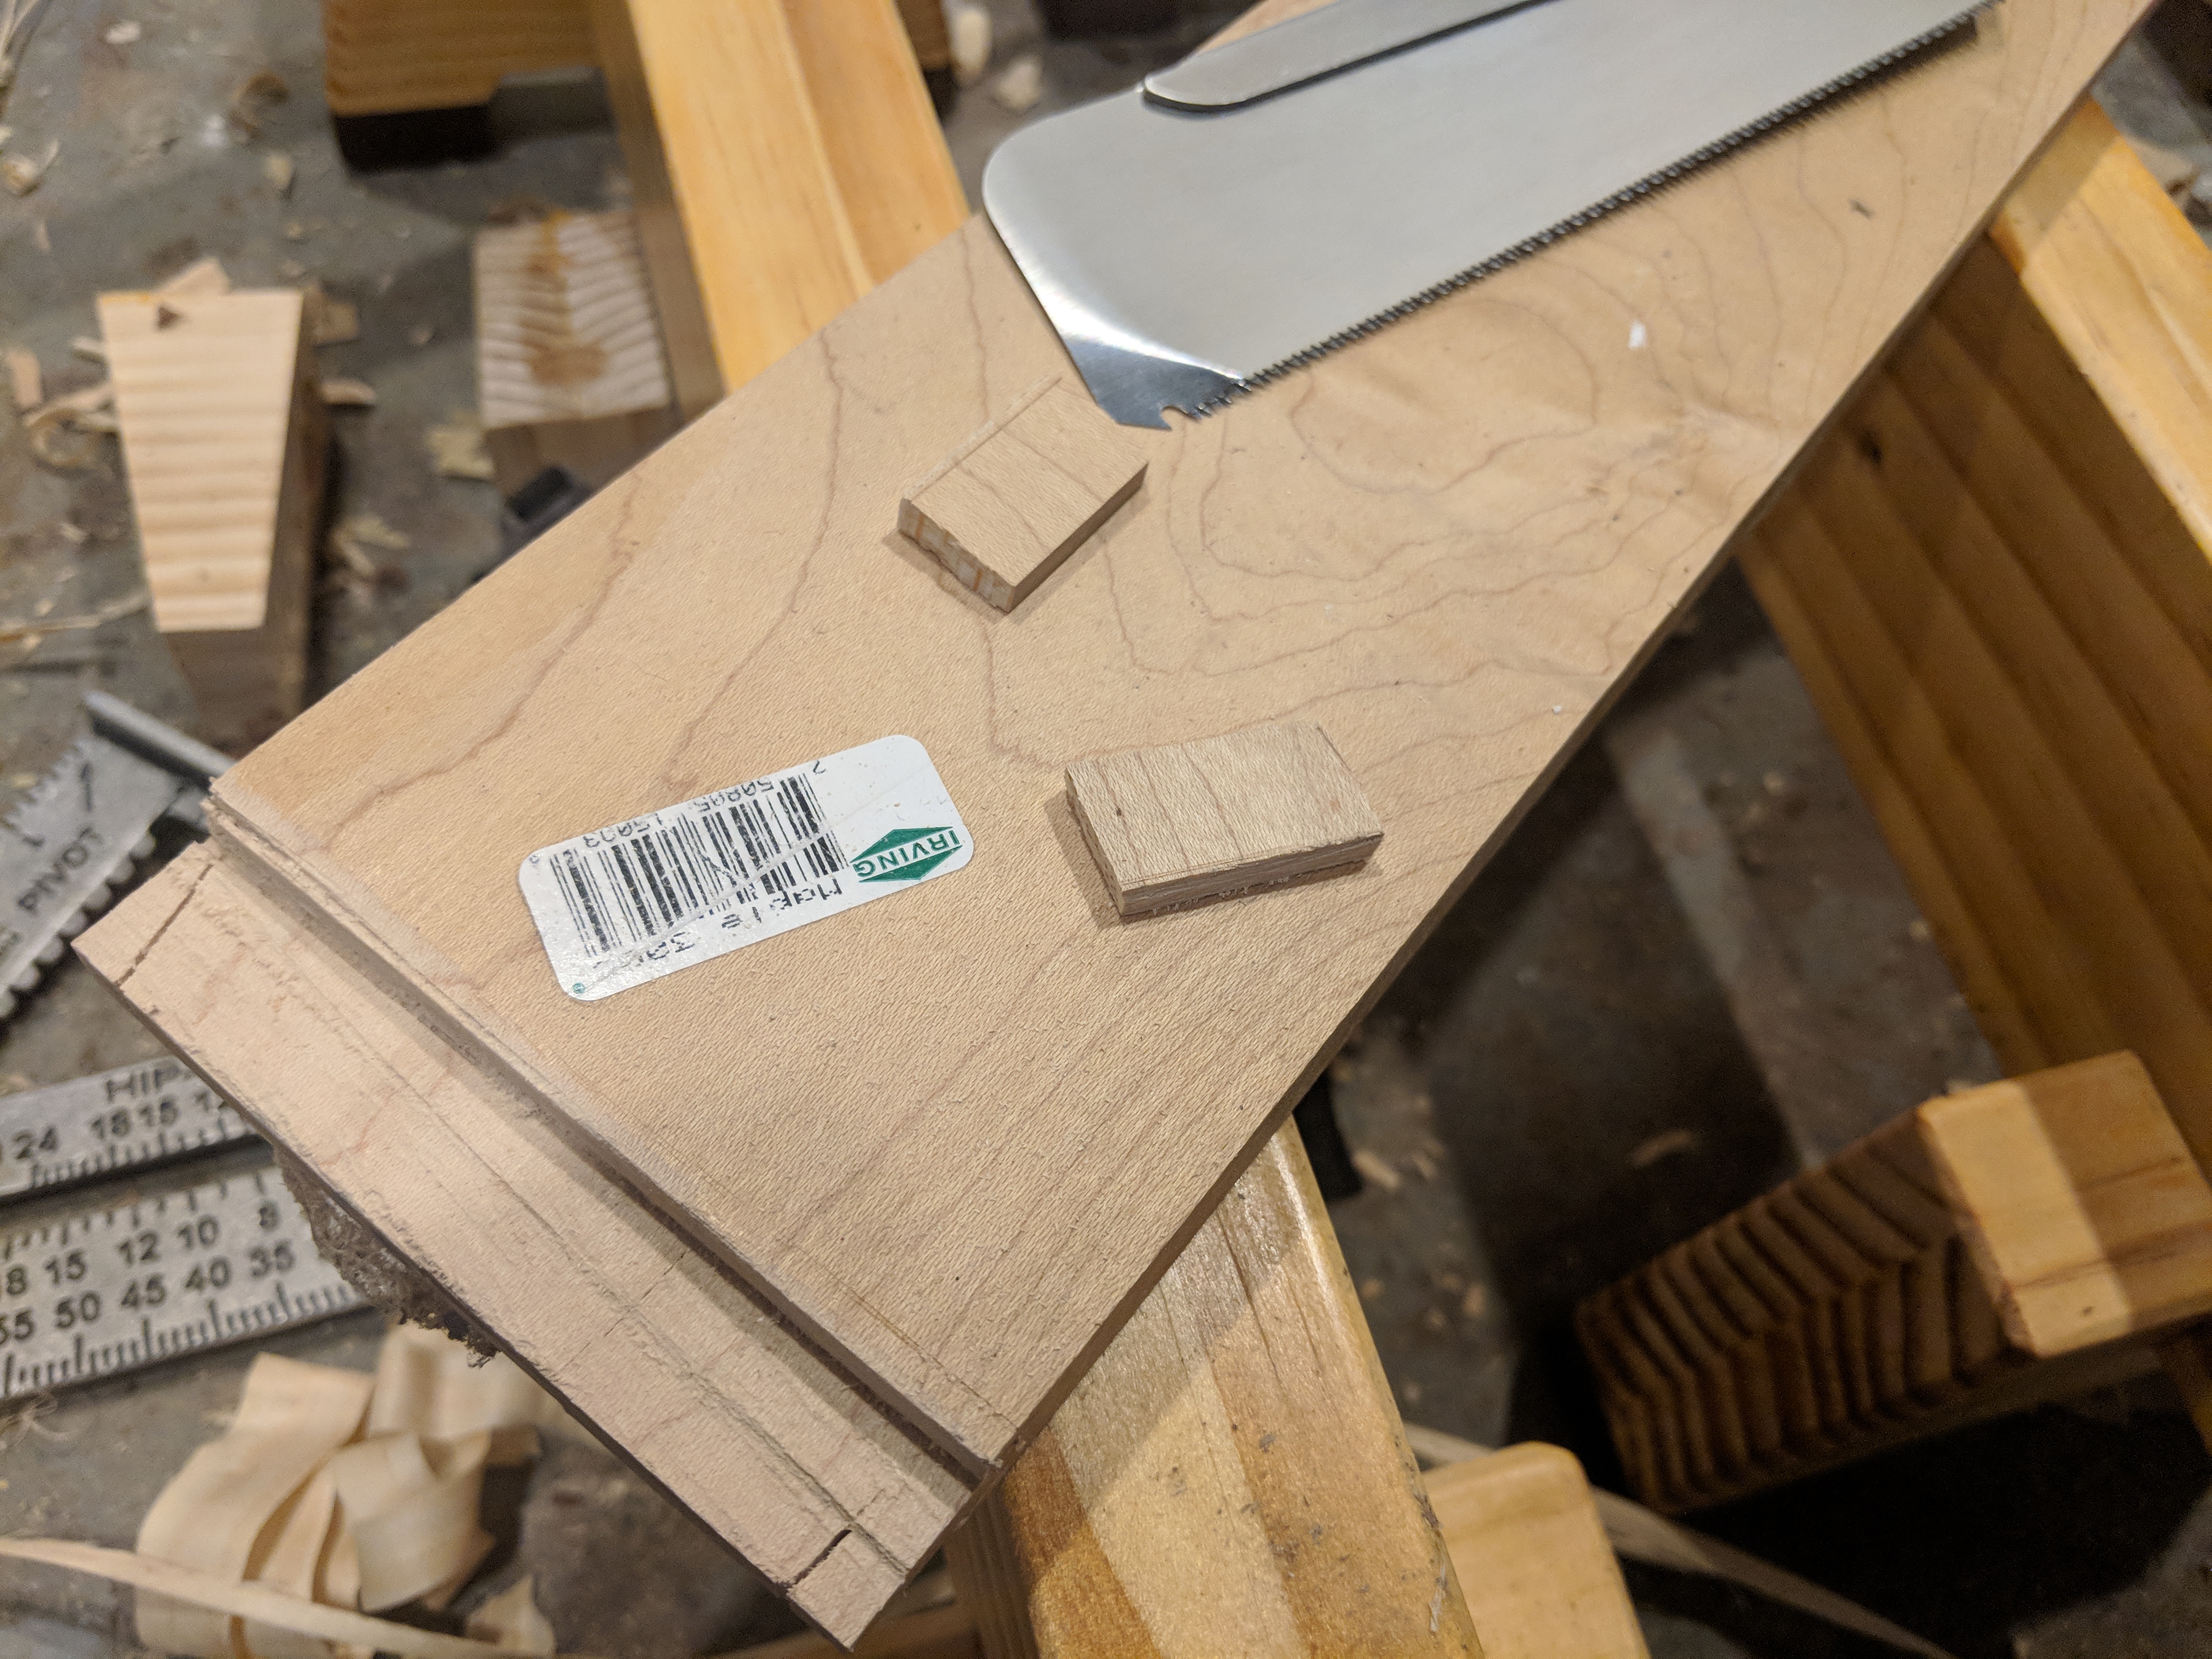
While I managed to cut the walnut strip easily enough (recycling it from attempt number one), the maple was more difficult. My detail saw had trouble cutting though the maple. At one point, I slipped and bent the tip of the saw completely. I tried to flatten it, but to no avail.
I did manage to get the two maple inlays for the "light" stick, but both broke in half. Fortunately, they both broke in exactly the same way. Instead of fighting it, I accepted the smaller pieces I got and kept going.
Once I had all the pieces cut, I glued the inlays in and used blue painter's tape to keep them in place. It wasn't perfect, but it did the job well enough. Once dry, I used a combination of tools to flatten the inlays to match the surfaces of the sticks.
The next problem was ensuring the two sticks were flat. For this, I used another trick I found online. I bought a small piece of thick plate glass as well as some sanding paper. Since the glass is inherently flat, sanding on the glass transfers the glass's flatness to the wood. This process took some time, but it resulted in two surprisingly flat and parallel surfaces. I was impressed with the results.
Separating the two pieces held together by tape was more difficult than I had thought. I had to carefully wedge the two apart using a putty knife until the tape gave way. Since the pine is so soft, I dented it in a number of places.
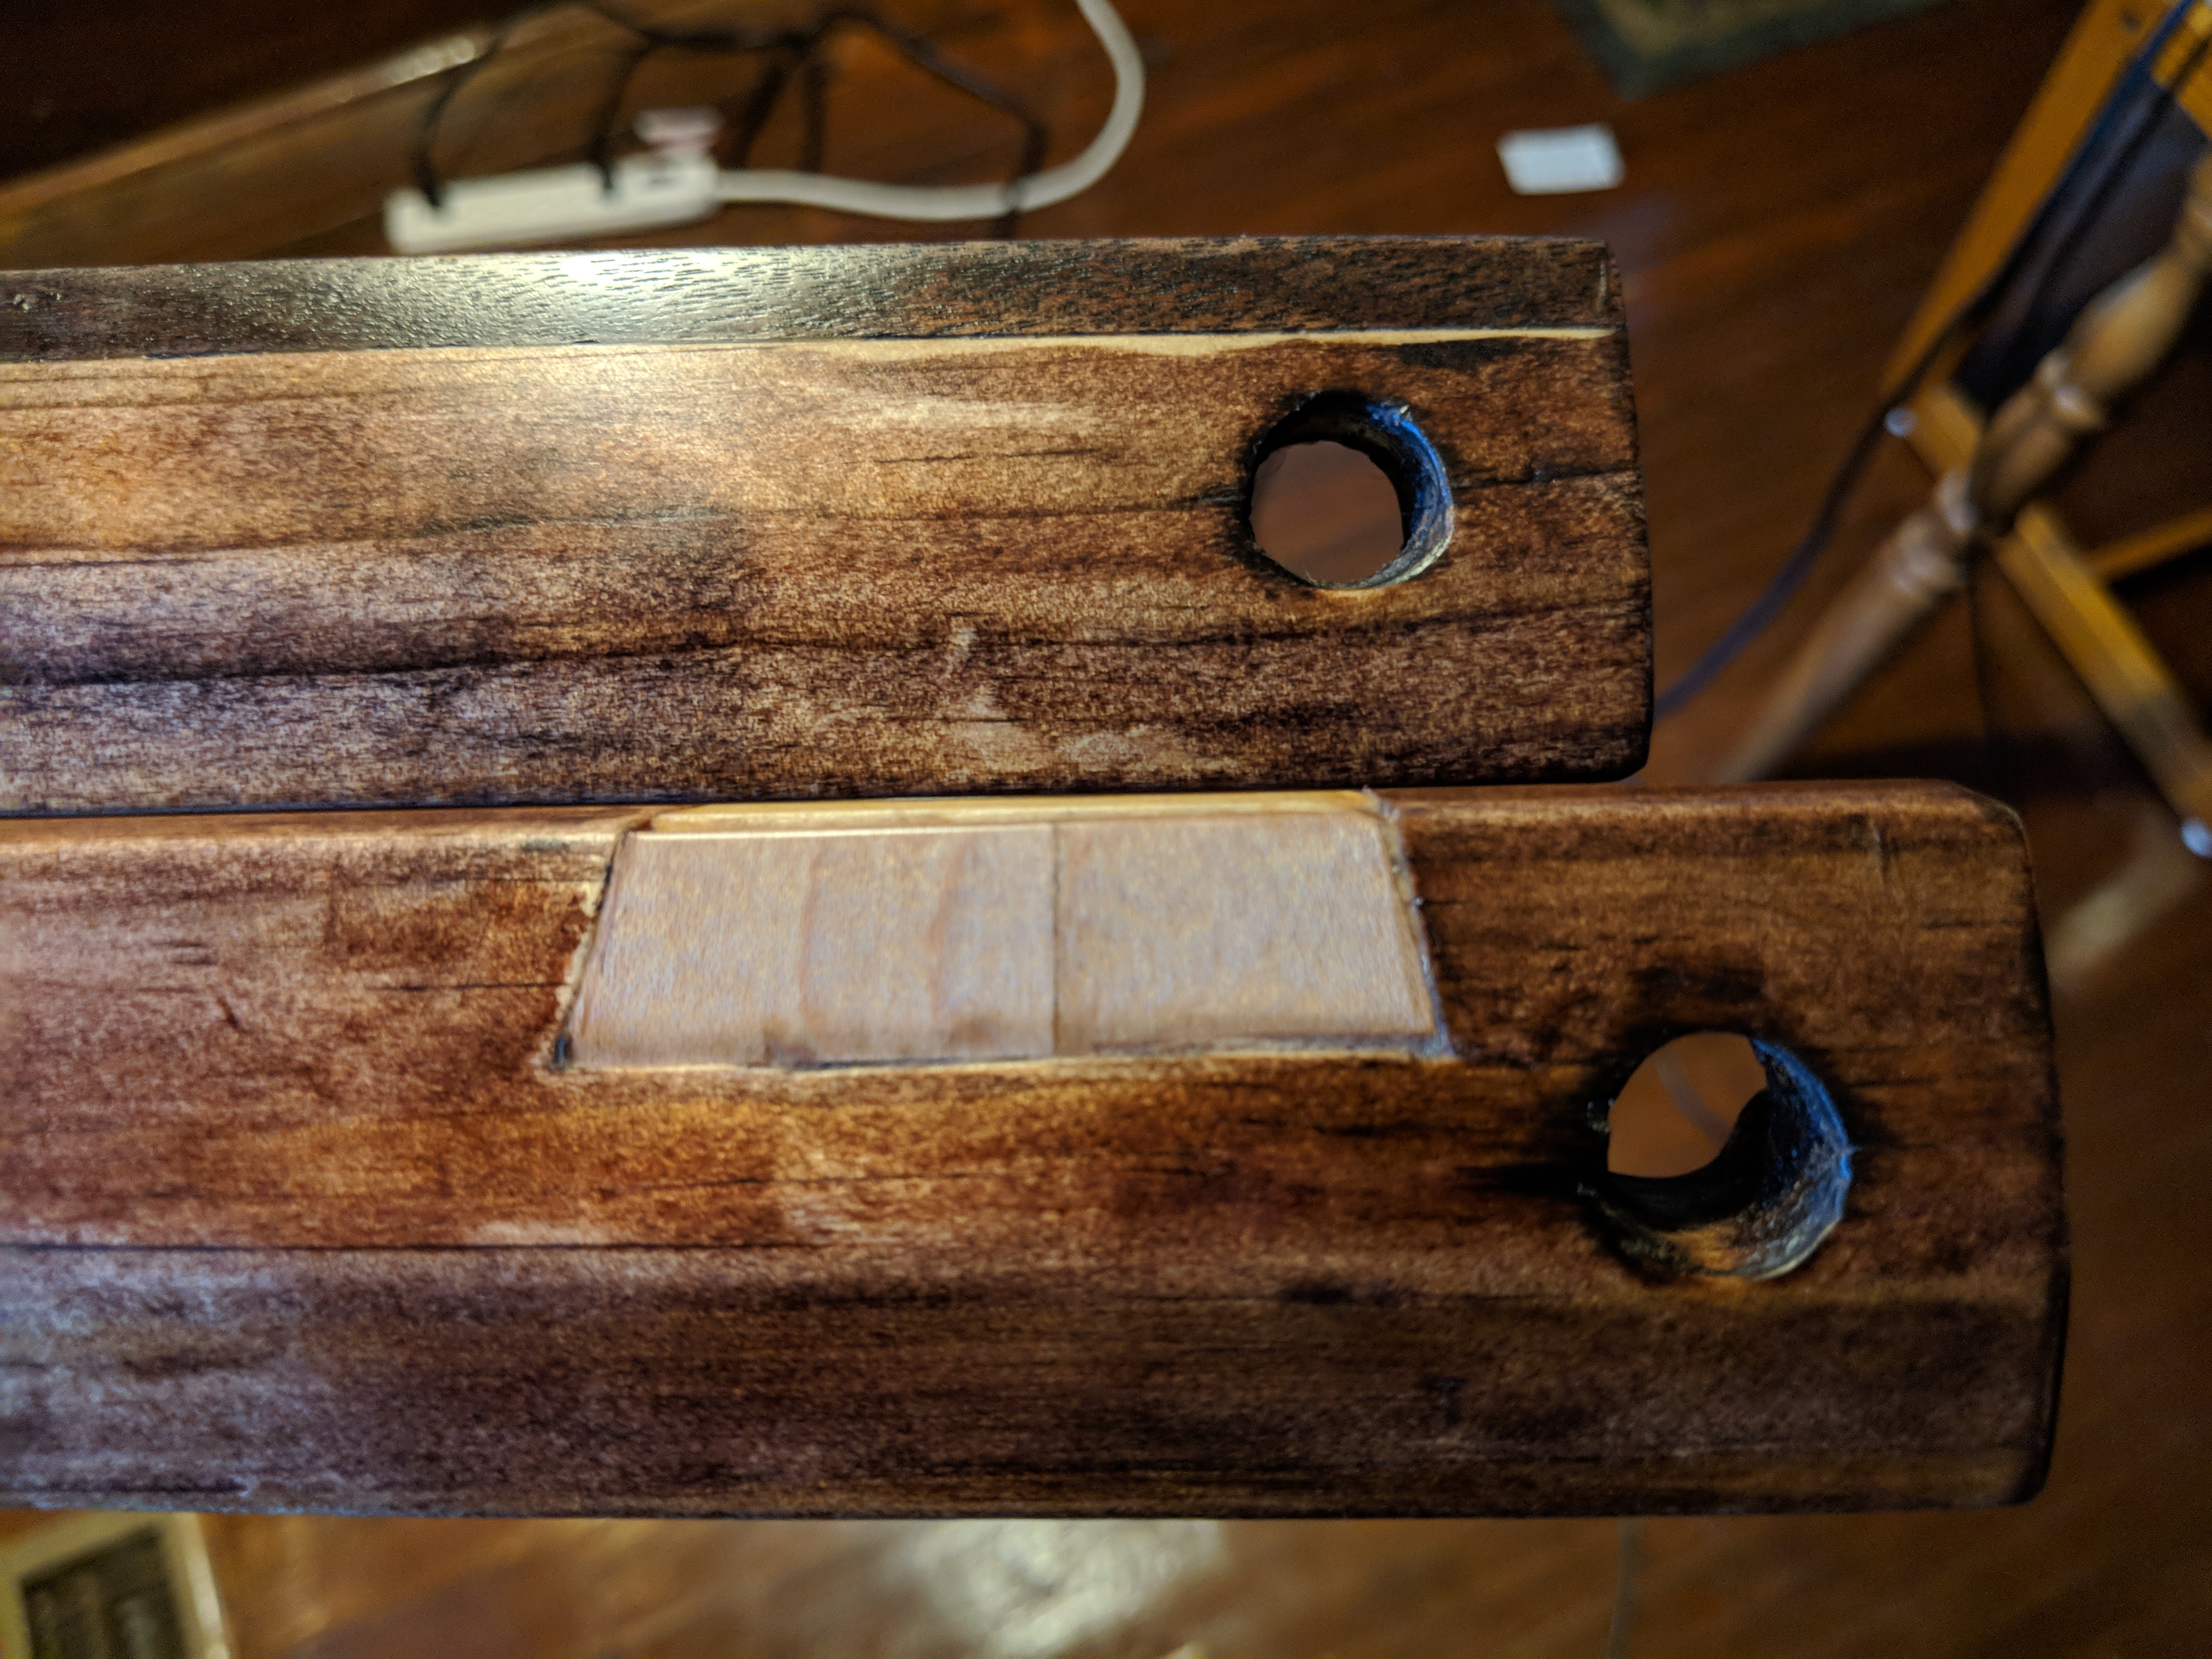
The last part of the project was finishing. Many winding sticks are made out of walnut, mahogany, or some kind of dark wood. This helps to highlight the light wood inlays and focus on the measuring surface. Pine, however, is a light wood. I decided to try to use a dark stain on the pine, hoping to simulate the effect.
Again, using blue painter's tape, I covered the walnut and maple inlays and stained the rest very carefully. If I weren't concerned about damaging the stain, I would have stained the pine first, and then glued in the inlays. Since the inlays were obviously and intentionally over-sized, I couldn't do that. I had to glue then stain.
Unsurprisingly, the stain did not stay confined to the untapped areas of the sticks. It seeped under, giving the walnut inlay a marbled look around the edges, and making the maple dark and blotchy. I tried staining both pieces again, this time letting the stain touch the walnut, but carefully avoiding the maple. It made no difference.
In the end, I had to cut away parts of the maple to give it a clean look. The result is the maple inlays are chamfered around the edges. It's not the look I was hoping for, but it worked nevertheless.
Once I tried applying Danish Oil to the whole thing, the stain fell apart. The oil actually lifted the stain, lightening it and threatening the maple all over again. I had to learn the hard way that the stain I had was incompatible with my preferred finish. I had to keep getting fresh paper towels to apply more coats of oil so I wouldn't contaminate the maple further. Had I known, I would have left the pine raw, and dealt with it being lighter than I preferred.
Three days later, I went back out and tried to put on a coat of paste wax. Again, some of the stain lifted, but far, far less than with the oil. Over the course of two hours in the humid, Minnesotan late summer, I polished the sticks until they were finally shiny.


One thing I found out with paste wax is that it reminds me a lot of applying nail polish. Instead of thick layers that take forever to dry, it's better to apply thin layers. These dry quickly and can be polished more iteratively.
Originally, I used a lump of wax in a knot of cheese cloth to apply it. This worked, but it applied far, far too much wax with each attempt. I simply wasn't getting the sheen I wanted even after letting it dry for a considerable amount of time. Eventually, I discovered that I could use a fine steel wool to apply the wax instead. This applied thinner coats, but also burnished the previous layer at the same time. Once the layer was dry, I polished it with an old cotton T-Shirt. I repeated this process three times.
The results were, finally, everything I hoped for:

This project turned out to be much more challenging than I expected, but I felt it was in all, a good learning experience. While the finishing was a complete mess, the carving, inlays, and flattening worked out surprisingly well. I now have a new functional tool that can be used on future projects.
More surprising, was the fact everything was stuff I had laying around. I bought no new materials for this project, only used what I had more thoughtfully and completely. I hope to do that again as I look toward the next project.
This post was created with the support of my wonderful supporters on Patreon.
If you like this post, consider becoming a supporter at:
Thank you!!!


