
Magnetic Saw Guide
Lately I've been working on a freelancing technical writing project, so I haven't had much focus left in me to write any new posts here. Combined with [gestures broadly at the state of the Western world], my energy and motivation has been thin. Still, I managed to pour some effort into a new project, a magnetic saw guide. This wasn't a project I had expected to undertake, but when the need arose, I decided to try it.
Saw problems
I've been thinking a lot recently about what I want to get out of woodworking. Certainly, I do enjoy creating beautiful and functional things. That alone wasn't enough. While watching some YouTube videos from John Zhu, it occurred to me what I really wanted was a physical, and meditative experience. Physical activity seems to help with my anxiety problems, but one can only pedal a bike, lift weights, or do chores around the house so long before it becomes simply unengaging. Furthermore, I've been captivated by other woodworkers such as Paul Sellars who relies almost exclusively on hand tools. The idea of falling back to something more physically demanding as well as slower has great appeal.
The problem is, saws.
The cornerstone of many modern woodworkers is the table saw. While I've rarely had one, my experiences with them have been....less than positive. I find them painfully loud, dangerous, and intimidating. Using one has never been a good experience for me, and I'd rather avoid using one at all if possible.
While watching several more hand-tool focused woodworkers, I started noticing the same set of tools being used again and again. One of those was a Japanese pull saw. Pull saws work rather differently than Western style saws. As the same implies, they cut on the pull stroke rather than the push stroke.
That may sound like a small thing, but it has a number of implications for the design and use of the saw. For one, it puts the saw blade under tension (like a taught rope) rather than compression (like a beam holding up a house). This means the blade can be thinner, and it's less likely to flex given the forces involved. That thin cut is particularly attractive, since it allows the same saw to do both rough and detail work. Furthermore, most pull saws have two different cutting sides. This makes pull saws not only cheaper due to less material involved in construction, but versatile.


I got my hands on both a regular pull saw as well as a hard-spined detail saw (a dozuki) and set to work on what I was hoping to be my next project: A mini, tabletop workbench. For cost reasons, I decided to using plywood as opposed to pine or hardwood for the work surface. The saws ate almost half of my fun budget for that month.
Using a pull saw takes a bit of getting used to. For one, you need to overcome any hardwired behavior to put more force in when pushing. The saw will suddenly flex dramatically if you do. Despite this, using a pull saw is fun. The thin cut of the saw acts as a force multiplier and results in a faster cut. My accuracy, however, was less than stellar.
I spent the next week wondering what I could have done to make things better.
The Saw Guide project
A pull saw is thin because it works under tension, but that also makes starting the cut very, very tricky. It's hard to keep the blade at the just the right angle when starting a cut. A solution I found on YouTube to this was brilliant: A magnetic saw guide.
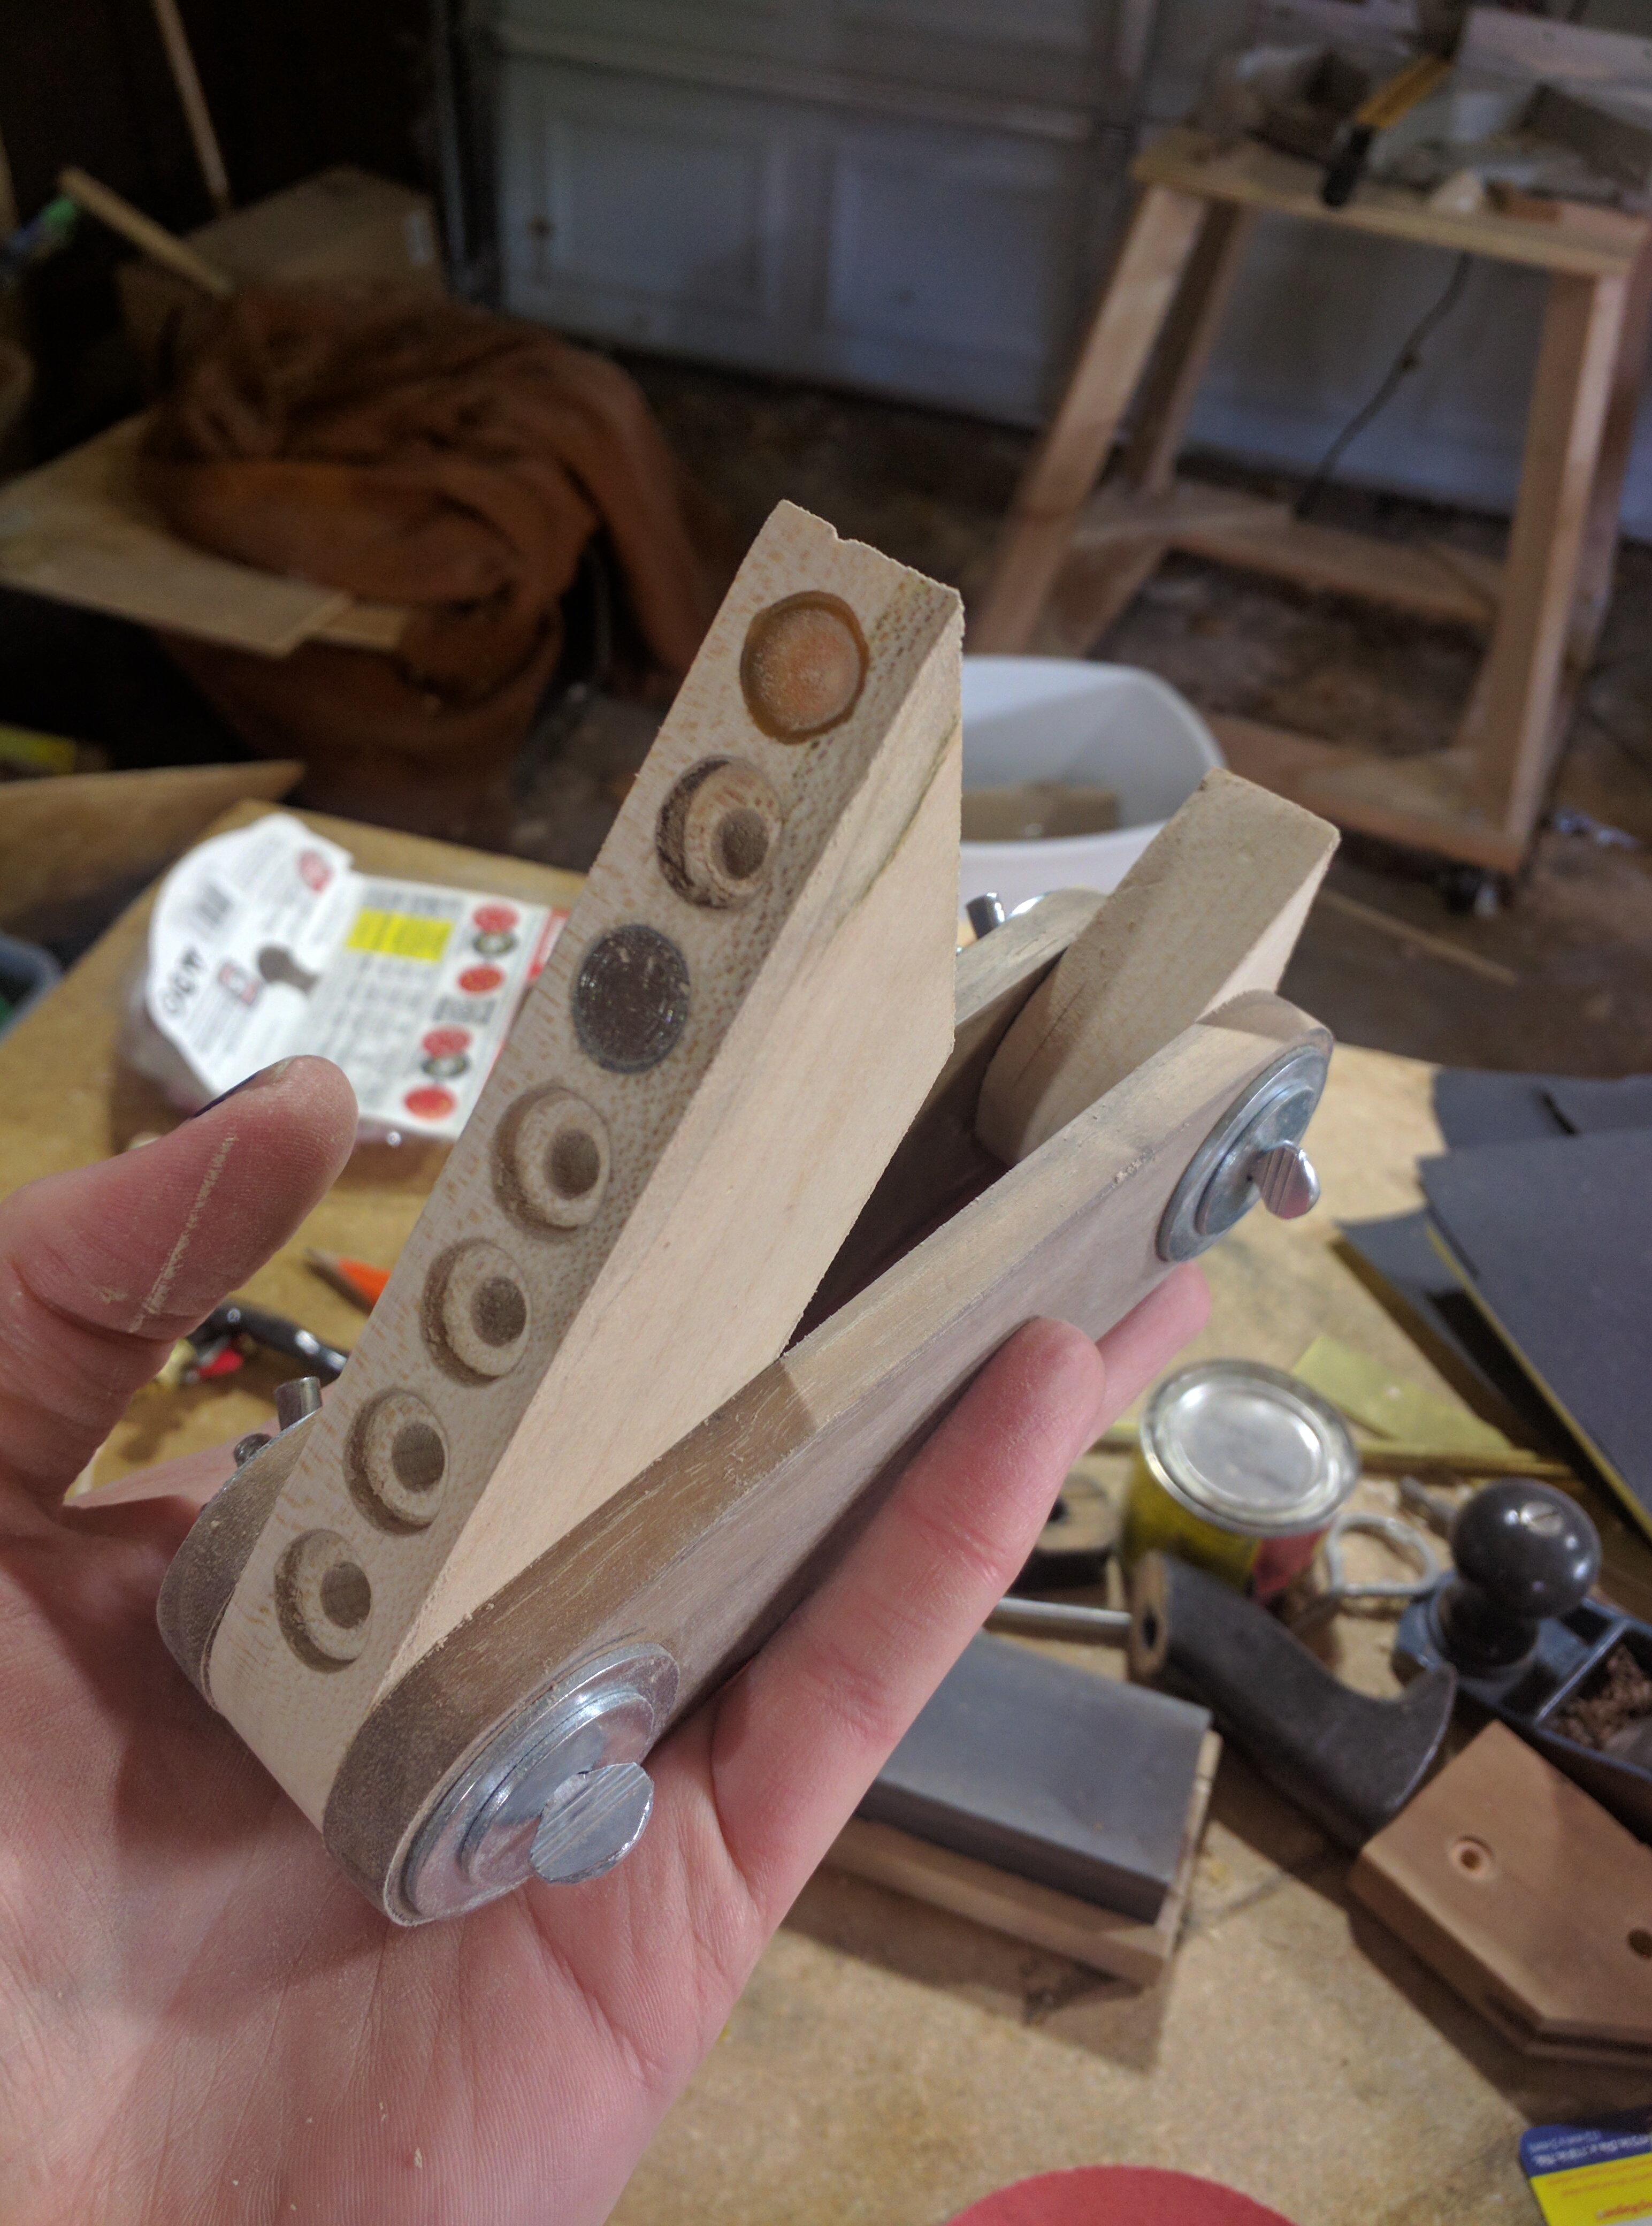
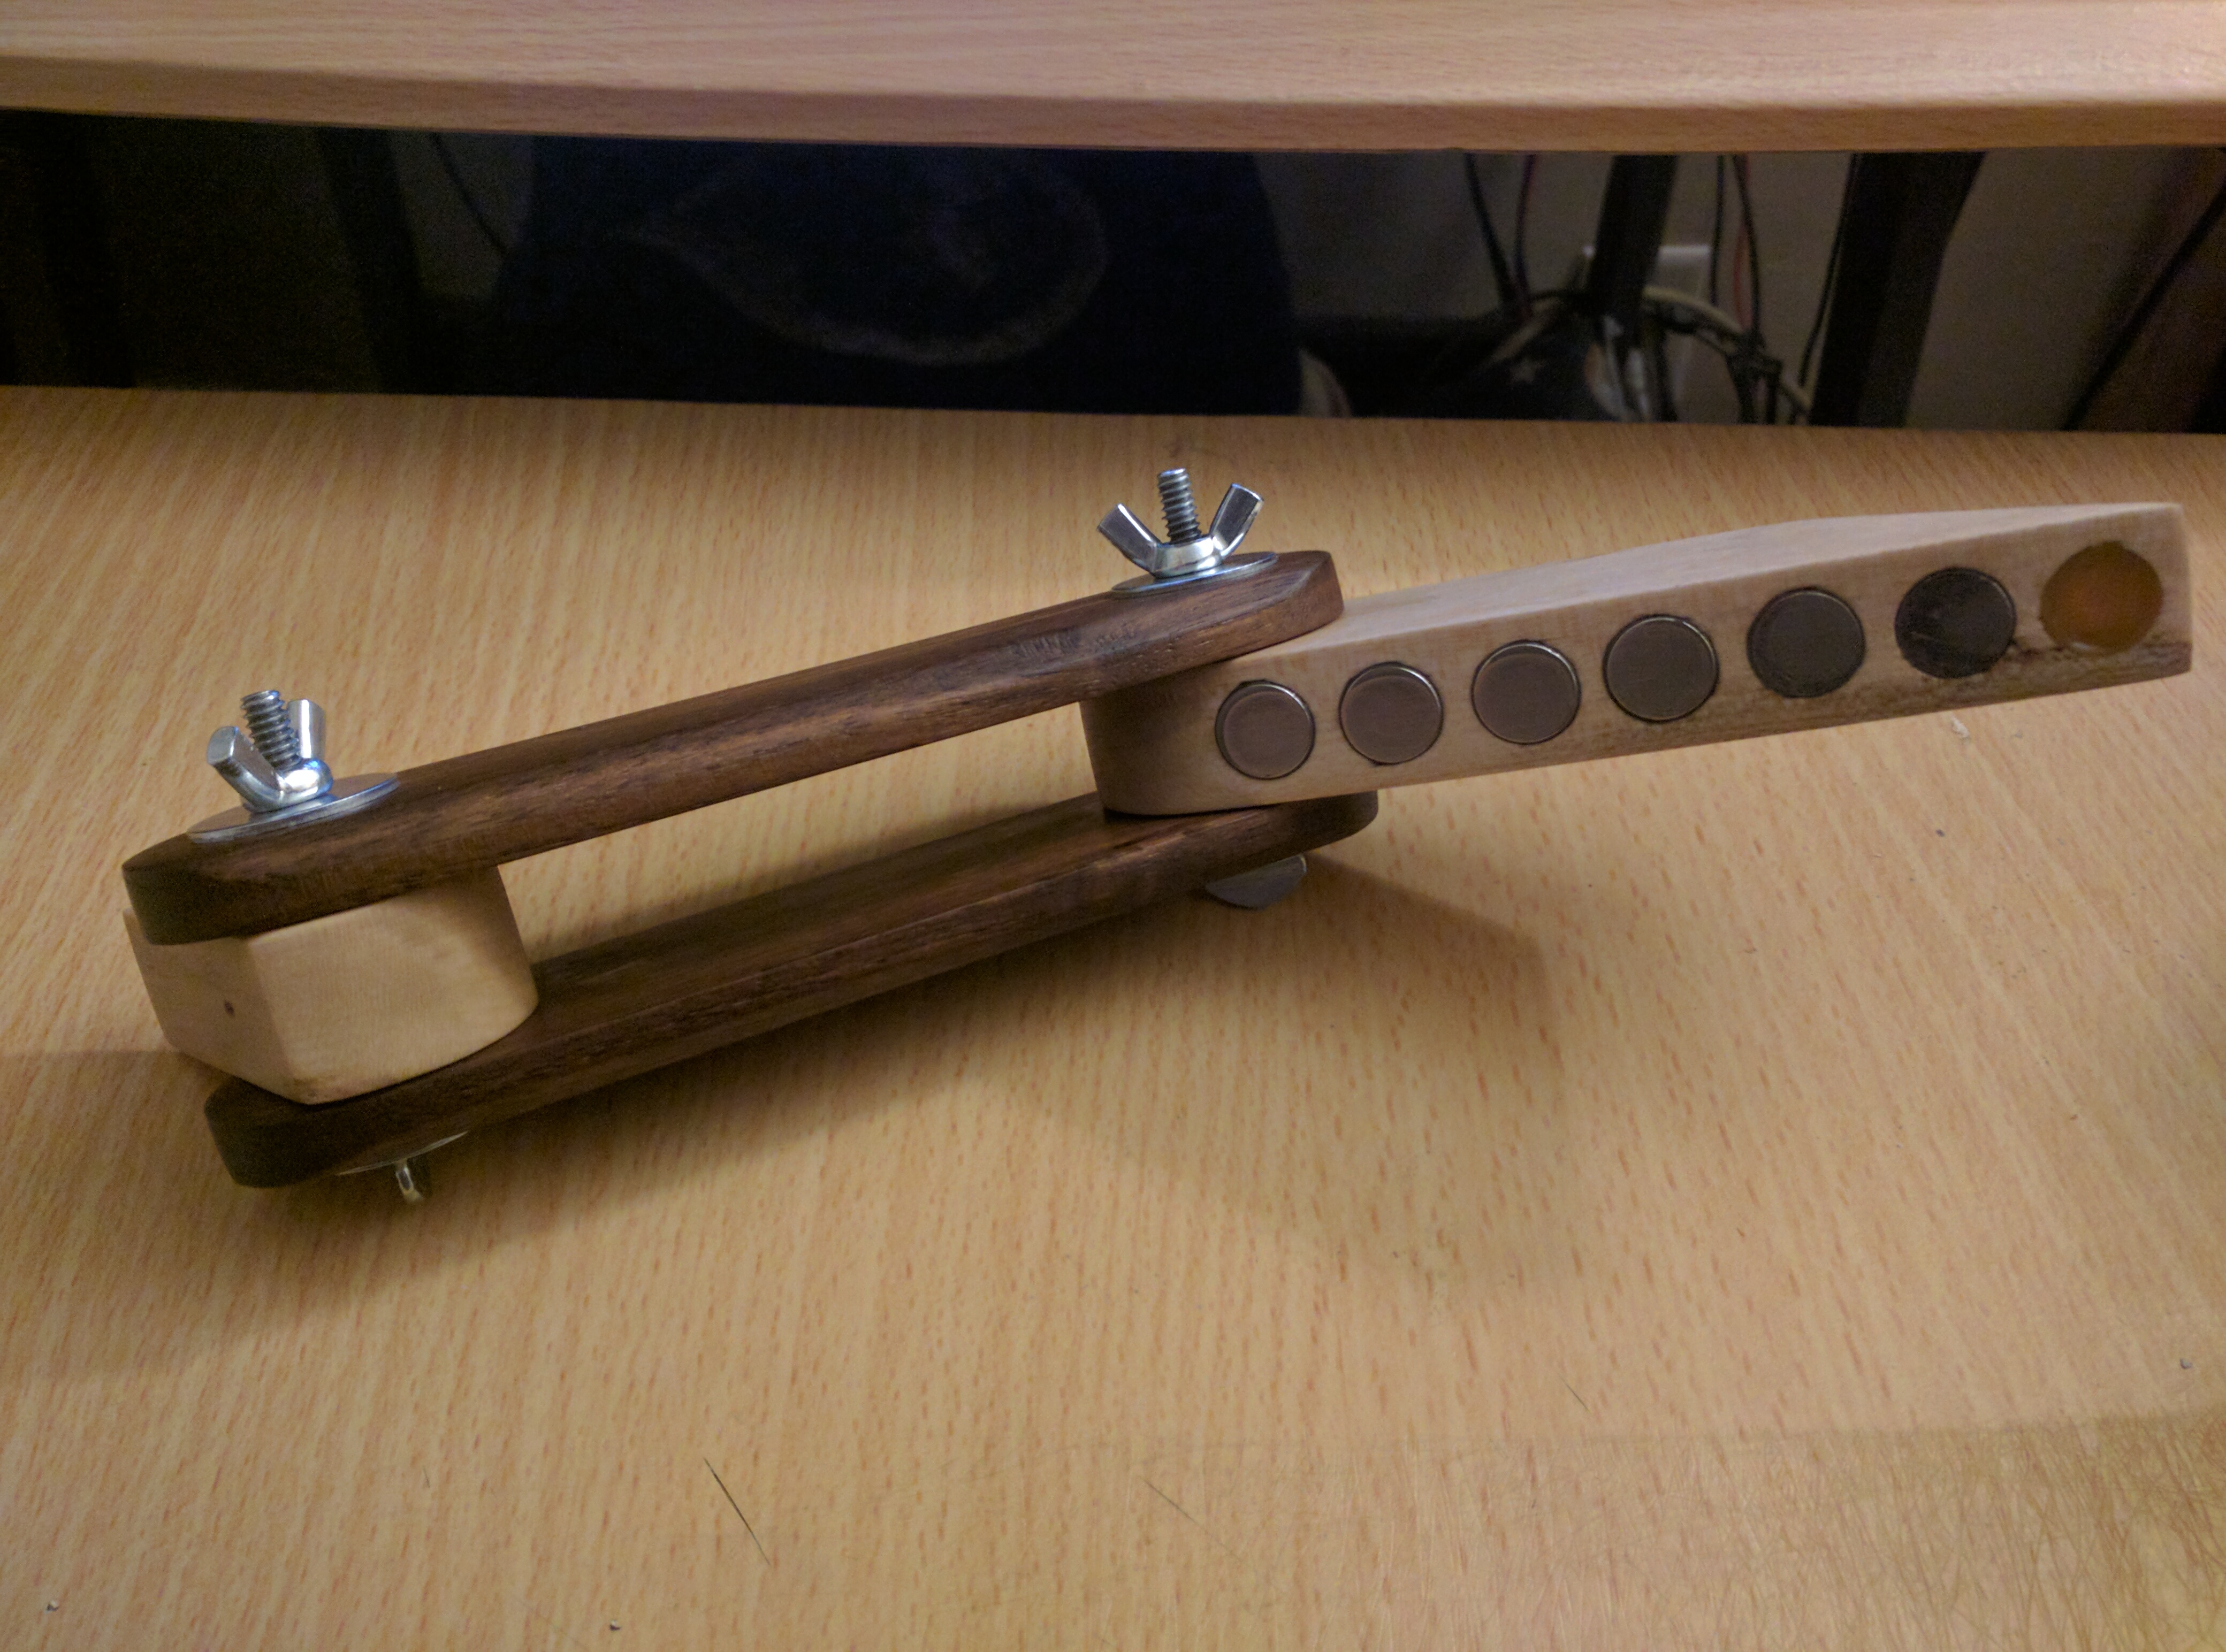
The saw guide works a bit like a bevel gauge. It has a flat handle and a swing arm that can be positioned to a specific angle. Unlike a bevel gauge, the saw guide swing arm is thicker, with one side covered in little magnets. The idea is that you would adjust the arm to the designed cut angle, place it on the board with one hand, and holding the saw in the other, attach the saw to the magnets. The magnets grip the saw, but not to immobility. Instead, it keeps the broadside of the saw at just the right angle so you can start the cut.
So one Saturday night, bored and more than a little twitchy, I decided to make one.
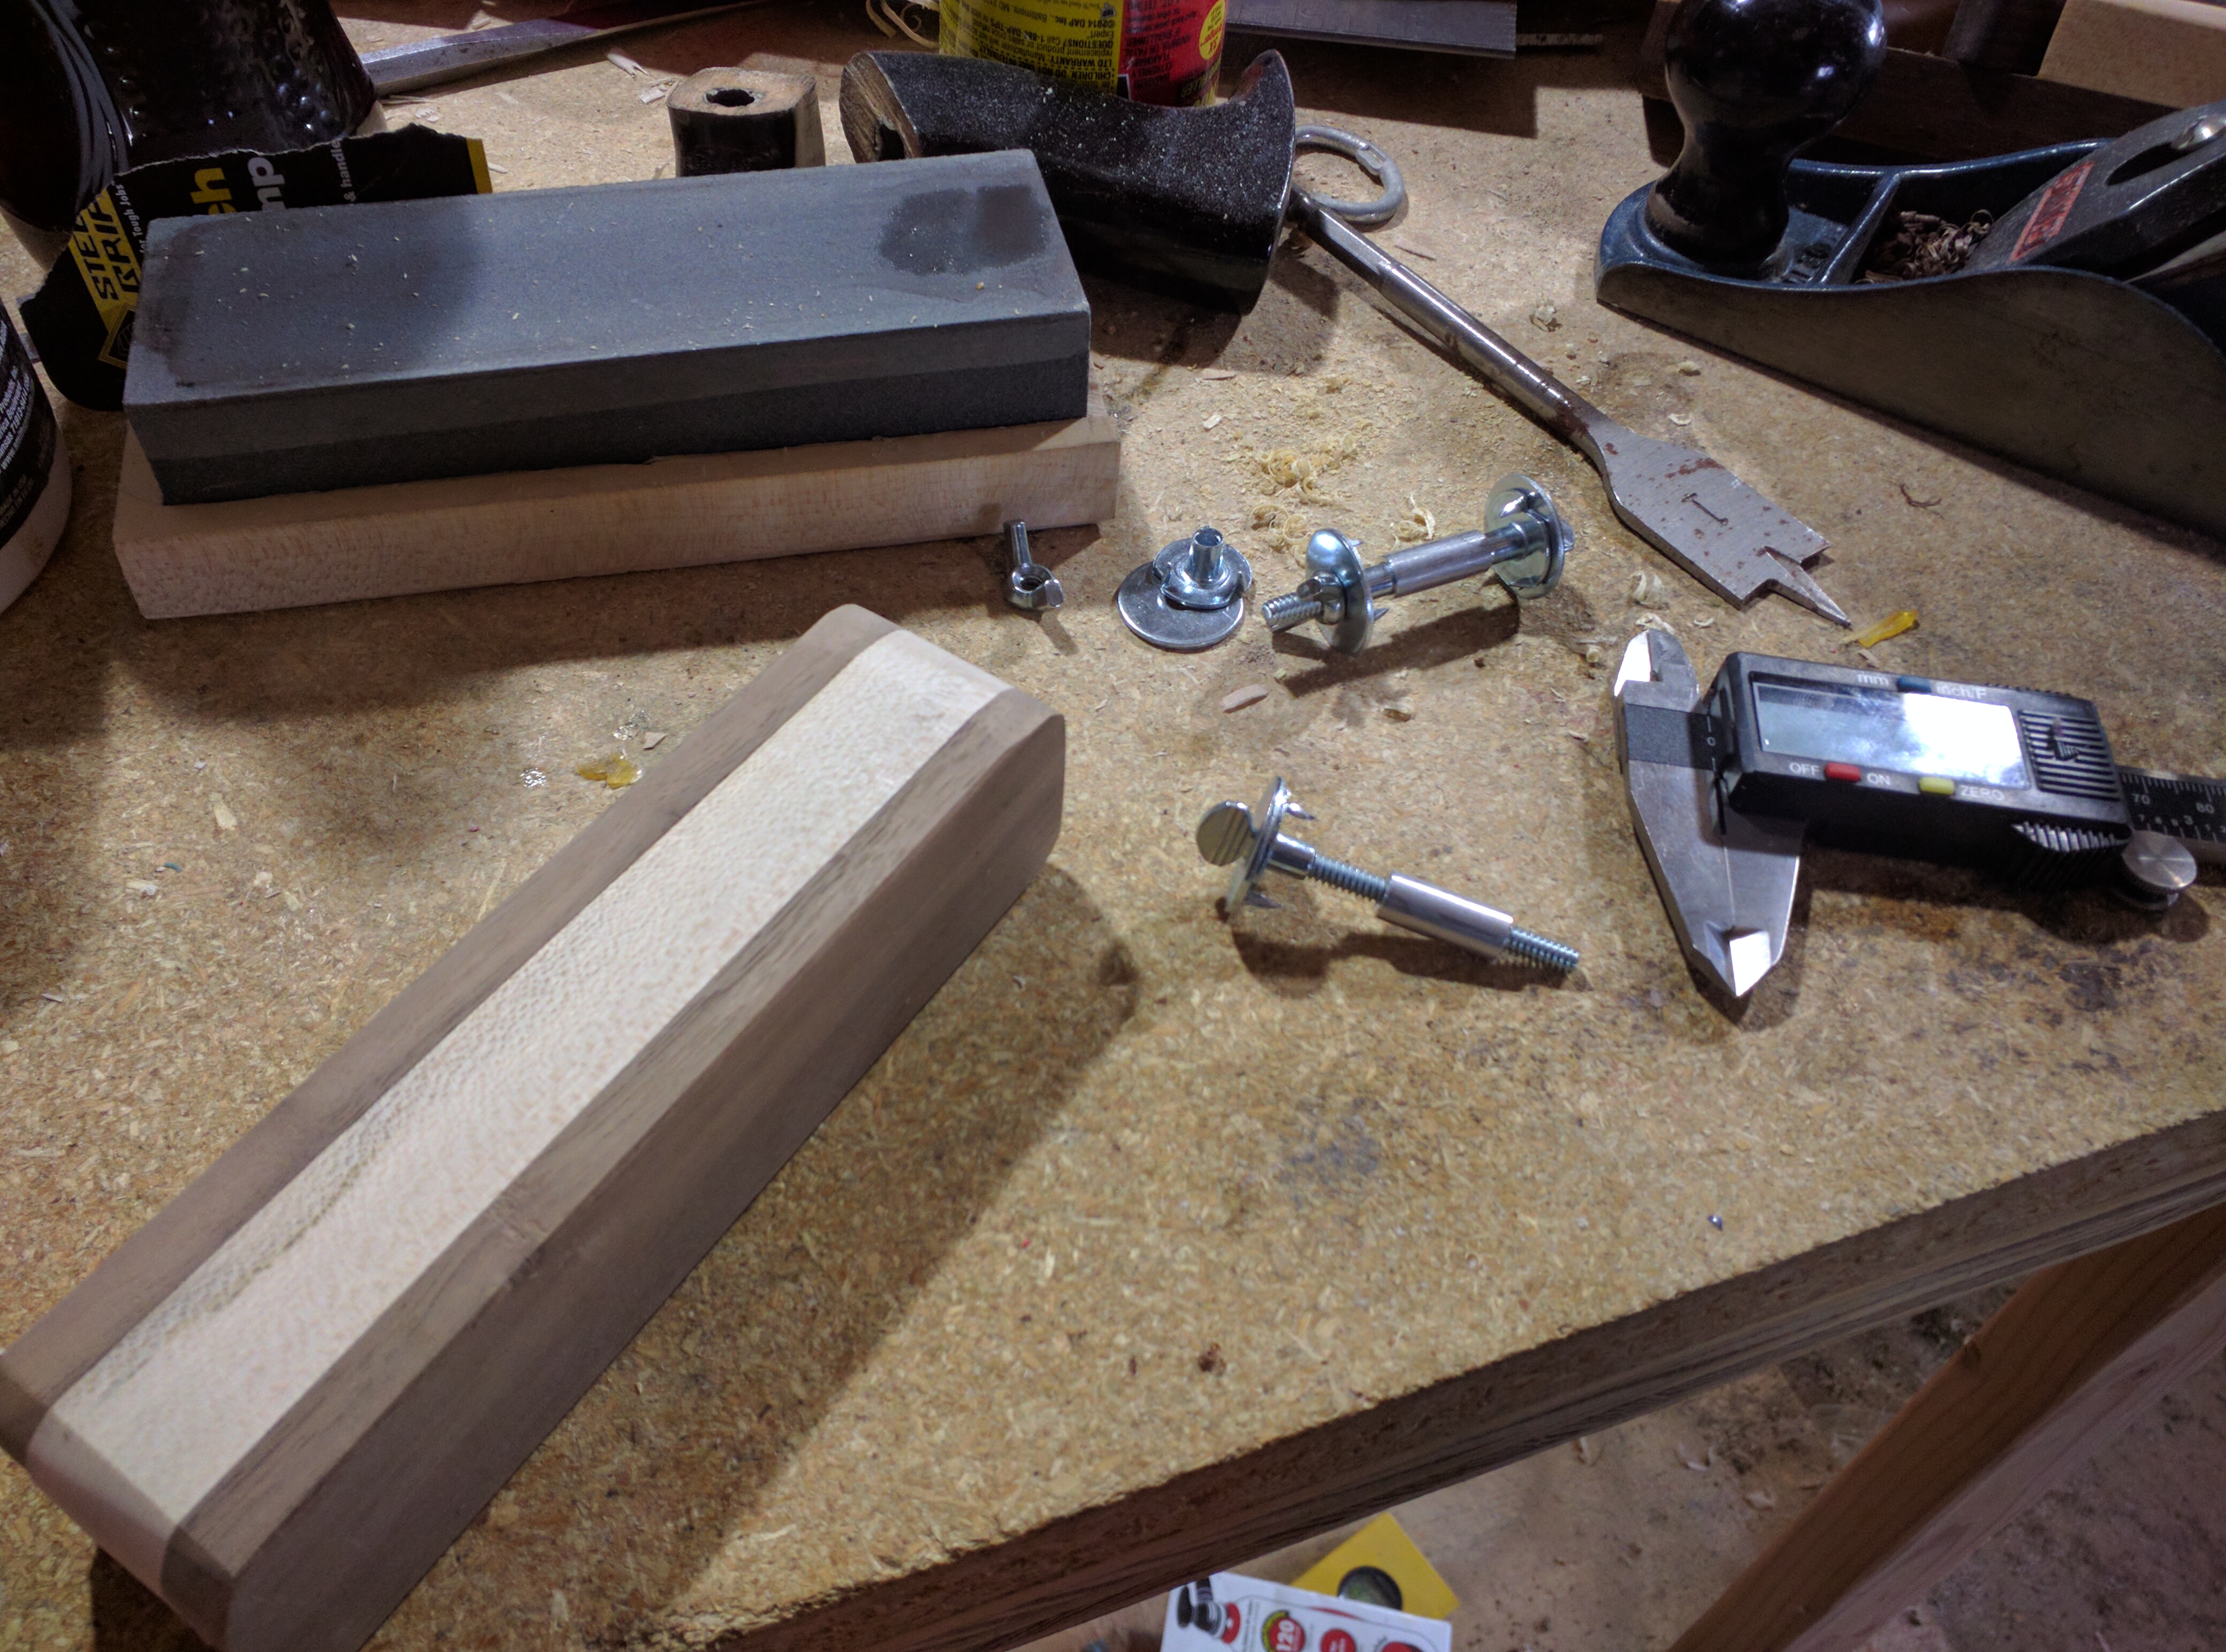

I used the detail saw to cut a piece of 1x2 walnut and a piece of 1x2 maple to size. The first task was to cut the walnut down lengthwise. After trying -- and failing -- to do this with the detail saw and a firm grip, I set up a vice in my basement. I switched to the pull saw, and it was an utter delight. In 10 or so minutes, I had two smaller pieces of walnut that could be laminated to the maple. This formed the handle of the saw guide. I used two pieces of double-sided tape to hold it together.
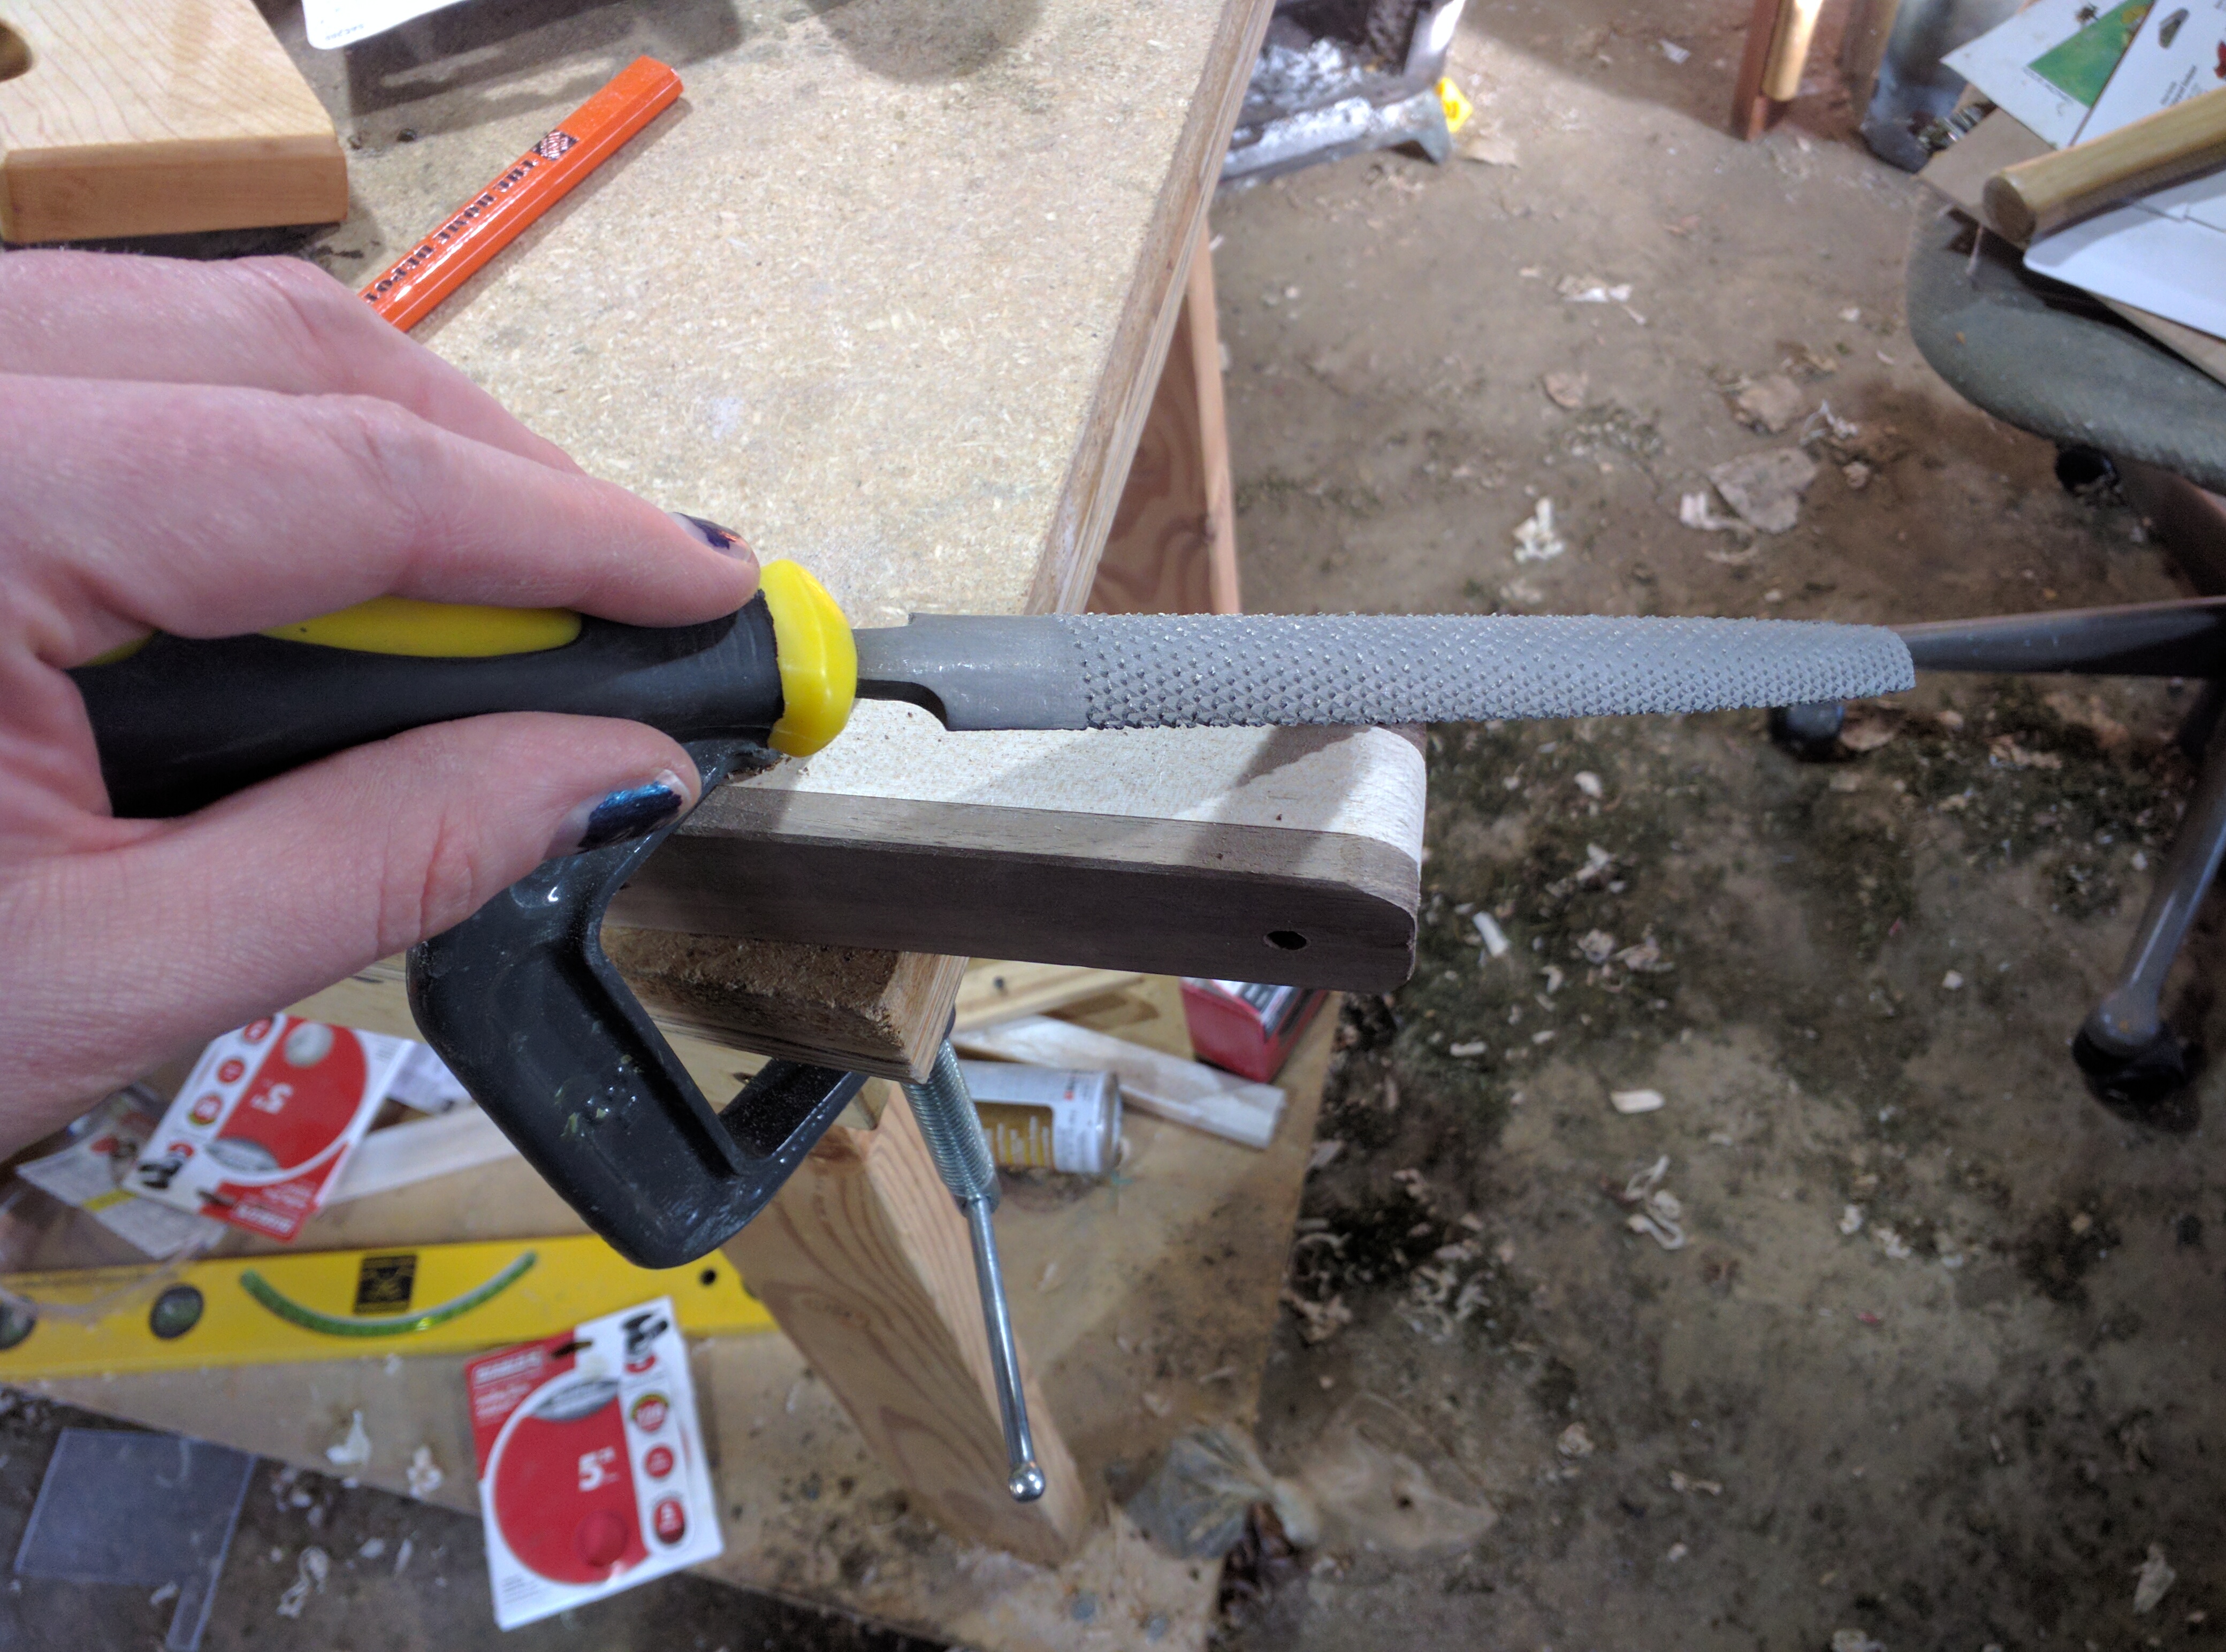
The next morning, I returned to the garage and continued to work. I drilled two holes for bolts, then used a rasp to round over the corners. It was at this point I started to run into some problems.
I started to get rushed. I hadn't expected rounding over the edges to take so long, and I began to make some mistakes. The collection of hardware I had purchased to fasten the guide together was too complex. The guide couldn't be tightened down properly. Even removing them, the holes I drilled were now too big for the tiny bolts I had bought. I tried to press on, but that led to another mistake. I drilled one too many holes for the magnets in the swing arm.
It was at this point I decided to put the whole thing down for the weekend and rethink the project.
Salvage or failure?
I honestly wasn't sure if the project was salvagable at this point. There were several problems:
- Despite using a drill press, the holes weren't entirely square.
- The T-nuts I used to secure the handle together didn't allow the tool to fully tighten.
- The holes were just too big for the bolts I had.
- The rounded over sides weren't round enough, and would have affected the angle of the guide.
- I had drilled one too many holes for the magnets, and too close to the edge of the swing arm.
After thinking about it for a week, I decided to try to salvage the project instead of start over. After all, better to destroy it in the attempt rather than have the pieces lay around forgotten.

The first step was to deal with the bolt holes in the handle. Using a round file, I reshaped the holes and inserted a metal standoff as a bushing. I took careful measurements to re-center each hole, and periodically checked it for fitness while filing. For the one hole I drilled too large, I used a combination of glue and tiny nails to wedge it in a proper place.
I then used some large washers as a guide to re-round each side. This process took several hours, but it eventually resulted in much better performance.

Final touches and the glue-up
Once I felt everything was as good as it was going to get, it was time to have a little fun. I rather enjoy putting some decorative flourishes on things I'm creating. Using a hand plane I had refurbished this fall, I chamfered the handle for a better feel. I knocked off all the corners using an sanding block.
I disassembled the guide, and mixed together some two part epoxy to glue in the magnets. I decided to simply fill the superfluous hole with more epoxy, hopefully strengthening the edge of the swing arm. It isn't pretty, but it is effective.


Finishing
For the finish, I fell back to my old standard of Danish oil. I also wanted to try a beeswax top-coat for a shinier look. Like my other projects, I wet sanded in the Danish oil up to a 600 grit. The beeswax finish, however was less than successful. What I found at my local hardware store wasn't pure beeswax, but a mixture intended to season wooden butcher blocks. It's food safe, but it doesn't dry completely. I did add a minor shine, but not nearly as much as I had hoped.


Lessons learned
Despite all the problems, I did learn several important things:
- You really can't eyeball a proper roundover. Get a guide and take some time.
- When using epoxy, make sure the applicator is smaller than what you're applying it to.
- Don't overthink your fasteners! Sometimes simple is best!
- Butcher block conditioner is closer to what I want in a top-coat, but not perfect.
- When making tools, you're only making for the now, not forever.
Summary
I had a lot of fun making this project, and hope that this tool will get a lot of use in the future. While making this project I also produced two pieces of scrap maple that would be perfect for a marking gauge. Hopefully I'll find some time during the holidays to work on that.


